c)Connect the other end of the Cat5e/6 cable (from LINK OUT A) to the LINK IN A
d)Connect the other end of the Cat5e/6 cable (from LINK OUT B) to the LINK IN B
NOTE: If using Cat6 cables, extension distance is limited to 40m (130 ft)
3.Install Receiver Unit
a)Position the Receiver Unit near the video display (i.e. television, projector).
b)Connect the video source to the HDMI® OUT on the Receiver Unit using an HDMI® cable.
c)(Optional) If you’ve chosen to power the kit from the Receiver side, connect the provided power supply.
4.Your source video image will now appear on the remote video display.
Operation
Video Adjustment (Receiver Unit Only)
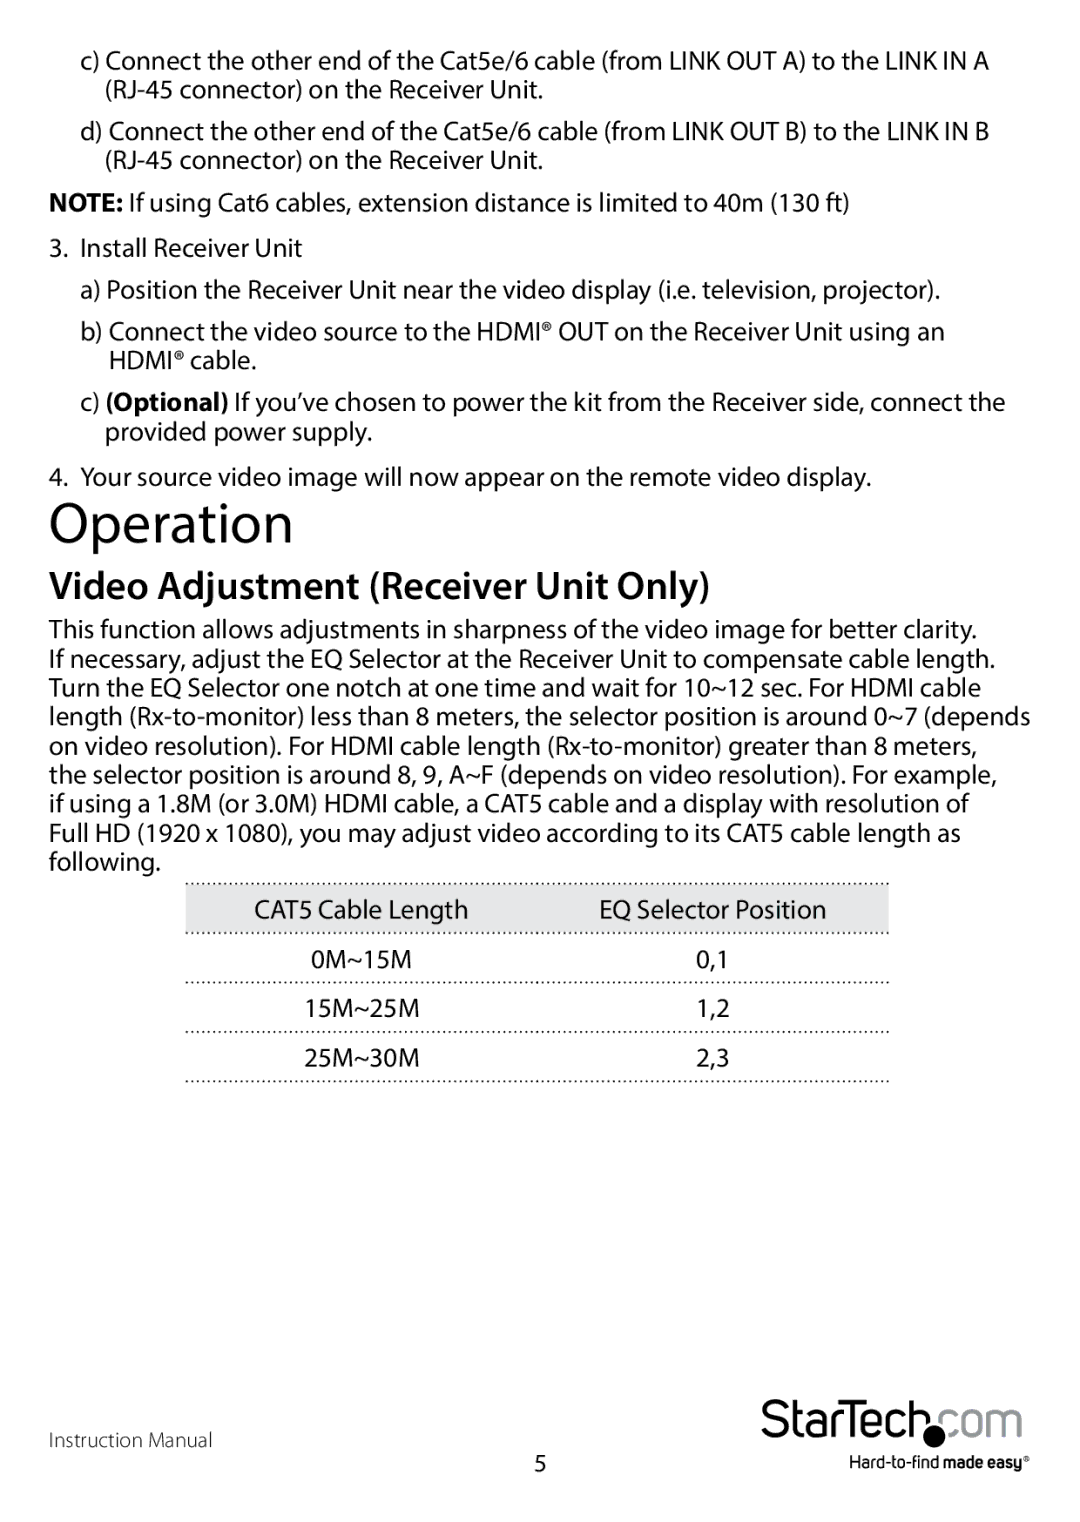
This function allows adjustments in sharpness of the video image for better clarity. If necessary, adjust the EQ Selector at the Receiver Unit to compensate cable length. Turn the EQ Selector one notch at one time and wait for 10~12 sec. For HDMI cable length
CAT5 Cable Length | EQ Selector Position |
0M~15M | 0,1 |
15M~25M | 1,2 |
25M~30M | 2,3 |
Instruction Manual
5