Installing the infrared remote control option
The optional Stewart Filmscreen infrared remote control allows control of the screens from anywhere in the room.
Note: The distance between the
Preparing the connection
Refer to the previous section on “Installing the low voltage
Making the connection
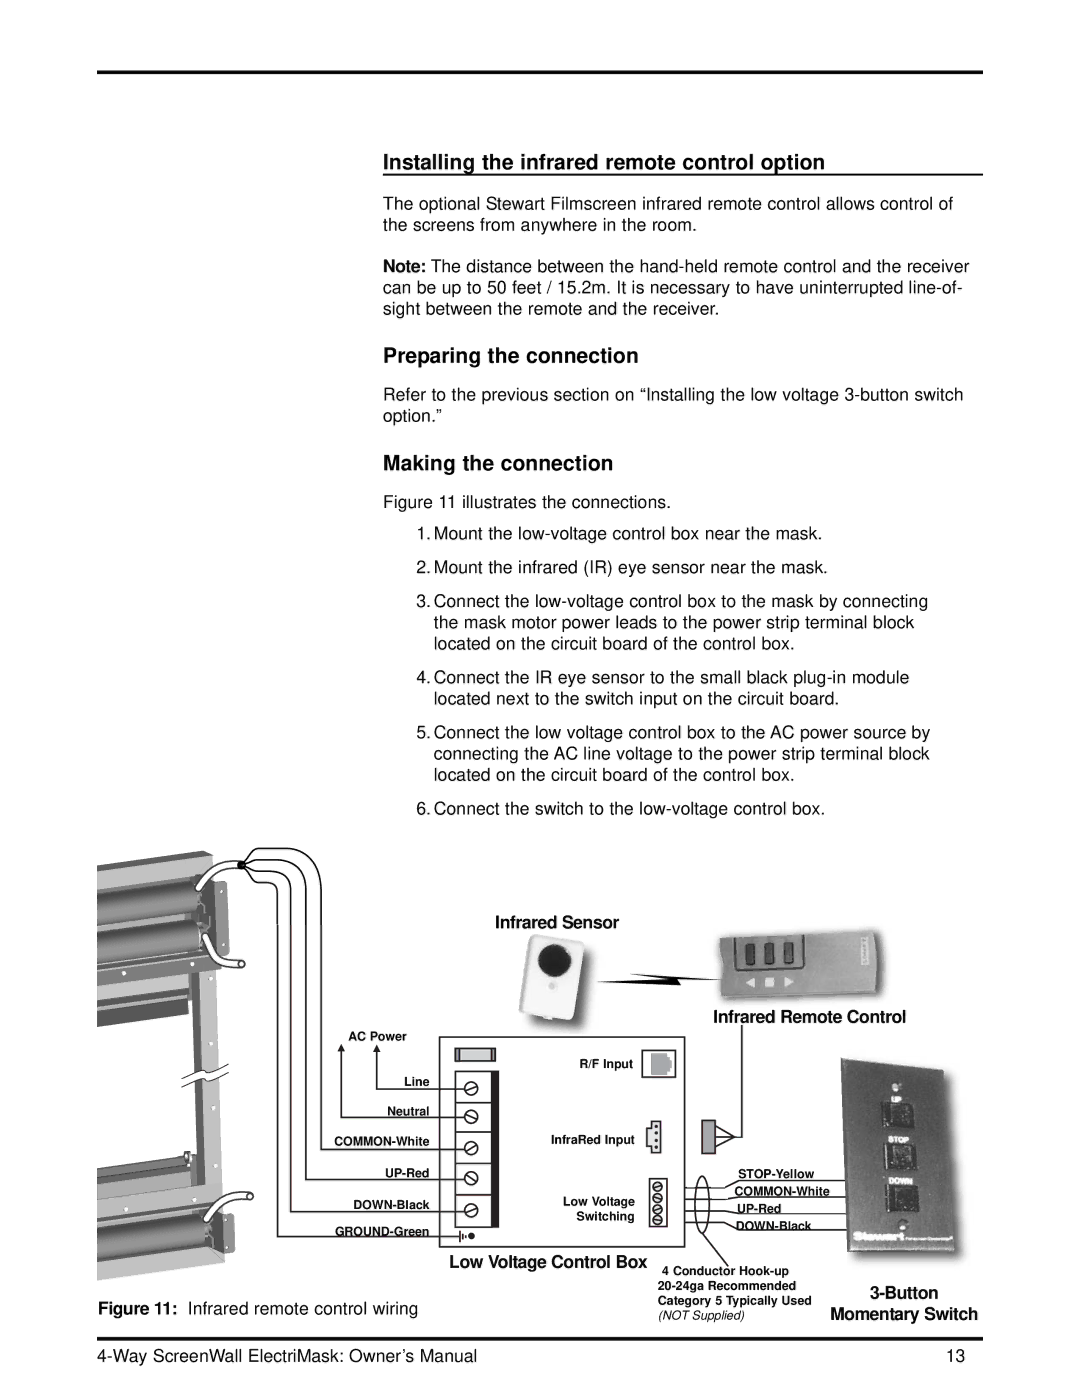
Figure 11 illustrates the connections.
1.Mount the low-voltage control box near the mask.
2.Mount the infrared (IR) eye sensor near the mask.
3.Connect the low-voltage control box to the mask by connecting the mask motor power leads to the power strip terminal block located on the circuit board of the control box.
4.Connect the IR eye sensor to the small black plug-in module located next to the switch input on the circuit board.
5.Connect the low voltage control box to the AC power source by connecting the AC line voltage to the power strip terminal block located on the circuit board of the control box.
6.Connect the switch to the low-voltage control box.
Infrared Sensor
Infrared Remote Control
AC Power |
Line |
Neutral |
R/F Input
InfraRed Input
Low Voltage Switching
Low Voltage Control Box | 4 Conductor |
| |
Figure 11: Infrared remote control wiring | Category 5 Typically Used |
(NOT Supplied) |
3-Button
Momentary Switch
13 |