Connecting the Video Interface Control System (VICS)
Note: The VICS option should not be used for the horizontal masking system.
The VICS enables up and down operation of the mask in conjunction with a projector, tuner, VCR, cable box, or switched AC outlet.
Preparing the connection
Before making the electrical connections, you need:
An available AC constant power source
A
Making the connection
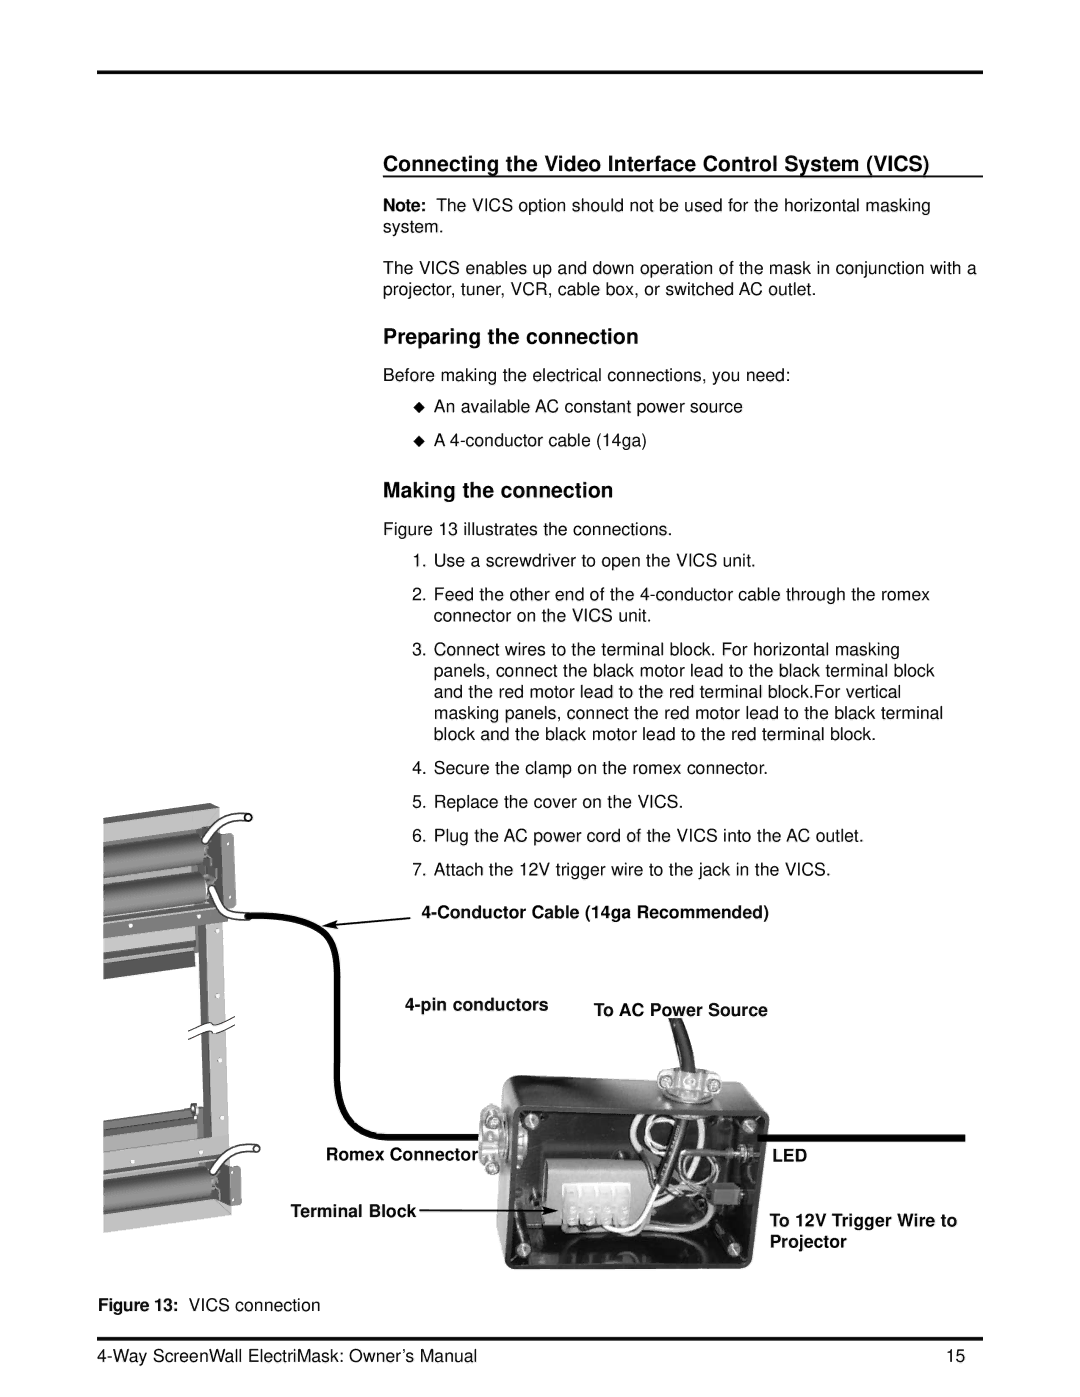
Figure 13 illustrates the connections.
1.Use a screwdriver to open the VICS unit.
2.Feed the other end of the 4-conductor cable through the romex connector on the VICS unit.
3.Connect wires to the terminal block. For horizontal masking panels, connect the black motor lead to the black terminal block and the red motor lead to the red terminal block.For vertical masking panels, connect the red motor lead to the black terminal block and the black motor lead to the red terminal block.
4.Secure the clamp on the romex connector.
5.Replace the cover on the VICS.
6. Plug the AC power cord of the VICS into the AC outlet.
7. Attach the 12V trigger wire to the jack in the VICS.
4-Conductor Cable (14ga Recommended)
| To AC Power Source |
Romex Connector | LED |
Terminal Block | To 12V Trigger Wire to |
| |
| Projector |
Figure 13: VICS connection |
|
|
|
15 |