LOCATING THE HEATER
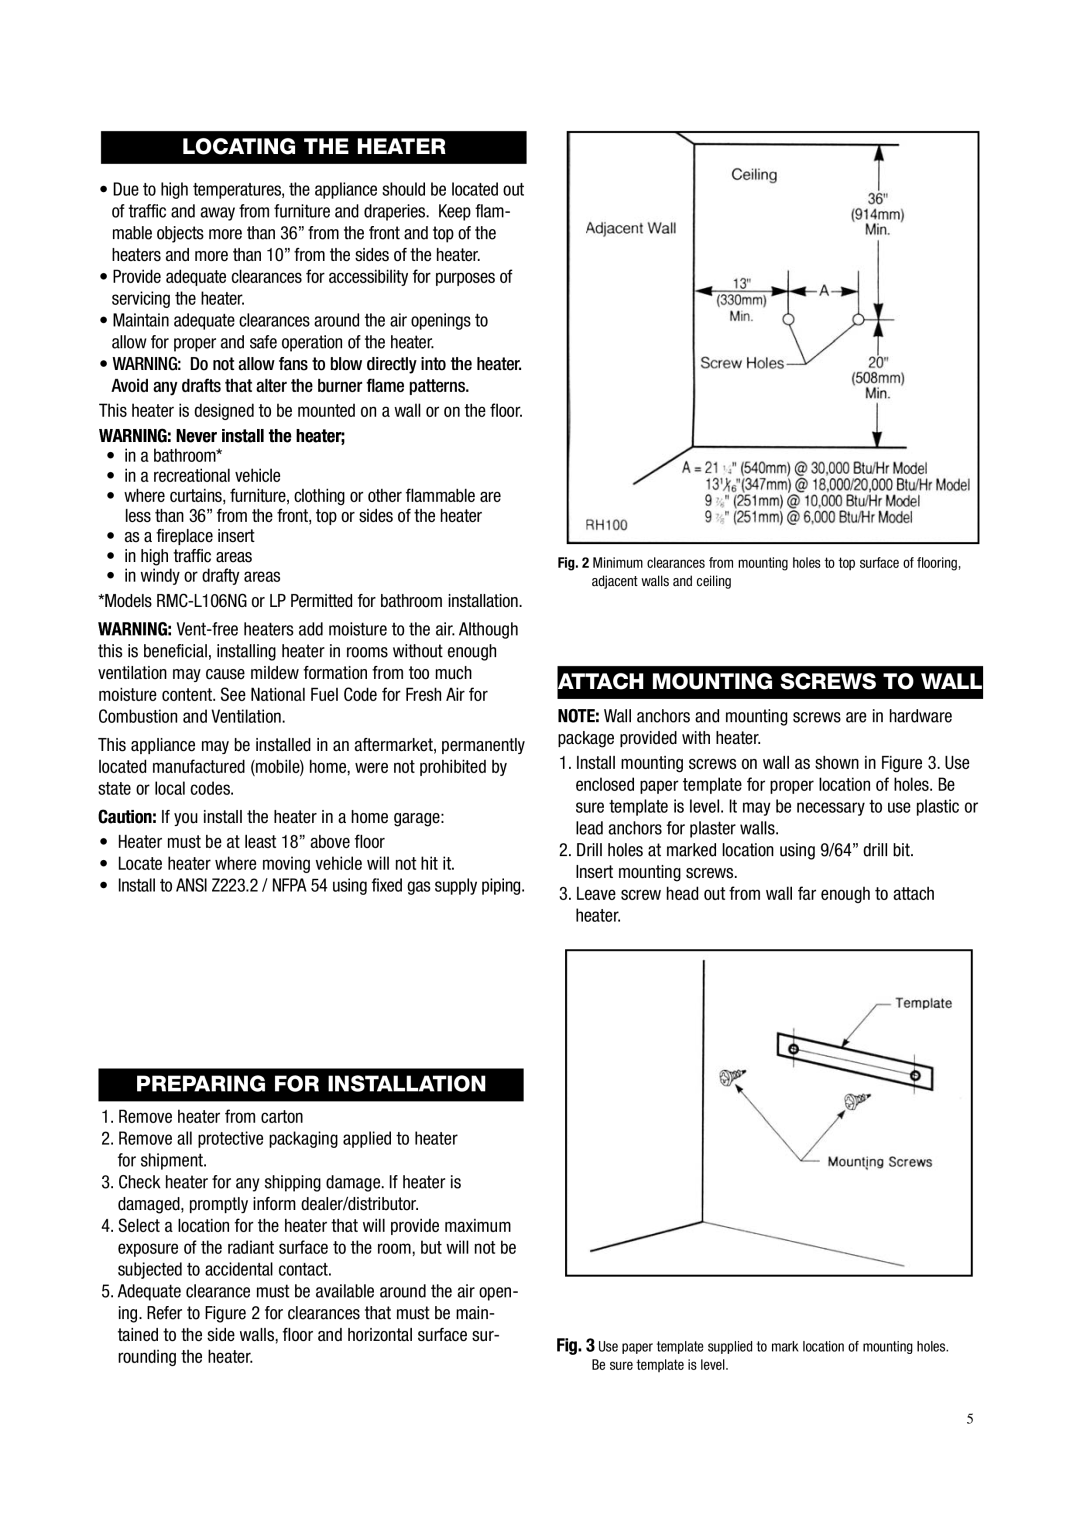
•Due to high temperatures, the appliance should be located out of traffic and away from furniture and draperies. Keep flam- mable objects more than 36” from the front and top of the heaters and more than 10” from the sides of the heater.
•Provide adequate clearances for accessibility for purposes of servicing the heater.
•Maintain adequate clearances around the air openings to allow for proper and safe operation of the heater.
•WARNING: Do not allow fans to blow directly into the heater. Avoid any drafts that alter the burner flame patterns.
This heater is designed to be mounted on a wall or on the floor.
WARNING: Never install the heater;
•in a bathroom*
•in a recreational vehicle
•where curtains, furniture, clothing or other flammable are less than 36” from the front, top or sides of the heater
•as a fireplace insert
•in high traffic areas
•in windy or drafty areas
*Models
WARNING:
This appliance may be installed in an aftermarket, permanently located manufactured (mobile) home, were not prohibited by state or local codes.
Caution: If you install the heater in a home garage:
•Heater must be at least 18” above floor
•Locate heater where moving vehicle will not hit it.
•Install to ANSI Z223.2 / NFPA 54 using fixed gas supply piping.
Fig. 2 Minimum clearances from mounting holes to top surface of flooring, adjacent walls and ceiling
ATTACH MOUNTING SCREWS TO WALL
NOTE: Wall anchors and mounting screws are in hardware package provided with heater.
1.Install mounting screws on wall as shown in Figure 3. Use enclosed paper template for proper location of holes. Be sure template is level. It may be necessary to use plastic or lead anchors for plaster walls.
2.Drill holes at marked location using 9/64” drill bit. Insert mounting screws.
3.Leave screw head out from wall far enough to attach heater.
PREPARING FOR INSTALLATION
1.Remove heater from carton
2.Remove all protective packaging applied to heater for shipment.
3.Check heater for any shipping damage. If heater is damaged, promptly inform dealer/distributor.
4.Select a location for the heater that will provide maximum exposure of the radiant surface to the room, but will not be subjected to accidental contact.
5.Adequate clearance must be available around the air open- ing. Refer to Figure 2 for clearances that must be main- tained to the side walls, floor and horizontal surface sur- rounding the heater.
Fig. 3 Use paper template supplied to mark location of mounting holes. Be sure template is level.
5
