USER INSTRUCTIONS
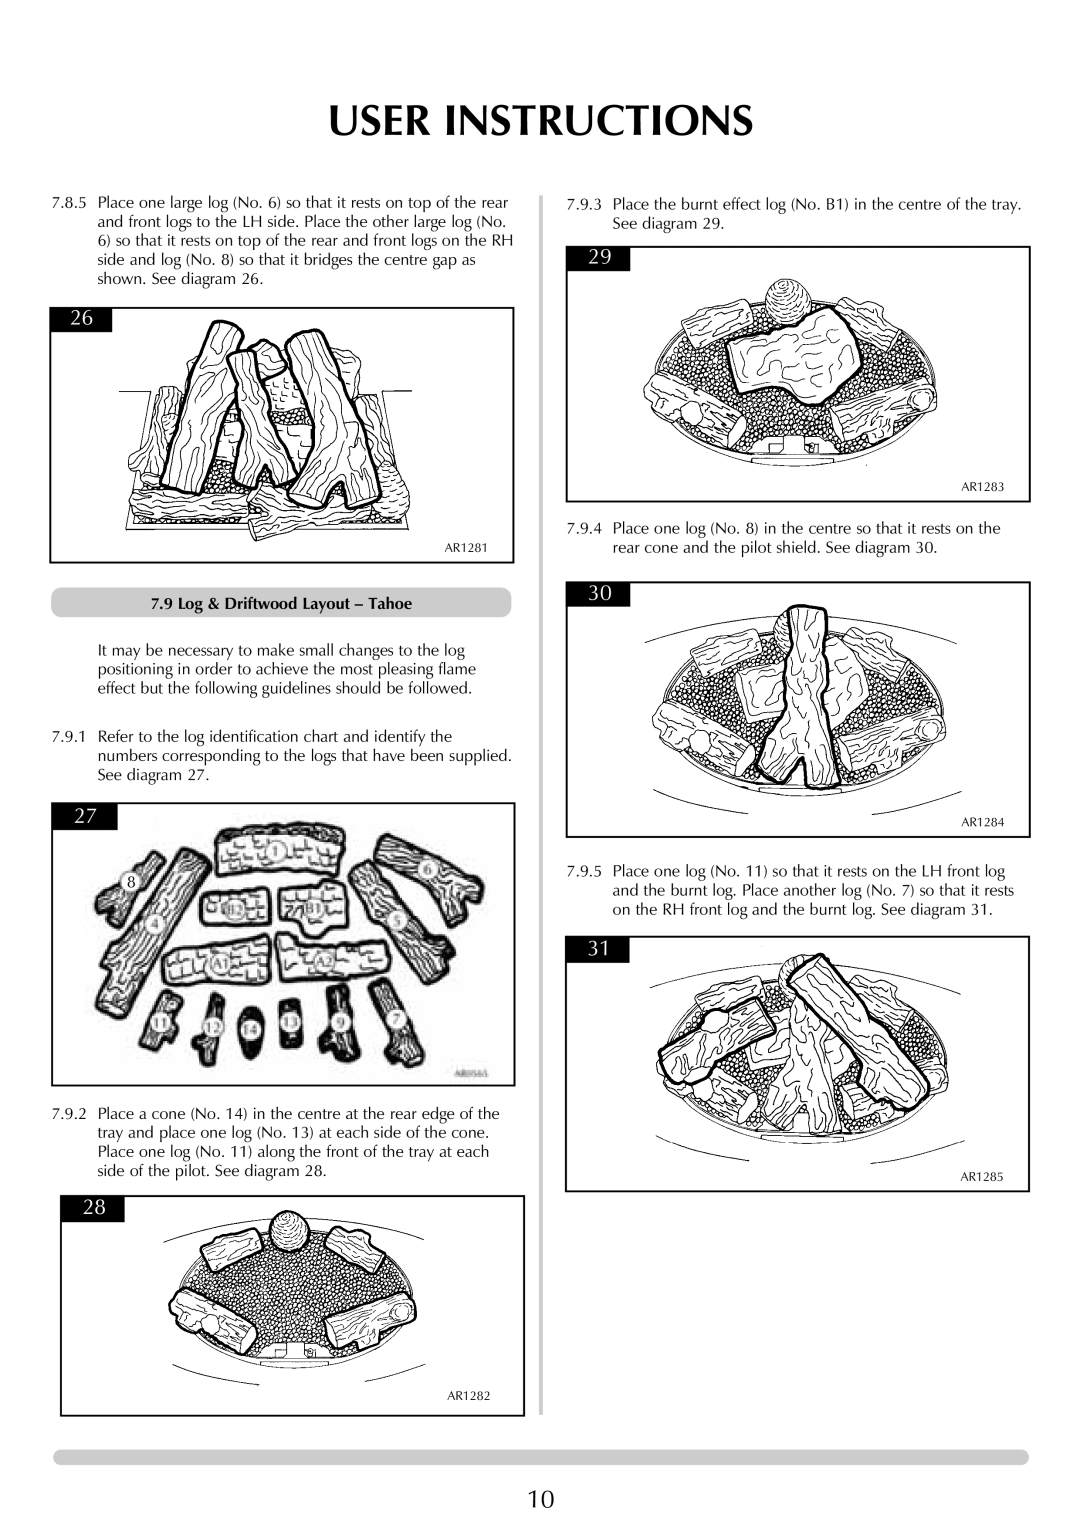
7.8.5Place one large log (No. 6) so that it rests on top of the rear and front logs to the LH side. Place the other large log (No. 6) so that it rests on top of the rear and front logs on the RH side and log (No. 8) so that it bridges the centre gap as shown. See diagram 26.
26
AR1281
7.9 Log & Driftwood Layout – Tahoe
It may be necessary to make small changes to the log positioning in order to achieve the most pleasing flame effect but the following guidelines should be followed.
7.9.1Refer to the log identification chart and identify the numbers corresponding to the logs that have been supplied. See diagram 27.
27
8
7.9.2Place a cone (No. 14) in the centre at the rear edge of the tray and place one log (No. 13) at each side of the cone. Place one log (No. 11) along the front of the tray at each side of the pilot. See diagram 28.
28
7.9.3Place the burnt effect log (No. B1) in the centre of the tray. See diagram 29.
29
AR1283
7.9.4Place one log (No. 8) in the centre so that it rests on the rear cone and the pilot shield. See diagram 30.
30
AR1284
7.9.5Place one log (No. 11) so that it rests on the LH front log and the burnt log. Place another log (No. 7) so that it rests on the RH front log and the burnt log. See diagram 31.
31
AR1285
AR1282
10