MAINTENANCE (MIXER)
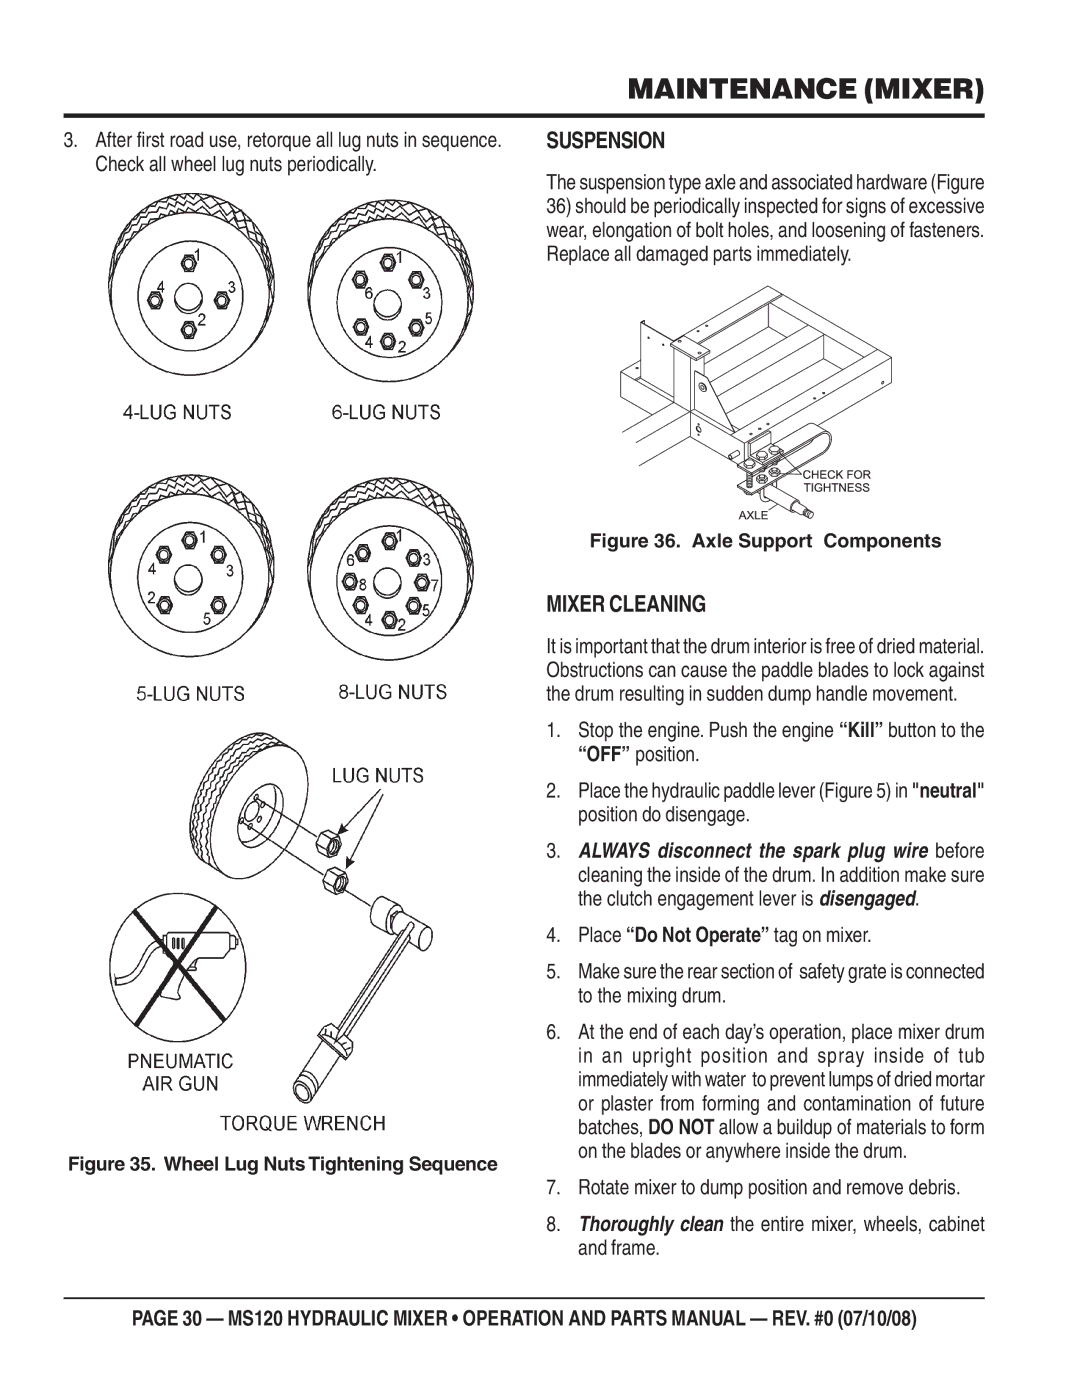
3.After first road use, retorque all lug nuts in sequence. Check all wheel lug nuts periodically.
SUSPENSION
The suspension type axle and associated hardware (Figure
36)should be periodically inspected for signs of excessive wear, elongation of bolt holes, and loosening of fasteners. Replace all damaged parts immediately.
Figure 35. Wheel Lug Nuts Tightening Sequence
Figure 36. Axle Support Components
MIXER CLEANING
It is important that the drum interior is free of dried material. Obstructions can cause the paddle blades to lock against the drum resulting in sudden dump handle movement.
1. Stop the engine. Push the engine “Kill” button to the “OFF” position.
2. Place the hydraulic paddle lever (Figure 5) in "neutral" position do disengage.
3. ALWAYS disconnect the spark plug wire before cleaning the inside of the drum. In addition make sure the clutch engagement lever is disengaged.
4. Place “Do Not Operate” tag on mixer.
5. Make sure the rear section of safety grate is connected to the mixing drum.
6. At the end of each day’s operation, place mixer drum in an upright position and spray inside of tub immediately with water to prevent lumps of dried mortar or plaster from forming and contamination of future batches, DO NOT allow a buildup of materials to form on the blades or anywhere inside the drum.
7. Rotate mixer to dump position and remove debris.
8. Thoroughly clean the entire mixer, wheels, cabinet and frame.
PAGE 30 — MS120 HYDRAULIC MIXER • OPERATION AND PARTS MANUAL — REV. #0 (07/10/08)