EJ SERIES IB-FINAL:Layout 2 10/13/2009 12:06 AM Page 12

C. Adding Water and Ground Coffee

1. Open the brew basket lid. For your convenience, you can lift out the removable filter basket.

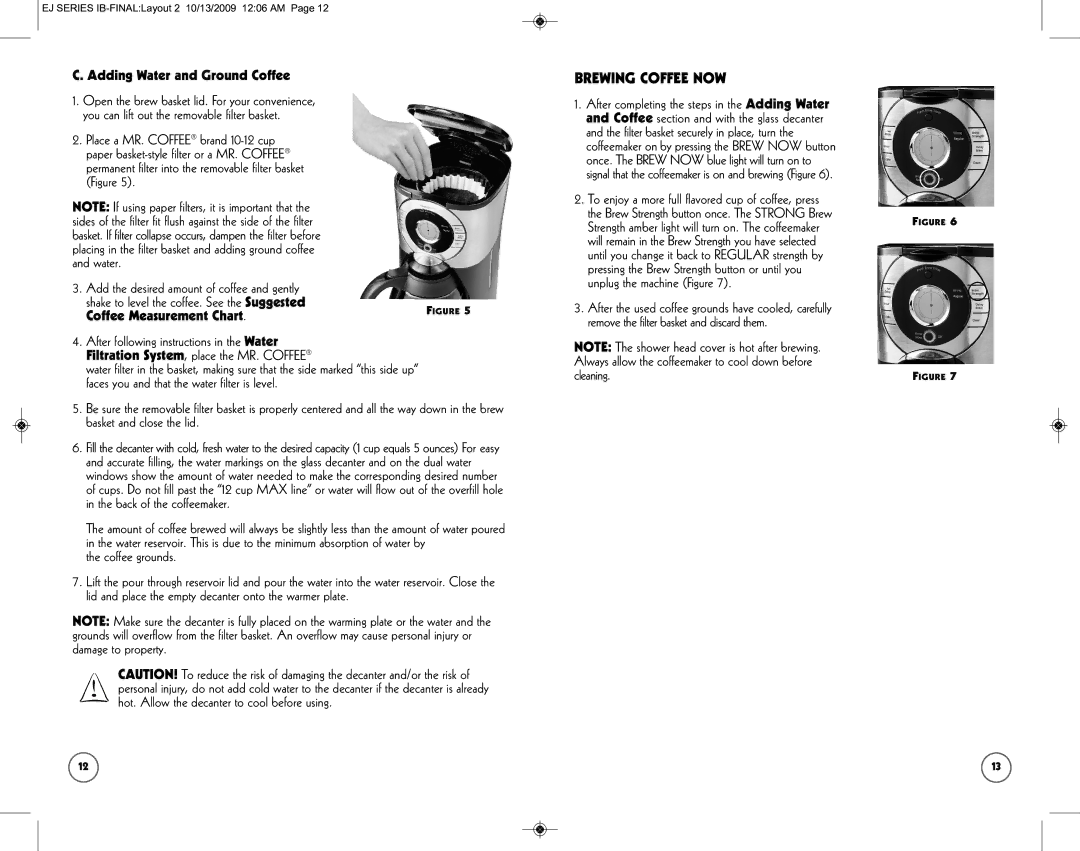
2. Place a MR. COFFEE® brand 10-12 cup paper basket-style filter or a MR. COFFEE® permanent filter into the removable filter basket (Figure 5).

NOTE: If using paper filters, it is important that the sides of the filter fit flush against the side of the filter basket. If filter collapse occurs, dampen the filter before placing in the filter basket and adding ground coffee and water.

3. Add the desired amount of coffee and gently

shake to level the coffee. See the Suggested

FIGURE 5

Coffee Measurement Chart.


4.After following instructions in the Water Filtration System, place the MR. COFFEE®

water filter in the basket, making sure that the side marked “this side up” faces you and that the water filter is level.

5.Be sure the removable filter basket is properly centered and all the way down in the brew basket and close the lid.

6.Fill the decanter with cold, fresh water to the desired capacity (1 cup equals 5 ounces) For easy and accurate filling, the water markings on the glass decanter and on the dual water windows show the amount of water needed to make the corresponding desired number of cups. Do not fill past the “12 cup MAX line” or water will flow out of the overfill hole in the back of the coffeemaker.

The amount of coffee brewed will always be slightly less than the amount of water poured in the water reservoir. This is due to the minimum absorption of water by

the coffee grounds.

7.Lift the pour through reservoir lid and pour the water into the water reservoir. Close the lid and place the empty decanter onto the warmer plate.

NOTE: Make sure the decanter is fully placed on the warming plate or the water and the grounds will overflow from the filter basket. An overflow may cause personal injury or damage to property.

CAUTION! To reduce the risk of damaging the decanter and/or the risk of personal injury, do not add cold water to the decanter if the decanter is already hot. Allow the decanter to cool before using.

BREWING COFFEE NOW

1.After completing the steps in the Adding Water and Coffee section and with the glass decanter and the filter basket securely in place, turn the coffeemaker on by pressing the BREW NOW button once. The BREW NOW blue light will turn on to signal that the coffeemaker is on and brewing (Figure 6).

2.To enjoy a more full flavored cup of coffee, press the Brew Strength button once. The STRONG Brew Strength amber light will turn on. The coffeemaker will remain in the Brew Strength you have selected until you change it back to REGULAR strength by pressing the Brew Strength button or until you unplug the machine (Figure 7).

3.After the used coffee grounds have cooled, carefully remove the filter basket and discard them.

NOTE: The shower head cover is hot after brewing. Always allow the coffeemaker to cool down before cleaning.

FIGURE 6

FIGURE 7

12

13

Page 7
Image 7
Sunbeam SPR-101006 user manual Brewing Coffee NOW, Adding Water and Ground Coffee, Coffee Measurement Chart, Coffee grounds

SPR-101006 specifications

The Sunbeam SPR-101006 is a versatile and efficient appliance designed to streamline your cooking experience. This multi-function appliance serves as a slow cooker, rice cooker, and steamer, making it an ideal addition to any kitchen, whether for everyday meals or special occasions.

One of the main features of the Sunbeam SPR-101006 is its user-friendly digital control panel. The large LCD display and intuitive buttons allow users to easily select cooking functions and set timers. This technology ensures precise monitoring of cooking times and temperatures, taking the guesswork out of meal preparation.

Equipped with a 6-quart capacity, the SPR-101006 is perfect for families or those who like to prepare meals in bulk. The spacious inner pot is made from high-quality, non-stick material, making it easy to clean after use while ensuring even heat distribution for perfectly cooked meals. The unit's removable inner pot is also dishwasher safe, simplifying the cleanup process.

The Sunbeam SPR-101006 is designed with versatility in mind. It features multiple cooking functions, including slow cooking, steaming, and rice cooking. This allows home chefs to prepare a wide range of dishes, from hearty stews to fluffy rice and even steamed vegetables. The adjustable temperature settings further enhance this versatility, allowing users to customize their cooking experience to suit different recipes.

Safety is a significant consideration in the design of the SPR-101006. The appliance includes built-in safety features, such as overheat protection and a locking lid mechanism, which prevents spills and ensures safe cooking. The lid has a steam release vent that regulates pressure during cooking, adding to the overall safety of the appliance.

Furthermore, the stylish and compact design of the Sunbeam SPR-101006 makes it suitable for any kitchen counter, while its lightweight nature allows for easy storage when not in use. Whether you’re a novice cook or an experienced chef, the Sunbeam SPR-101006 provides an array of features and technologies that make meal preparation efficient and enjoyable.

In summary, the Sunbeam SPR-101006 stands out for its versatility, user-friendly controls, ample capacity, safety features, and stylish design. It is an excellent choice for anyone looking to simplify their cooking process without compromising on flavor or quality.