8 | I n s t a l l a t i o n | |
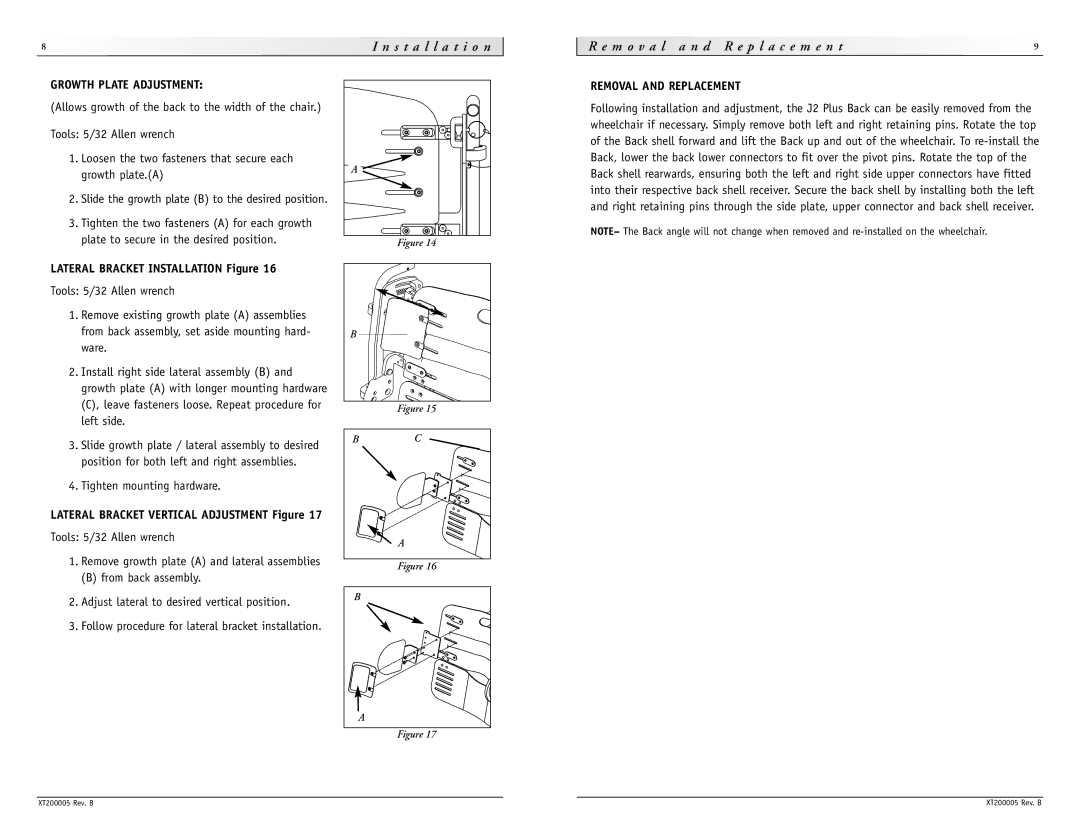
GROWTH PLATE ADJUSTMENT: |
| |
(Allows growth of the back to the width of the chair.) |
| |
Tools: 5/32 Allen wrench |
| |
1. Loosen the two fasteners that secure each | A | |
growth plate.(A) | ||
| ||
2. Slide the growth plate (B) to the desired position. |
| |
3. Tighten the two fasteners (A) for each growth |
| |
plate to secure in the desired position. | Figure 14 | |
LATERAL BRACKET INSTALLATION Figure 16 |
| |
Tools: 5/32 Allen wrench |
| |
1. Remove existing growth plate (A) assemblies |
| |
from back assembly, set aside mounting hard- | B | |
ware. |
| |
2. Install right side lateral assembly (B) and |
| |
growth plate (A) with longer mounting hardware |
| |
(C), leave fasteners loose. Repeat procedure for | Figure 15 | |
left side. |
|
| R | e | m | o | v | a | l |
| a | n | d | R | e | p | l | a | c e | m | e n | t |
|
|
|
|
|
|
|
|
|
|
|
|
|
|
| 9 |
REMOVAL AND REPLACEMENT
Following installation and adjustment, the J2 Plus Back can be easily removed from the wheelchair if necessary. Simply remove both left and right retaining pins. Rotate the top of the Back shell forward and lift the Back up and out of the wheelchair. To
NOTE– The Back angle will not change when removed and
3.Slide growth plate / lateral assembly to desired position for both left and right assemblies.
4.Tighten mounting hardware.
LATERAL BRACKET VERTICAL ADJUSTMENT Figure 17
Tools: 5/32 Allen wrench
1.Remove growth plate (A) and lateral assemblies
(B) from back assembly.
2.Adjust lateral to desired vertical position.
3.Follow procedure for lateral bracket installation.
BC
A |
Figure 16 |
B |
A |
Figure 17
XT200005 Rev. B | XT200005 Rev. B |