CV301-8CH 19
SVAT ELECTRONICS
now you can see
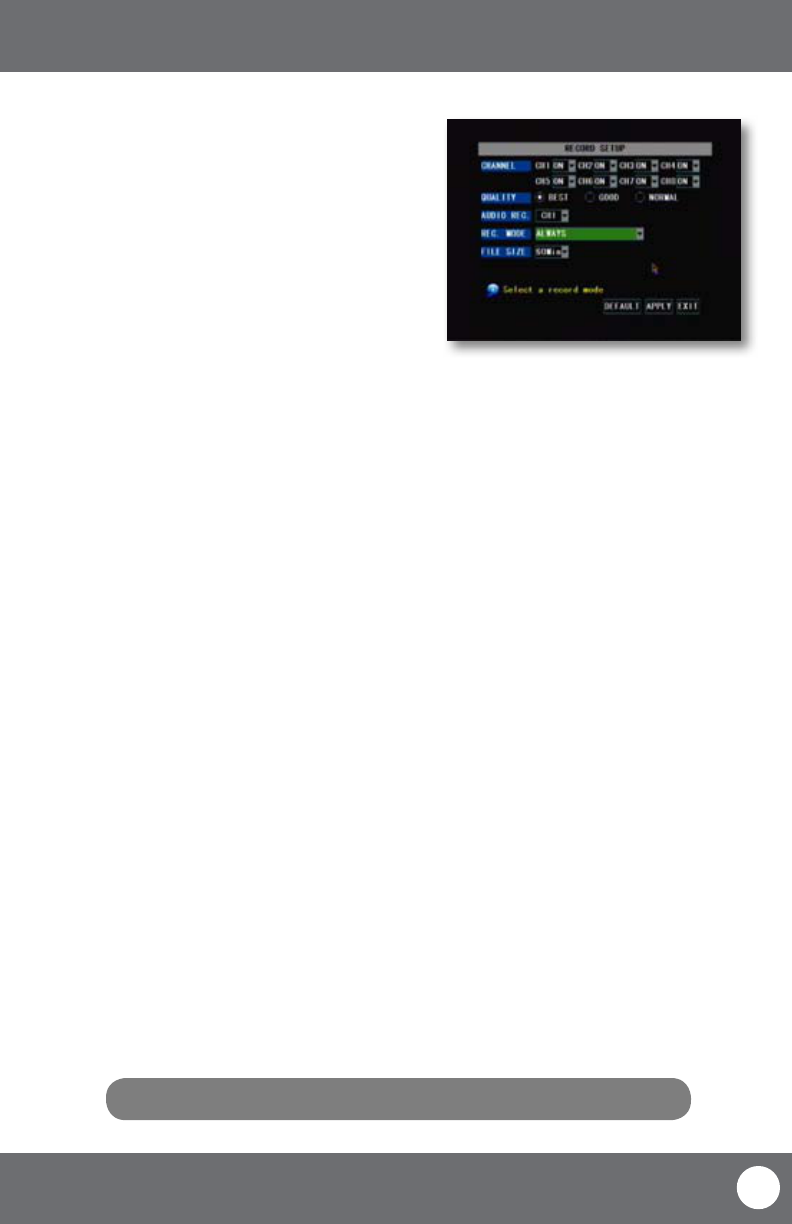
RECORD SETUP This option allows you to turn on or o each
camera, pick a video quality, turn on or o
auto record, pick a recording mode (time
schedule or always) as well as decide on a le
size (recorded video size in minutes).
Channel (On/O)
To turn channels on or o from recording:
1. Select the drop down menu beside the channel(s) you would like adjusted.
2. Highlight whether you would like the camera on or o and press select.
3. Select “apply” to save settings.
Quality
To change the quality of the recorded video:
1. Highlight the quality you would like to change to (Best, Good or Normal) and press select.
2. Select “apply” to save settings.
Audio Rec.
To turn audio recording On or O:
1. Select the drop down menu beside “Audio Rec”.
2. Highlight which camera you would like the audio to record from and press select. This has to be an audio
supported camera (not included) and it must be connected to the RCA audio input at the back of the DVR.
3. Select “apply” to save settings.
File Size
The DVR allows you choose the maximum length that each recorded video clip will be. This is for backup purposes.
To adjust and/or set a le size:
1. Select the drop down menu beside “File size”.
2. Highlight the time you would like each recorded video clip to be (15, 30, 45 and/or 60 min) and press select.
3. Select “apply” to save settings.
Note: Higher quality and resolution settings use up more space on your hard drive.
MAIN MENU