INSTALLING THE CAMERA (TANSMITTER)
1.Unpack the camera.
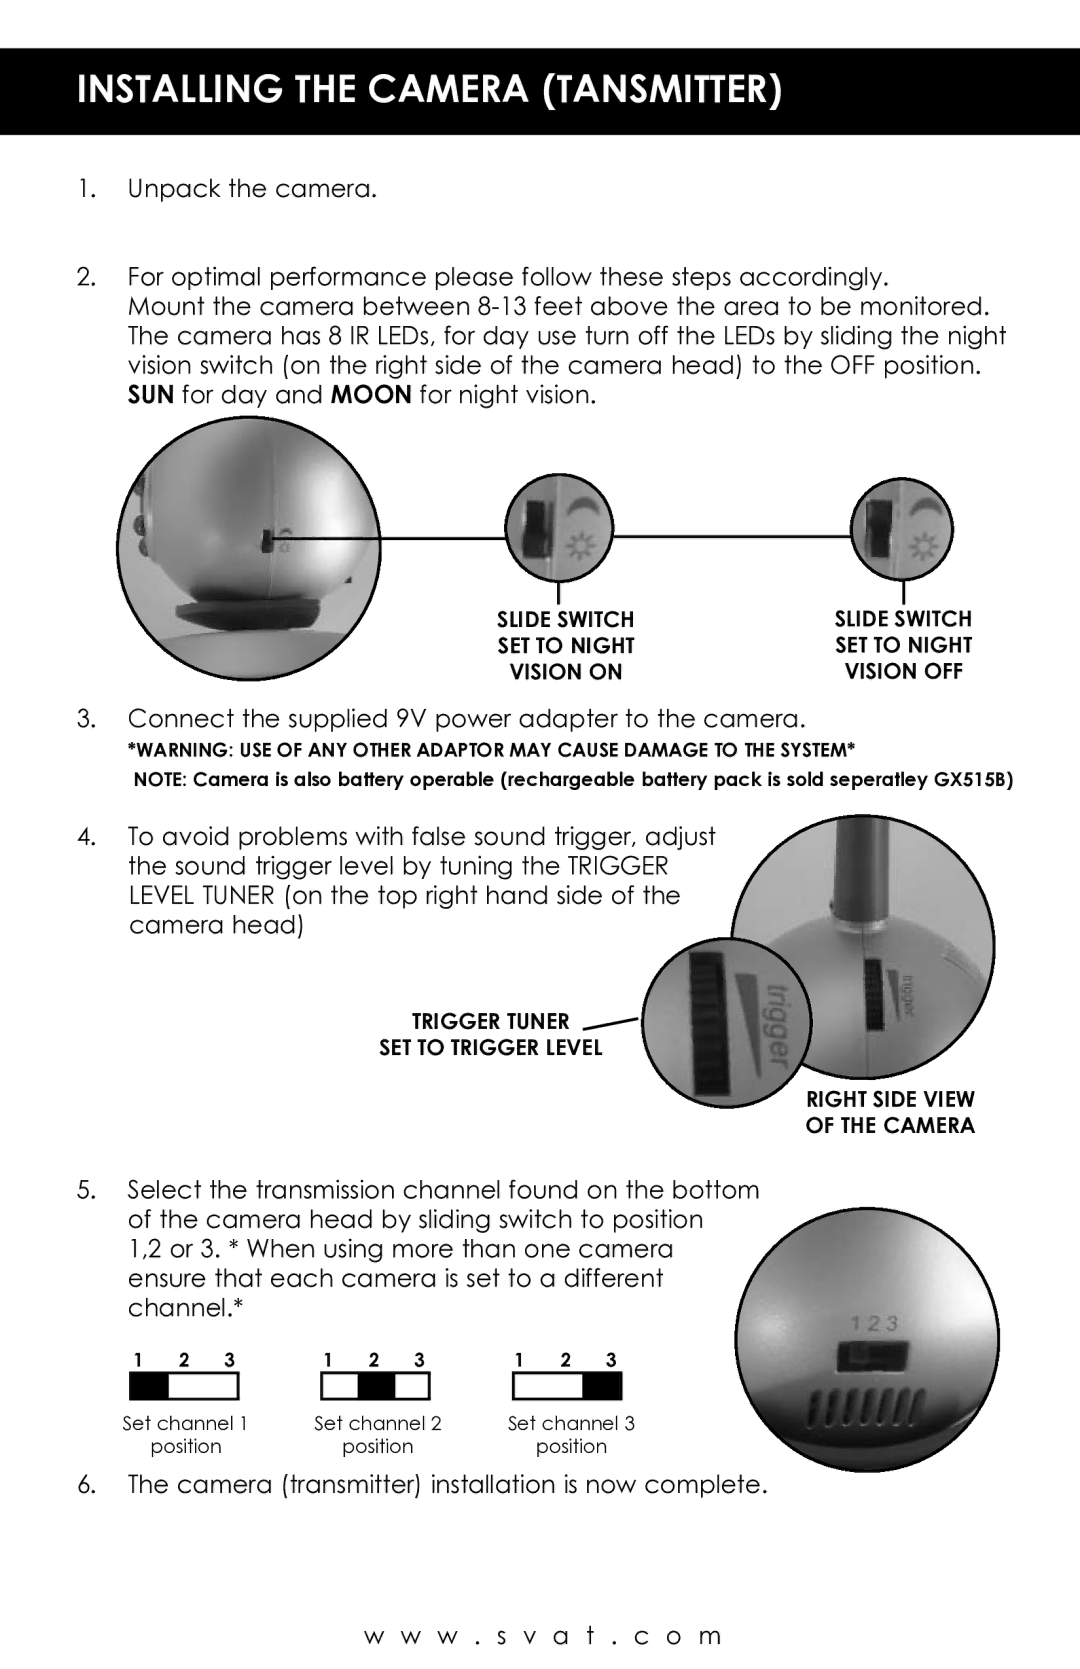
2.For optimal performance please follow these steps accordingly.
Mount the camera between
SLIDE |
| SWITCH | SLIDE |
| SWITCH |
|
| ||||
SET TO NIGHT | SET TO NIGHT | ||||
VISION ON | VISION OFF | ||||
3.Connect the supplied 9V power adapter to the camera.
*WARNING: USE OF ANY OTHER ADAPTOR MAY CAUSE DAMAGE TO THE SYSTEM*
NOTE: Camera is also battery operable (rechargeable battery pack is sold seperatley GX515B)
4.To avoid problems with false sound trigger, adjust the sound trigger level by tuning the TRIGGER LEVEL TUNER (on the top right hand side of the camera head)
TRIGGER TUNER
SET TO TRIGGER LEVEL
RIGHT SIDE VIEW
OF THE CAMERA
5.Select the transmission channel found on the bottom of the camera head by sliding switch to position 1,2 or 3. * When using more than one camera ensure that each camera is set to a different channel.*
1 | 2 | 3 |
| 1 | 2 |
| 3 |
| 1 | 2 | 3 |
| |||||
|
|
|
|
|
|
|
|
|
|
|
|
| |||||
Set channel 1 | Set channel | 2 | Set channel 3 | ||||||||||||||
|
| position |
|
|
|
| position |
|
|
|
| position | |||||
6.The camera (transmitter) installation is now complete.
w w w . s v a t . c o m
