– TIMER PROGRAMMING –

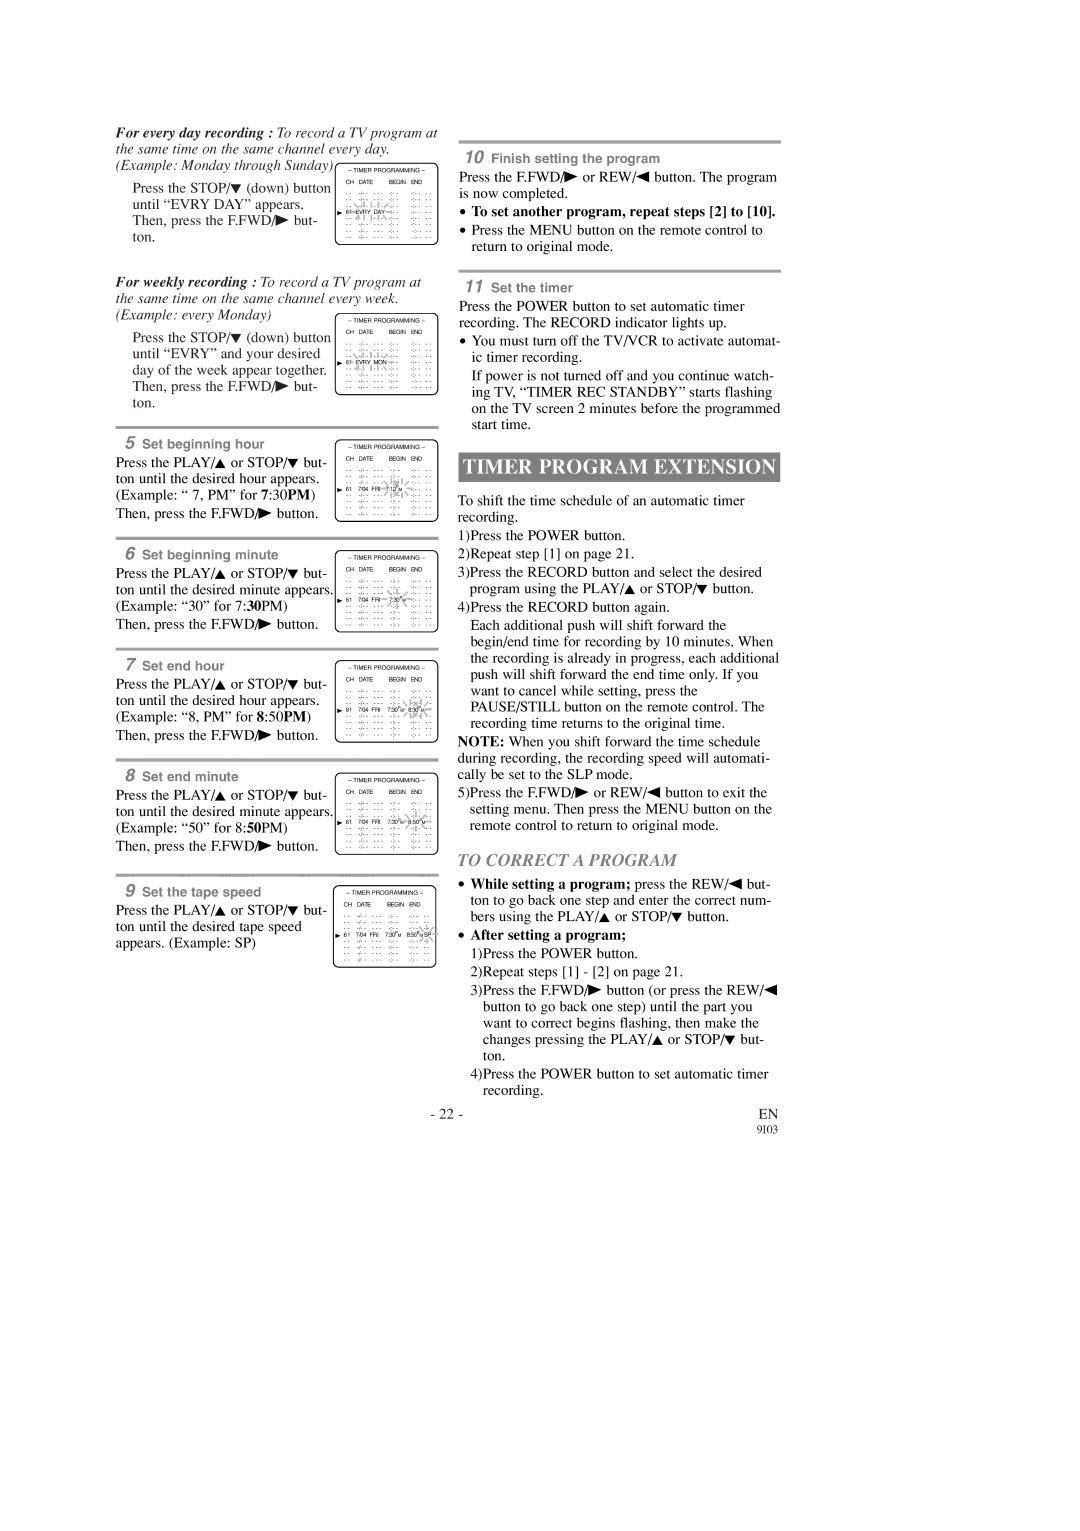
For every day recording : To record a TV program at the same time on the same channel every day. (Example: Monday through Sunday)

Press the STOP/L (down) button

CH DATE

BEGIN END

- -

-/- -

- - - -:- -

-:- - - -

until “EVRY DAY” appears.

- -

-/- -

- - - -:- -

-:- - - -

- -

-/- -

- - - -:- -

-:- - - -

Then, press the F.FWD/B but-

B 61 EVRY DAY -:- -

-:- - - -

- -

-/- -

- - - -:- -

-:- - - -


- - -/- -

- - - -:- -

-:- - - -

ton.

- -

-/- -

- - - -:- -

-:- - - -

- -

-/- -

- - - -:

-:- -


For weekly recording : To record a TV program at the same time on the same channel every week. (Example: every Monday)

Press the STOP/L (down) button

CH DATE

BEGIN END

- -

-/- -

- - -

-:- -

-:- - - -

until “EVRY” and your desired

- -

-/- -

- - -

-:- -

-:- - - -

- -

-/- -

- - -

-:- -

-:- - - -

day of the week appear together.

B 61 EVRY MON -:- -

-:- - - -

- -

-/- -

- - -

-:- -

-:- - - -


- - -/- -

- - - -:- -

-:- - - -

Then, press the F.FWD/B but-

- -

-/- -

- - -

-:- -

-:- - - -


- -

-/- -

- - -

-:- -

-:- - - -

ton.


5 Set beginning hour

– TIMER PROGRAMMING –

Press the PLAY/K or STOP/L but-

CH DATE

BEGIN END

- -

-/- -


-:- -

-:- - - -

ton until the desired hour appears.

- - -

- -

-/- -

- - -

-:- -

-:- - - -


- -

-/- -

- - -

-:- -

-:- - - -

(Example: “ 7, PM” for 7:30PM)

B 61

7/04

FRI

7:12PM

-:- - - -

- -

-/- -

- - -

-:- -

-:- - - -


- -

-/- -

- - -

-:- -

-:- - - -

Then, press the F.FWD/B button.

- -

-/- -

- - -

-:- -

-:- - - -


- -

-/- -

- - -

-:- -

-:- - - -


6 Set beginning minute

– TIMER PROGRAMMING –

Press the PLAY/K or STOP/L but-

CH DATE

BEGIN END

- -

-/- -


-:- -

-:- - - -

ton until the desired minute appears.

- - -

- -

-/- -

- - -

-:- -

-:- - - -


- -

-/- -

- - -

-:- -

-:- - - -

(Example: “30” for 7:30PM)

B 61

7/04

FRI

7:30PM -:- - - -

- -

-/- -

- - -

-:- -

-:- - - -


- -

-/- -

- - -

-:- -

-:- - - -

Then, press the F.FWD/B button.

- -

-/- -

- - -

-:- -

-:- - - -


- -

-/- -

- - -

-:- -

-:- - - -


7 Set end hour

– TIMER PROGRAMMING –

Press the PLAY/K or STOP/L but-

CH DATE

BEGIN END

- -

-/- -


-:- -

-:- - - -

ton until the desired hour appears.

- - -

- -

-/- -

- - -

-:- -

-:- - - -


- -

-/- -

- - -

-:- -

-:- - - -

(Example: “8, PM” for 8:50PM)

B 61

7/04

FRI

7:30PM 8:30PM - -

- -

-/- -

- - -

-:- -

-:- - - -


- -

-/- -

- - -

-:- -

-:- - - -

Then, press the F.FWD/B button.

- -

-/- -

- - -

-:- -

-:- - - -


- -

-/- -

- - -

-:- -

-:- - - -


8 Set end minute

– TIMER PROGRAMMING –

Press the PLAY/K or STOP/L but-

CH DATE

BEGIN END

ton until the desired minute appears.

- -

-/- -

- - -

-:- -

-:- - - -

- -

-/- -

- - -

-:- -

-:- - - -


- -

-/- -

- - -

-:- -

-:- - - -

(Example: “50” for 8:50PM)

B 61

7/04

FRI

7:30PM 8:50PM- -


- -

-/- -

- - -

-:- -

-:- - - -


- -

-/- -

- - -

-:- -

-:- - - -

Then, press the F.FWD/B button.

- -

-/- -

- - -

-:- -

-:- - - -


- -

-/- -

- - -

-:- -

-:- - - -

10Finish setting the program

Press the F.FWD/B or REW/s button. The program is now completed.

To set another program, repeat steps [2] to [10].

Press the MENU button on the remote control to return to original mode.

11Set the timer

Press the POWER button to set automatic timer recording. The RECORD indicator lights up.

You must turn off the TV/VCR to activate automat- ic timer recording.

If power is not turned off and you continue watch- ing TV, “TIMER REC STANDBY” starts flashing on the TV screen 2 minutes before the programmed start time.

TIMER PROGRAM EXTENSION

To shift the time schedule of an automatic timer recording.

1)Press the POWER button. 2)Repeat step [1] on page 21.

3)Press the RECORD button and select the desired program using the PLAY/K or STOP/L button.

4)Press the RECORD button again.

Each additional push will shift forward the begin/end time for recording by 10 minutes. When the recording is already in progress, each additional push will shift forward the end time only. If you want to cancel while setting, press the PAUSE/STILL button on the remote control. The recording time returns to the original time.

NOTE: When you shift forward the time schedule during recording, the recording speed will automati- cally be set to the SLP mode.

5)Press the F.FWD/B or REW/s button to exit the setting menu. Then press the MENU button on the remote control to return to original mode.

9Set the tape speed

Press the PLAY/K or STOP/L but- ton until the desired tape speed appears. (Example: SP)

– TIMER PROGRAMMING –

CH

DATE

BEGIN

END

- -

-/- - - - -

-:- -

-:- - - -

- -

-/- - - - -

-:- -

-:- - - -

- -

-/- - - - -

-:- -

-:- - - -

B 61

7/04 FRI

7:30PM

8:50PM SP

- -

-/- - - - -

-:- -

-:- - - -

- -

-/- - - - -

-:- -

-:- - - -

- -

-/- - - - -

-:- -

-:- - - -

- -

-/- - - - -

-:- -

-:- - - -

TO CORRECT A PROGRAM

While setting a program; press the REW/s but- ton to go back one step and enter the correct num- bers using the PLAY/K or STOP/L button.

After setting a program; 1)Press the POWER button. 2)Repeat steps [1] - [2] on page 21.

3)Press the F.FWD/B button (or press the REW/s button to go back one step) until the part you want to correct begins flashing, then make the changes pressing the PLAY/K or STOP/L but- ton.

4)Press the POWER button to set automatic timer recording.

- 22 -

EN

9I03

Page 22
Image 22
Sylvania 6313CD, 6319CD Timer Program Extension, To Correct a Program, To set another program, repeat steps 2 to

6313CD, 6319CD specifications

The Sylvania 6319CD and 6313CD are two notable models in Sylvania's lineup, designed to meet the demands of modern lighting while providing exceptional quality and efficiency. These models are recognized for their innovative features, advanced technologies, and exceptional characteristics that make them ideal for various applications.

One of the standout features of the Sylvania 6319CD and 6313CD is their energy efficiency. Both models utilize advanced LED technology, which significantly reduces energy consumption compared to traditional lighting solutions. With a high lumen output, they ensure that spaces are well-lit while consuming minimal electricity. This not only lowers utility bills but also contributes to a more sustainable environment by reducing the overall carbon footprint.

Moreover, these models offer a long lifespan, making them cost-effective in the long run. The Sylvania 6319CD and 6313CD are designed to last for many years, often exceeding 25,000 hours of use. This longevity means that users spend less time and resources on replacements and maintenance.

In terms of performance, the Sylvania 6319CD and 6313CD provide excellent color rendering, which is critical for both residential and commercial environments. With high Color Rendering Index (CRI) ratings, these lights enhance the appearance of colors in any setting, making them suitable for retail spaces, homes, and art galleries where color accuracy is paramount.

Additionally, these models feature versatility in design, allowing them to be integrated seamlessly into various settings. Their sleek and modern aesthetics can complement a wide range of interior designs, whether it is an office space, a retail store, or a home.

Another characteristic worth noting is their user-friendly installation and operation. The Sylvania 6319CD and 6313CD come with easy-to-follow instructions and can be quickly installed, reducing downtime and ensuring that users can enjoy the benefits of their new lighting solutions without delays.

In conclusion, the Sylvania 6319CD and 6313CD stand out in the realm of modern lighting technologies. With their energy efficiency, long lifespan, excellent color rendering, and versatile design, they provide an ideal lighting solution for various applications while ensuring users enjoy quality and performance. Whether for residential, commercial, or industrial use, these models reflect Sylvania's commitment to innovation and sustainability, making them a smart choice for those looking to upgrade their lighting systems.