OPERATING CONTROLS AND FUNCTIONS
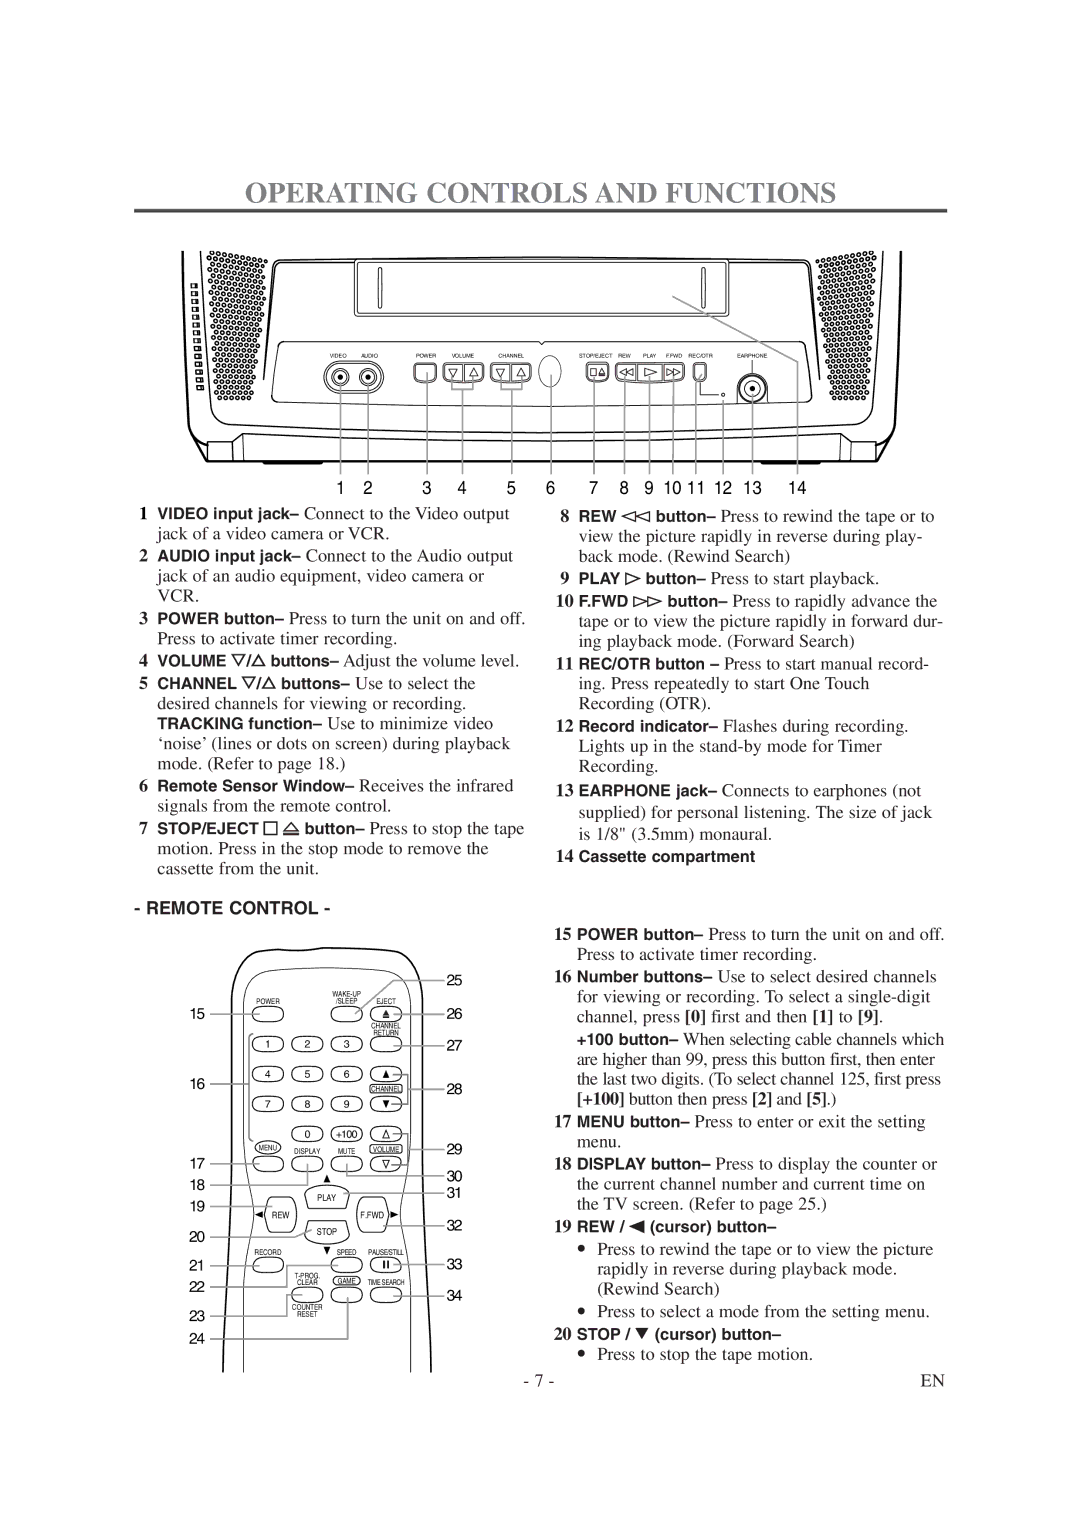
VIDEO | AUDIO | POWER | VOLUME | CHANNEL | STOP/EJECT REW | PLAY F.FWD REC/OTR | EARPHONE |
1 | 2 | 3 | 4 | 5 |
1VIDEO input jack– Connect to the Video output jack of a video camera or VCR.
2AUDIO input jack– Connect to the Audio output jack of an audio equipment, video camera or VCR.
3POWER button– Press to turn the unit on and off. Press to activate timer recording.
4VOLUME Y/X buttons– Adjust the volume level.
5CHANNEL Y/X buttons– Use to select the desired channels for viewing or recording. TRACKING function– Use to minimize video ‘noise’ (lines or dots on screen) during playback mode. (Refer to page 18.)
6Remote Sensor Window– Receives the infrared signals from the remote control.
7STOP/EJECT P N button– Press to stop the tape motion. Press in the stop mode to remove the cassette from the unit.
-REMOTE CONTROL -
|
|
|
| 25 |
|
|
| ||
POWER |
| /SLEEP | EJECT |
|
15 |
|
| CHANNEL | 26 |
|
|
|
| |
|
|
| RETURN | 27 |
1 | 2 | 3 |
| |
4 | 5 | 6 |
|
|
16 |
|
| CHANNEL | 28 |
7 | 8 | 9 |
|
|
| 0 | +100 |
|
|
MENU | DISPLAY | MUTE | VOLUME | 29 |
17 |
|
|
| 30 |
18 |
|
|
| |
PLAY |
| 31 | ||
19 |
| |||
|
| F.FWD |
| |
REW |
|
| 32 | |
20 | STOP |
| ||
|
| |||
|
|
|
| |
RECORD |
| SPEED | PAUSE/STILL | 33 |
21 |
|
| ||
22 | GAME | TIME SEARCH |
| |
CLEAR | 34 | |||
|
|
| ||
| COUNTER |
|
| |
23 |
|
|
| |
RESET |
|
|
| |
|
|
|
| |
24 |
|
|
|
|
6 | 7 | 8 | 9 10 11 12 | 13 | 14 |
8REW b button– Press to rewind the tape or to view the picture rapidly in reverse during play- back mode. (Rewind Search)
9PLAY O button– Press to start playback.
10 F.FWD a button– Press to rapidly advance the tape or to view the picture rapidly in forward dur- ing playback mode. (Forward Search)
11 REC/OTR button – Press to start manual record- ing. Press repeatedly to start One Touch Recording (OTR).
12 Record indicator– Flashes during recording. Lights up in the
13 EARPHONE jack– Connects to earphones (not supplied) for personal listening. The size of jack is 1/8" (3.5mm) monaural.
14 Cassette compartment
15 POWER button– Press to turn the unit on and off. Press to activate timer recording.
16 Number buttons– Use to select desired channels for viewing or recording. To select a
+100 button– When selecting cable channels which are higher than 99, press this button first, then enter the last two digits. (To select channel 125, first press [+100] button then press [2] and [5].)
17 MENU button– Press to enter or exit the setting menu.
18 DISPLAY button– Press to display the counter or the current channel number and current time on the TV screen. (Refer to page 25.)
19 REW / s (cursor) button–
•Press to rewind the tape or to view the picture rapidly in reverse during playback mode. (Rewind Search)
•Press to select a mode from the setting menu.
20 STOP / L (cursor) button–
•Press to stop the tape motion.
- 7 - | EN |