6427GFG
Important Safeguards
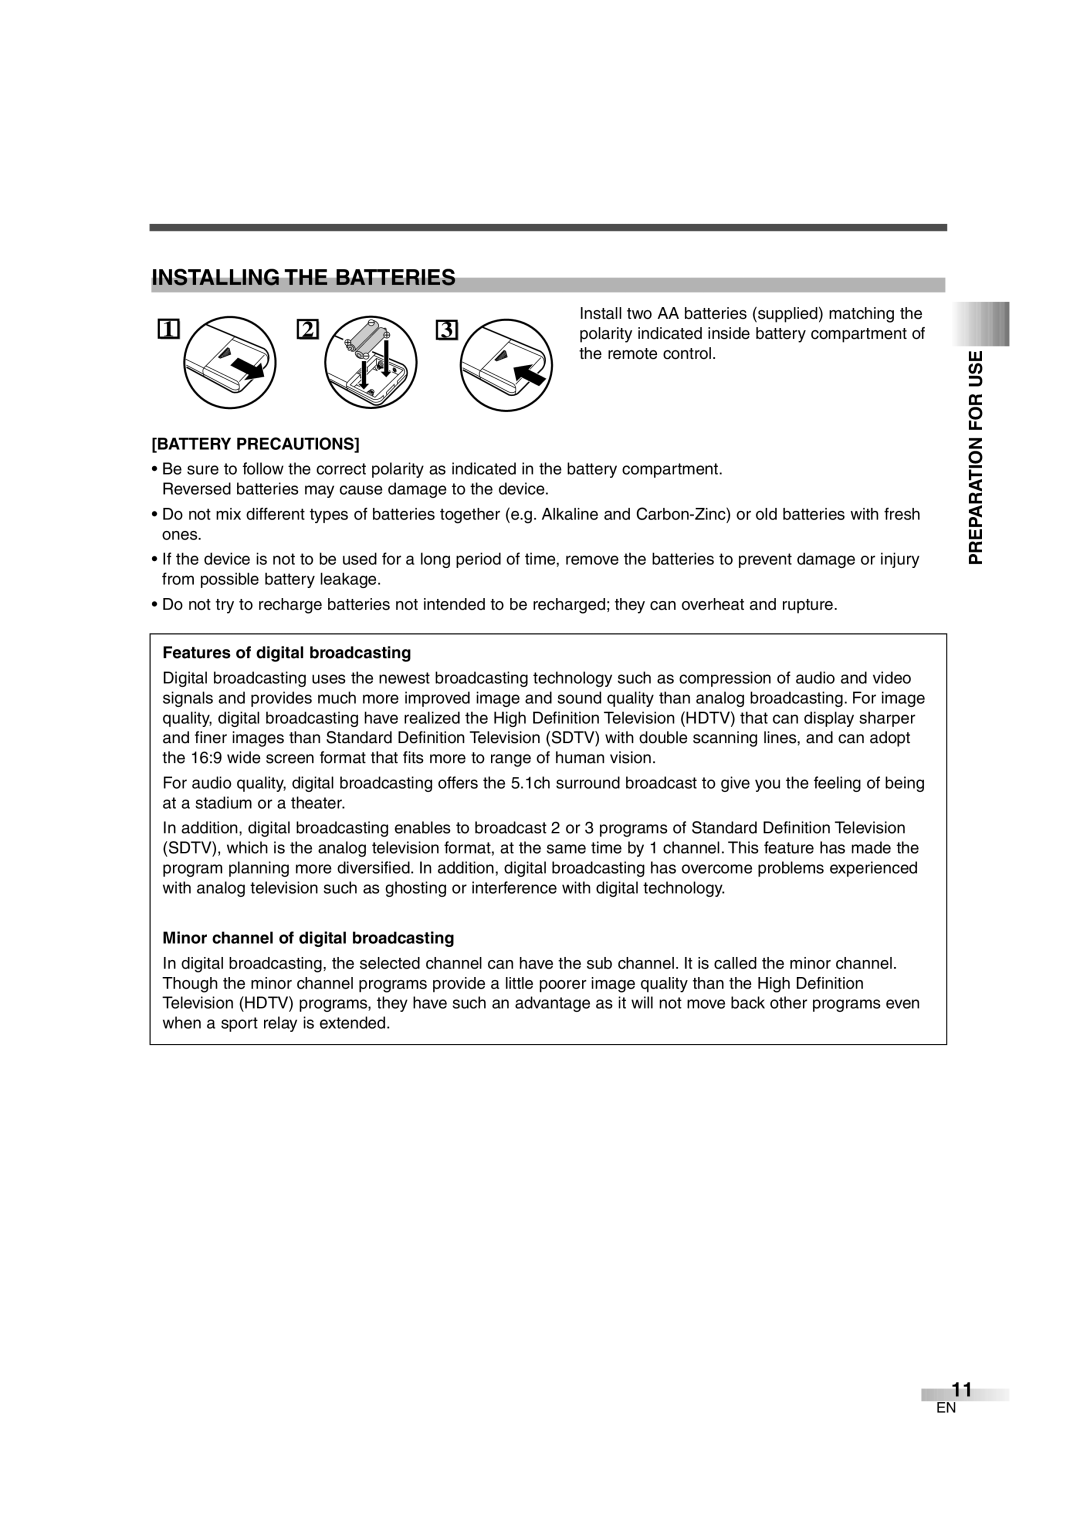
Figure a
Important Safeguards
Precautions
Supplied Accessories
Chip
Features
Accessories / Precautions / Features
DTV/TV/CATV
Contents
Connection
Contents / Preparation for USE
Preparation for USE
Component Connection
Connection to CABLE/SATELLITE BOX
External Connection
Digital Audio Connection
Using Front A/V Connection
Minor channel of digital broadcasting
Remote control
Battery Precautions
Features of digital broadcasting
Catv
Remote Control and Front Panel Function
Functions
Time Zone
Initial Settings
Watching TV
Language Selection
You can exit the initial Auto Preset menu by pressing Menu
Set the Auto Preset CH
Channel
Channel Selection
Watching TV
DTV/ TV
Mute
Volume Adjustment
Switching Audio
Using VOL X/Y
Program air time
When using component video cable for con- nection
Screen Information
Info
When using S-VIDEO Input jack
Switching External Input
When using VIDEO-2 Input jack
When using Component Video Input jack
Menu Screen
Optional Settings
Sleep Timer
Optional Settings
Picture Adjustment
CAPTION1 C1
Caption Mode C1, C2
Text Mode T1, T2
Closed Caption
Press VOL Following screen is displayed
Select DTV SET UP Using CH K/L, select DTV SET UP
Select Dtvcc Using CH K/L, select Dtvcc
Text size of the displayed caption can be switched as below
Back Opacity
Font Style Fore Color
Character Edge
Fore Opacity
Menu VOL
Chip
TV Rating
Channel 1 2 Number 4 5 Buttons 7 8
Mpaa Rating
Set Mpaa Rating Using the CH K/L, select the rating
Change Code
Zoom
Optional
Letterbox
Lower screen
For TV channels Using CH K/L, select Auto Preset Chtv
Other Settings
Auto Preset CH
Select Channel SET Using CH K/L, select Channel SET
CHTV/DTV
Press VOL Using CH K/L, select Auto Preset Chdtv
When scanning both TV and DTV at the same time
Press VOL Using CH K/L, select Auto Preset
Press VOL Following Channel SET screen is dis- played
Select ADD/DELETE Using CH K/L, select ADD/DELETE
Using CH K/L or Channel number buttons, select the channel
Channel ADD/DELETE
Menu VOL X / Y
Language Selection
Other
Set D.S.T. Daylight Saving Using VOL X/Y, set to on or OFF
Time Zone
Select Time Zone Using CH K/L, select Time Zone
Miscellaneous
Troubleshooting Guide
Before calling for service, check the following chart again
Miscellaneous
Ntsc
Maintenance
Glossary
Atsc
NTSC-M
Specifications
Specifications
Limits and Exclusions
Sylvania Limited Warranty
Duration
Para Recibir Señal Digital Debe Conectar LA Antena
Importante Para SU Seguridad
Según EL Código Nacional DE Electricidad
Importante Para SU Seguridad
Precauciones
Accesorios Suministrados
Accesorios / Precauciones / Características
Características
Símbolos Empleados EN Este Manual
Indice
Conexión DE ANTENA/CABLE Básico
Preparación Para EL USO
Conexión
Índice / Preparación Para EL USO
Conexión DE Componente
Conexión CON Caja DE CONVERTIDOR/CAJA DE Satélite
CABLE/SATÉLITE
Conexión Externa
Preparación Para EL USO
Conexión DE Audio Digital
USO DE Conexión A/V Frontal
Características de la radiodifusión digital
Instalación DE LAS Pilas
Timento del mando a distancia
Precauciones Relacionadas CON LAS Pilas
Funciones DEL Mando a Distancia Y EL Panel Frontal
Funciones
Funciones / Para
Para Mirar TV
Preajustes Inicial
Mirar TV
Notas
Ajuste del PREA. Auto CA
Usando CH K/L Cambie el canal usando CH K/L
Selección DE Canal
Botones de Número de Canal
Uso Mute
Ajuste DEL Volumen
Cambio DEL Modo DE Audio
Uso VOL X/Y
Cuando se use el cable de vídeo componente para la conexión
Información DE Pantalla
Para Tvmirar
Si usa el conector S-VIDEO Input
Selección DE LA Entrada Externa
Si usa el conector VIDEO-2 Input
Si usa el conector Component Video Input
Ajustes Opcionales
Ajustes Opcionales
Pantalla DE Menú
Matiz
Ajuste DE LA Imagen
Claridad
Contraste
Modo DE Texto T1, T2
Subtítulos
Modo DE Título C1, C2
Selección de Dtvcc Con CH K/L, seleccione Dtvcc
Uso de CONFIG. Usuarid
Con CH K/L, seleccione CONFIG. Usuarid
Presione VOL Se mostrará la siguiente pantalla
Opaco Adelante
Estilo Fuente
Color Adelante
Borde Caracter
Ajuste de Clase DE TV Con CH K/L, seleccione la clase
Clase DE TV
Para realizar el ajuste de cada uno de los ele
Mentos vea la siguiente descripción
Público general
Clase DE Mpaa
Ajuste de Clase DE Mpaa Con CH K/L, seleccione la clase
Cambiar Código
Digital
Cambio DEL Modo Devisualización DE Pantalla
Ancho Buzón
Amplia y muestra la zona central del programa
Selección de Canal Prep Con CH K/L, seleccione Canal Prep
Otros Ajustes
PREA. Auto CA
Presione Menu Se visualizará la siguiente pantalla de menú
CA.TV/DTV
Presione VOL Con CH K/L, seleccione PREA. Auto CA.DTV
Cuando explore ambos TV y DTV al mismo tiempo
Presione VOL Con CH K/L, seleccione PREA. Auto
Presione VOL Aparecerá la siguiente pantalla de Canal Prep
AGREGAR/BORRAR Canales
Selección de ESP/FRA/ENG Con CH K/L, seleccione ESP/FRA/ENG
Selección DE Idioma
Ajustes
Se mostrará la siguiente pantalla de menú
Selección de Hora DE Verano Con VOL X/Y, seleccione on u OFF
Hora DE Verano
Uación. Ajustes Otros
Huso Horario
Varios
Guía DE Localización DE Problemas
Página
Varios
Mantenimiento
Glosario
DTV Catv
Especificaciones
Especificaciones
VHF UHF
Limites Y Exclusiones
Sylvania Garantia Limitada
Atencion
Duracion