
DVC865G specifications
The Sylvania DVC865G is a versatile and innovative digital video recorder that revolutionizes the way users capture and enjoy their favorite television programming. Designed with cutting-edge technology, this device serves as an all-in-one solution for those looking to elevate their viewing experience.One of the standout features of the DVC865G is its advanced recording capabilities. With a generous built-in hard drive, users can record multiple shows simultaneously without the worry of running out of storage space. This makes it ideal for families or individuals who have diverse viewing schedules. The ability to pause, rewind, and fast-forward live television adds a layer of flexibility, allowing viewers to take control of their viewing experience.
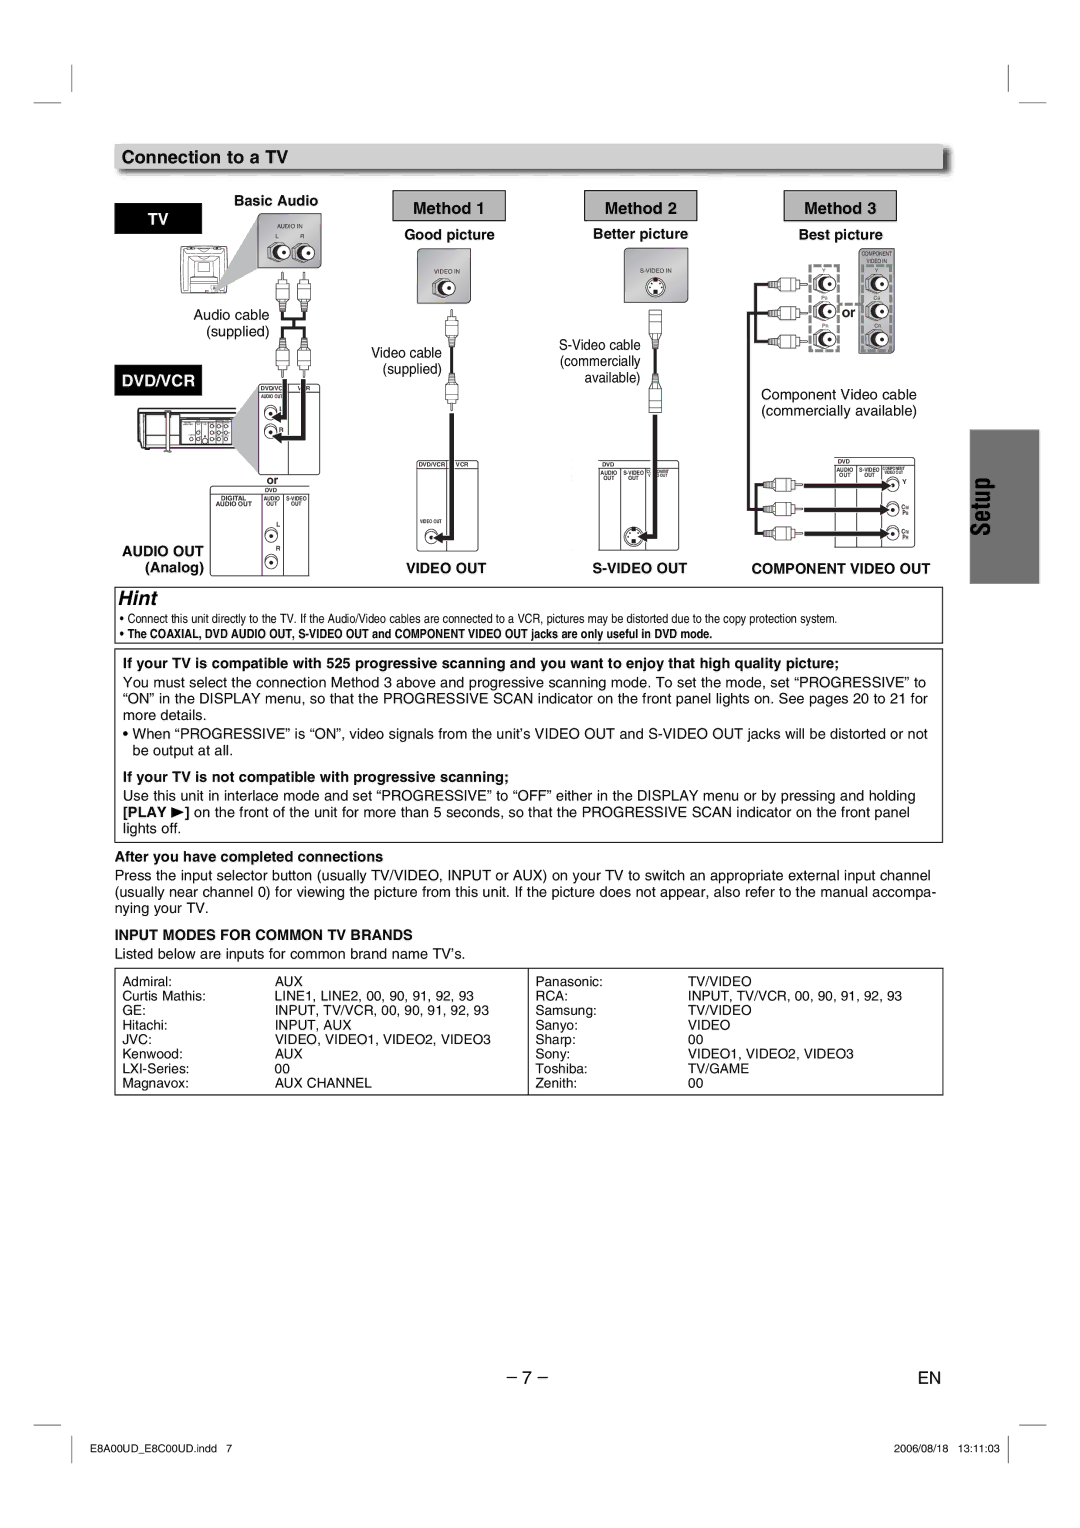
Another remarkable aspect of the DVC865G is its compatibility with various digital formats. Whether it’s standard definition or high definition content, this device ensures that users receive the best possible quality in their recordings. Additionally, it supports multiple input options, making it easy to connect to various television sets and other compatible devices.
The DVC865G features an intuitive user interface that enhances user experience. The on-screen navigation is designed to be straightforward, making it easy for even the least tech-savvy individuals to operate the recorder. Users can quickly schedule recordings, manage their media library, and organize their favorite shows with just a few clicks.
Connectivity is another crucial factor in the DVC865G's appeal. The device is equipped with USB ports, and HDMI outputs, which allow for seamless integration with external storage devices and modern televisions. This connectivity ensures that users can easily share their content or expand their storage options, catering to their unique needs.
In terms of energy efficiency, the Sylvania DVC865G stands out with its low power consumption features. This is not only beneficial for the environment but also helps consumers save on electricity bills, making it a smart choice for eco-conscious users.
Moreover, the DVC865G often includes features that enhance the viewing experience, such as parental controls, customizable recording settings, and integration with streaming services. This allows users to tailor their device to suit their personal preferences and viewing habits.
Overall, the Sylvania DVC865G combines functionality, user-friendly design, and modern technology to deliver a top-notch digital video recording experience. It's a robust solution for anyone wishing to take their television viewing to the next level.