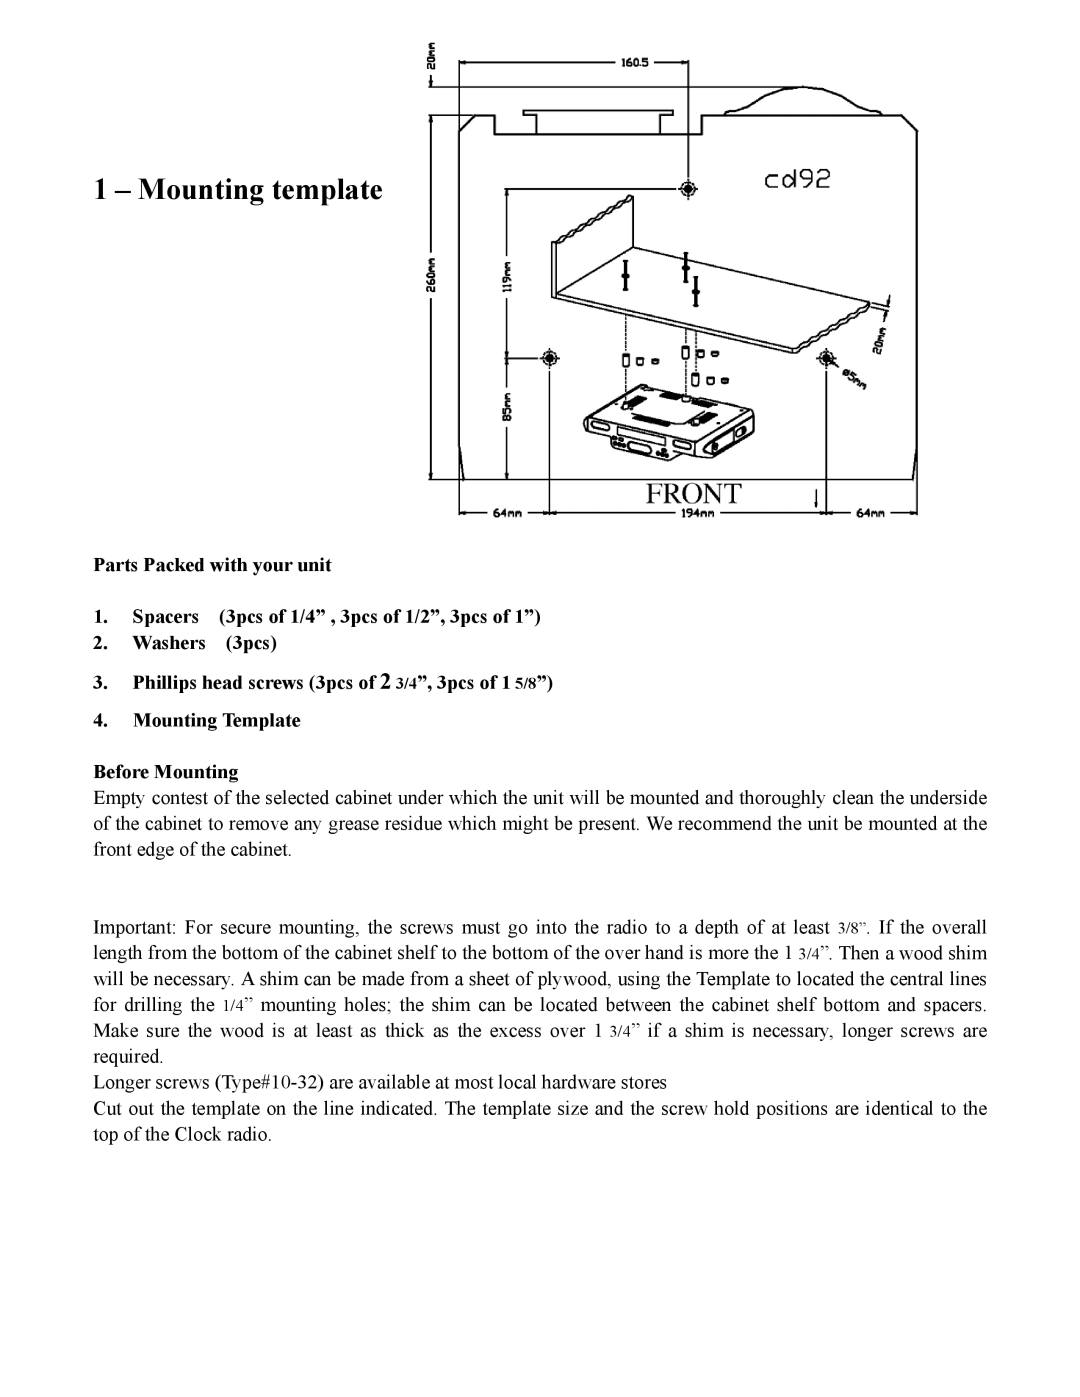
1 – Mounting template
Parts Packed with your unit
1. Spacers (3pcs of 1/4” , 3pcs of 1/2”, 3pcs of 1”)
2.Washers (3pcs)
3.Phillips head screws (3pcs of 2 3/4”, 3pcs of 1 5/8”)
4.Mounting Template
Before Mounting
Empty contest of the selected cabinet under which the unit will be mounted and thoroughly clean the underside of the cabinet to remove any grease residue which might be present. We recommend the unit be mounted at the front edge of the cabinet.
Important: For secure mounting, the screws must go into the radio to a depth of at least 3/8”. If the overall length from the bottom of the cabinet shelf to the bottom of the over hand is more the 1 3/4”. Then a wood shim will be necessary. A shim can be made from a sheet of plywood, using the Template to located the central lines for drilling the 1/4” mounting holes; the shim can be located between the cabinet shelf bottom and spacers. Make sure the wood is at least as thick as the excess over 1 3/4” if a shim is necessary, longer screws are required.
Longer screws
Cut out the template on the line indicated. The template size and the screw hold positions are identical to the top of the Clock radio.
