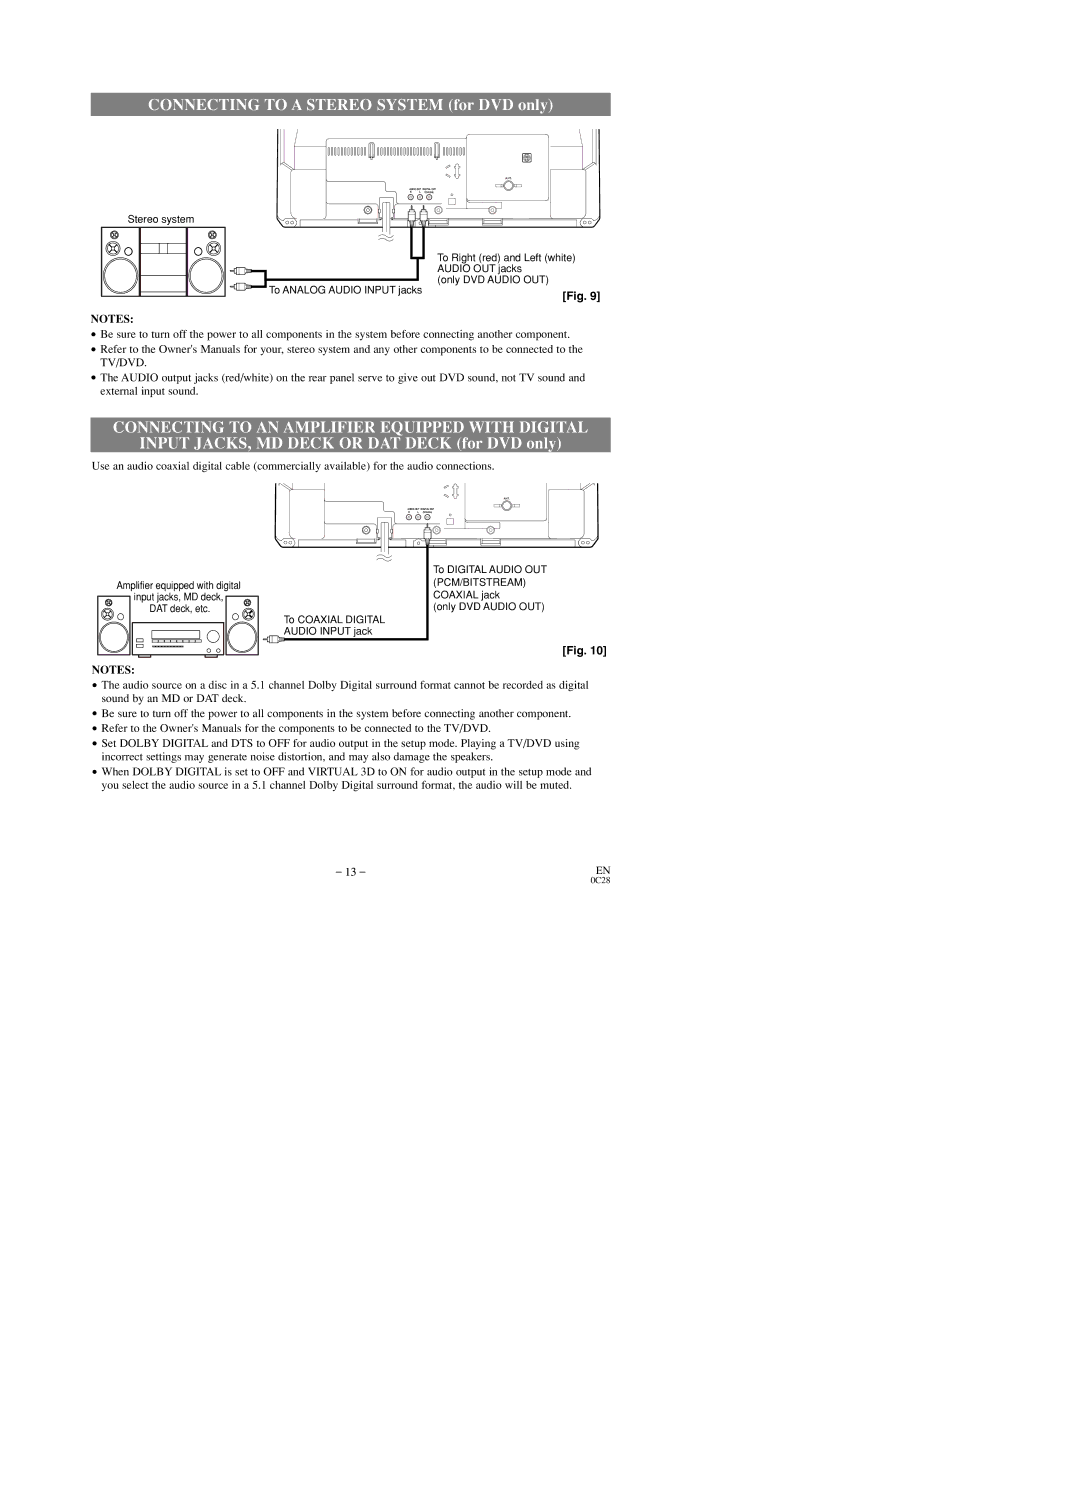
CONNECTING TO A STEREO SYSTEM (for DVD only)
1
ANT.
AUDIO OUT DIGITAL OUT
R L COAXIAL
Stereo system
To ANALOG AUDIO INPUT jacks
NOTES:
To Right (red) and Left (white) AUDIO OUT jacks
(only DVD AUDIO OUT)
[Fig. 9]
•Be sure to turn off the power to all components in the system before connecting another component.
•Refer to the Owner's Manuals for your, stereo system and any other components to be connected to the TV/DVD.
•The AUDIO output jacks (red/white) on the rear panel serve to give out DVD sound, not TV sound and external input sound.
CONNECTING TO AN AMPLIFIER EQUIPPED WITH DIGITAL
INPUT JACKS, MD DECK OR DAT DECK (for DVD only)
Use an audio coaxial digital cable (commercially available) for the audio connections.
ANT.
AUDIO OUT DIGITAL OUT
R L COAXIAL
Amplifier equipped with digital
input jacks, MD deck, DAT deck, etc.
NOTES:
To COAXIAL DIGITAL AUDIO INPUT jack
To DIGITAL AUDIO OUT (PCM/BITSTREAM) COAXIAL jack
(only DVD AUDIO OUT)
[Fig. 10]
•The audio source on a disc in a 5.1 channel Dolby Digital surround format cannot be recorded as digital sound by an MD or DAT deck.
•Be sure to turn off the power to all components in the system before connecting another component.
•Refer to the Owner's Manuals for the components to be connected to the TV/DVD.
•Set DOLBY DIGITAL and DTS to OFF for audio output in the setup mode. Playing a TV/DVD using incorrect settings may generate noise distortion, and may also damage the speakers.
•When DOLBY DIGITAL is set to OFF and VIRTUAL 3D to ON for audio output in the setup mode and you select the audio source in a 5.1 channel Dolby Digital surround format, the audio will be muted.
– 13 – | EN |
