GB
7.Clearing Paper Jams
W Components of the Printer Unit | W Clearing Paper Jams | |
|
|
|
| mCAUTION | Please pay careful attention to avoid injury from the sharp edge. | ||
| Please turn off the machine before clearing Paper jams. | |||
|
|
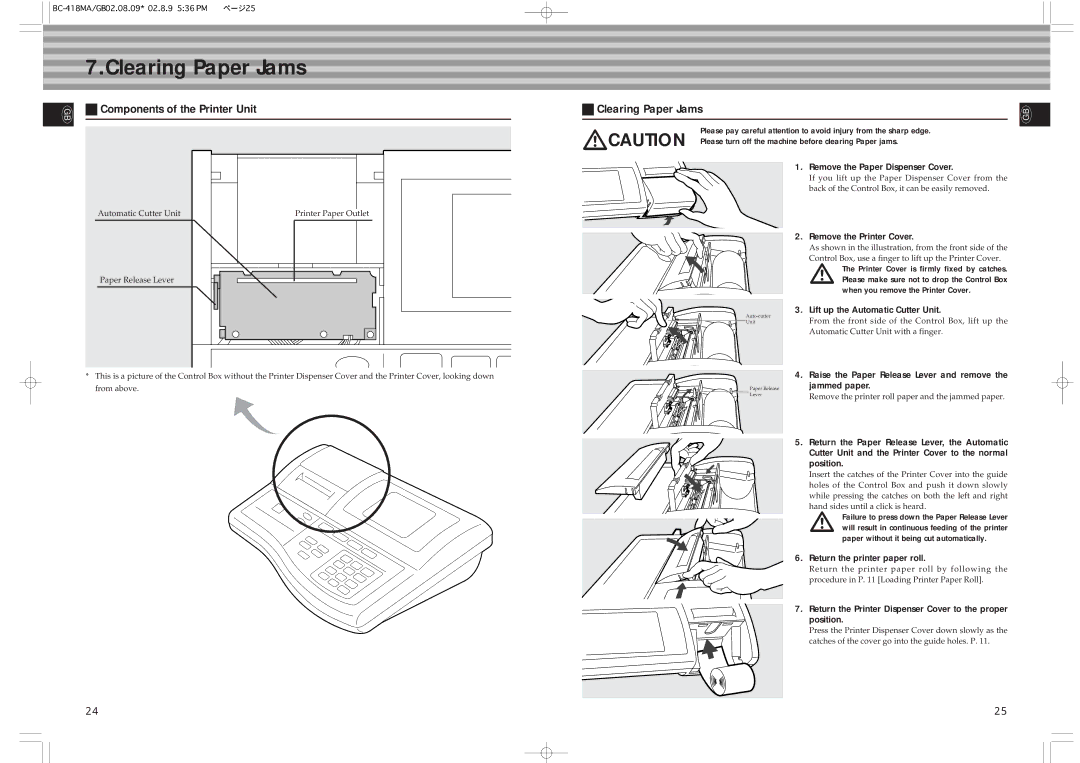
| 1. Remove the Paper Dispenser Cover. | |
|
|
| If you lift up the Paper Dispenser Cover from the | |
|
|
| back of the Control Box, it can be easily removed. | |
Automatic Cutter Unit | Printer Paper Outlet |
|
|
|
|
|
| 2. Remove the Printer Cover. | |
|
|
| As shown in the illustration, from the front side of the | |
|
|
| Control Box, use a finger to lift up the Printer Cover. | |
|
|
| m | The Printer Cover is firmly fixed by catches. |
|
|
|
| |
Paper Release Lever |
|
|
| Please make sure not to drop the Control Box |
|
|
|
| when you remove the Printer Cover. |
|
| 3. Lift up the Automatic Cutter Unit. | ||
|
| From the front side of the Control Box, lift up the | ||
|
| Unit | ||
|
|
| Automatic Cutter Unit with a finger. | |
GB
*This is a picture of the Control Box without the Printer Dispenser Cover and the Printer Cover, looking down from above.
Paper Release Lever
4. Raise the Paper Release Lever and remove the jammed paper.
Remove the printer roll paper and the jammed paper.
5.Return the Paper Release Lever, the Automatic Cutter Unit and the Printer Cover to the normal
position.
Insert the catches of the Printer Cover into the guide holes of the Control Box and push it down slowly while pressing the catches on both the left and right hand sides until a click is heard.
mFailure to press down the Paper Release Lever will result in continuous feeding of the printer paper without it being cut automatically.
6.Return the printer paper roll.
Return the printer paper roll by following the procedure in P. 11 [Loading Printer Paper Roll].
7. Return the Printer Dispenser Cover to the proper position.
Press the Printer Dispenser Cover down slowly as the catches of the cover go into the guide holes. P. 11.
24 | 25 |
