the monitors should be mounted on a rigid structure, preferably with the use of soft pads (rubber, Sorbothane,
When used in the landscape orientation, we recommend location of the monitors so that the drive units are toed inwards, with their axes oriented towards the listening position. The distance between the two speakers should be about 1.5 to 2 metres, depending on the monitoring position. The distance between the monitoring position and each speaker should be slightly greater than the distance between the speakers. If the speakers are placed too close to each other the full stereo image may not develop, on the other hand if you place them too far apart you will notice an audible hole in the middle of the stereo image.
Ensure that the console position does not obscure the direct sound radiation from the Dual Concentric drive unit when sitting down. The engineer and producer should have a clear, uninterrupted view of the monitor loudspeakers.
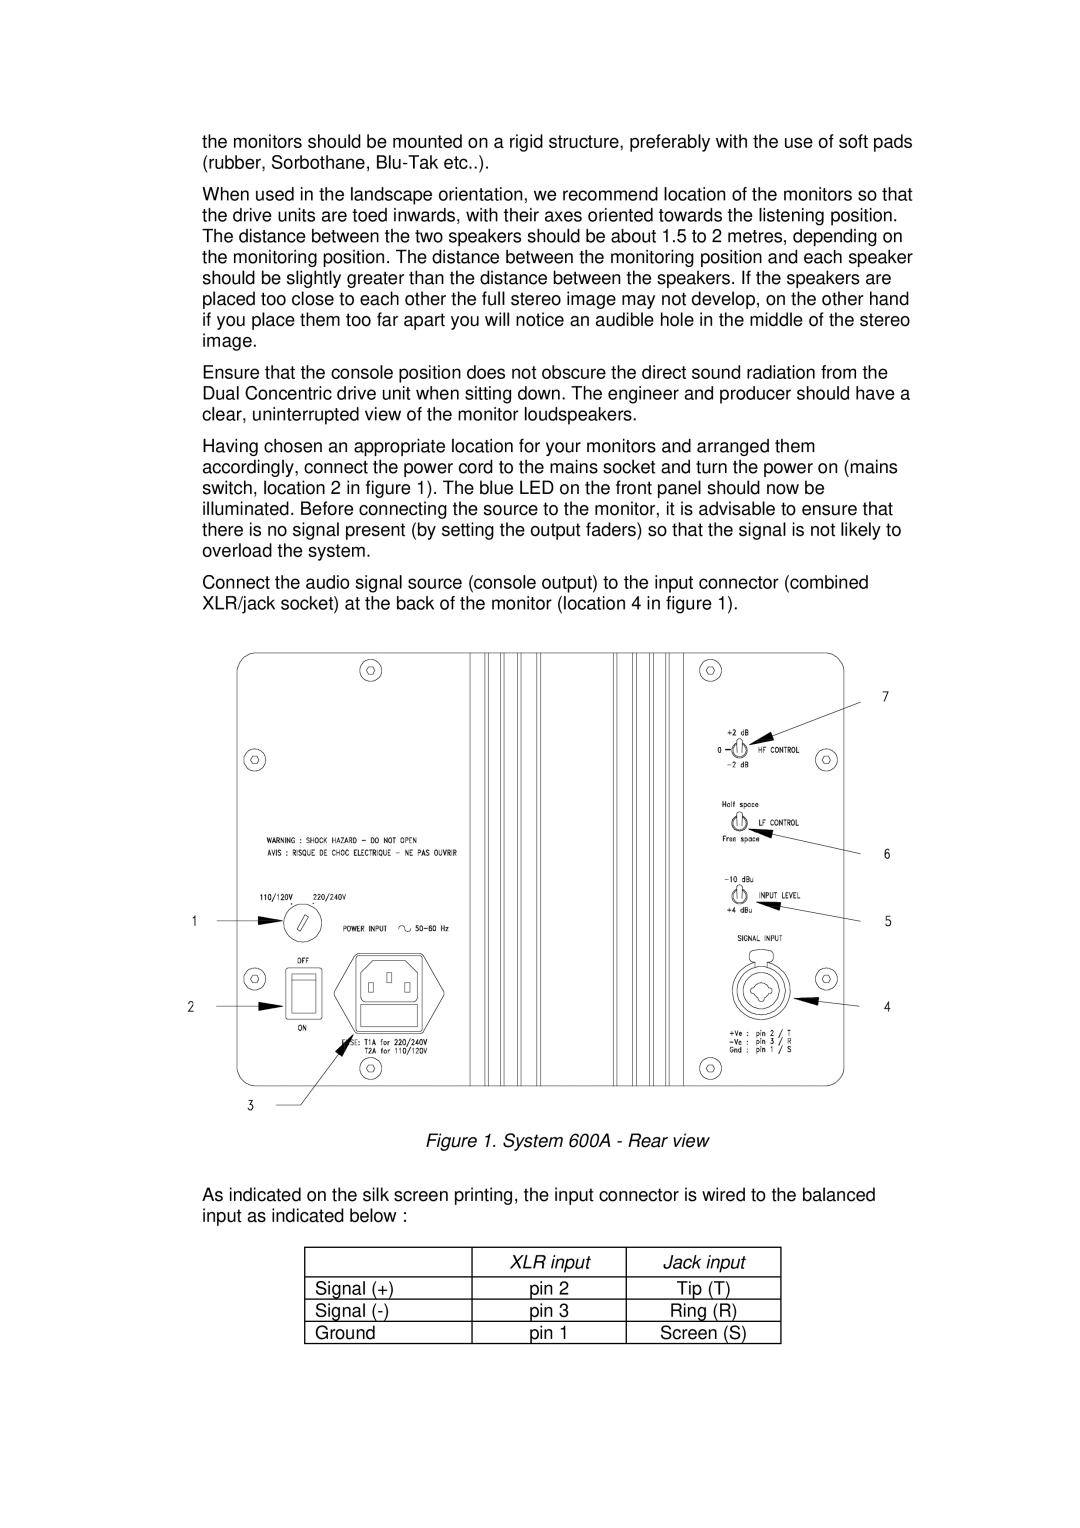
Having chosen an appropriate location for your monitors and arranged them accordingly, connect the power cord to the mains socket and turn the power on (mains switch, location 2 in figure 1). The blue LED on the front panel should now be illuminated. Before connecting the source to the monitor, it is advisable to ensure that there is no signal present (by setting the output faders) so that the signal is not likely to overload the system.
Connect the audio signal source (console output) to the input connector (combined XLR/jack socket) at the back of the monitor (location 4 in figure 1).
Figure 1. System 600A - Rear view
As indicated on the silk screen printing, the input connector is wired to the balanced input as indicated below :
| XLR input | Jack input |
|
|
|
Signal (+) | pin 2 | Tip (T) |
Signal | pin 3 | Ring (R) |
Ground | pin 1 | Screen (S) |
