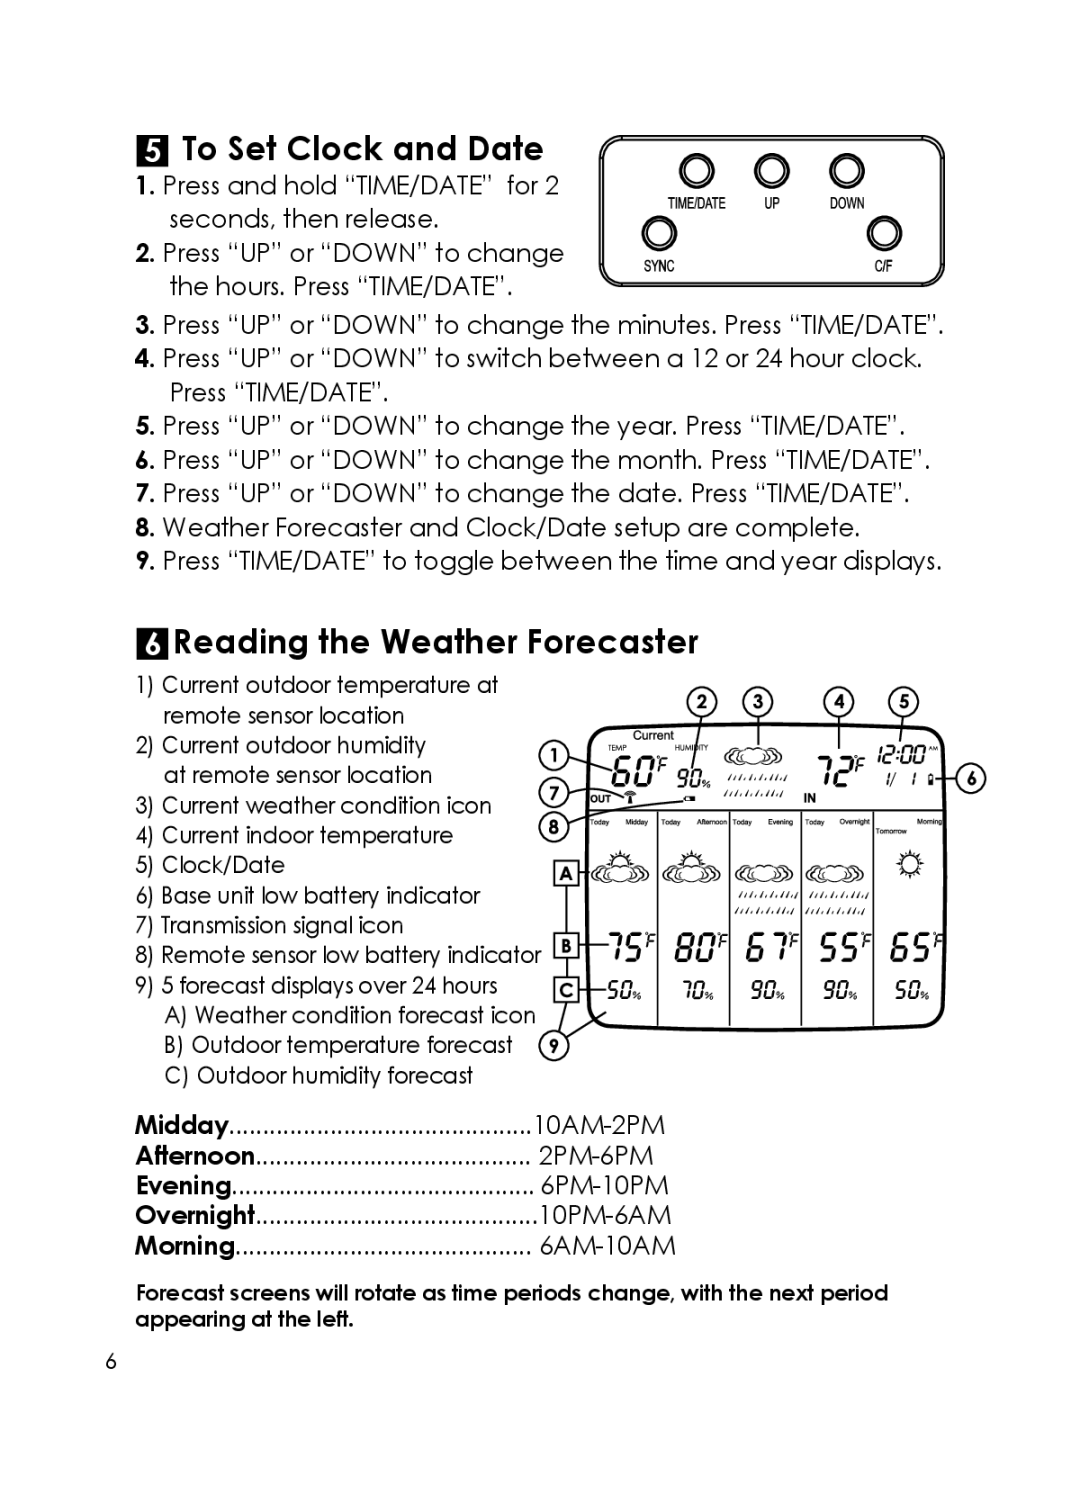
To Set Clock and Date
1.Press and hold “TIME/DATE” for 2
seconds, then release.
2.Press “UP” or “DOWN” to change the hours. Press “TIME/DATE”.
3.Press “UP” or “DOWN” to change the minutes. Press “TIME/DATE”.
4.Press “UP” or “DOWN” to switch between a 12 or 24 hour clock. Press “TIME/DATE”.
5.Press “UP” or “DOWN” to change the year. Press “TIME/DATE”.
6.Press “UP” or “DOWN” to change the month. Press “TIME/DATE”.
7.Press “UP” or “DOWN” to change the date. Press “TIME/DATE”.
8.Weather Forecaster and Clock/Date setup are complete.
9.Press “TIME/DATE” to toggle between the time and year displays.
 Reading the Weather Forecaster
1) Current outdoor temperature at remote sensor location
2) Current outdoor humidity at remote sensor location
3) Current weather condition icon
4) Current indoor temperature
5) Clock/Date
6) Base unit low battery indicator
7) Transmission signal icon
8) Remote sensor low battery indicator
9) 5 forecast displays over 24 hours ![]() A) Weather condition forecast icon B) Outdoor temperature forecast
A) Weather condition forecast icon B) Outdoor temperature forecast ![]() C) Outdoor humidity forecast
C) Outdoor humidity forecast
Midday |
|
Afternoon |
|
Evening |
|
Overnight |
|
Morning |
Forecast screens will rotate as time periods change, with the next period appearing at the left.
6
