DTH190_EN 9/07/02 17:43 Page 5
Initial setup of your DVD player
BASIC CONNECTIONS
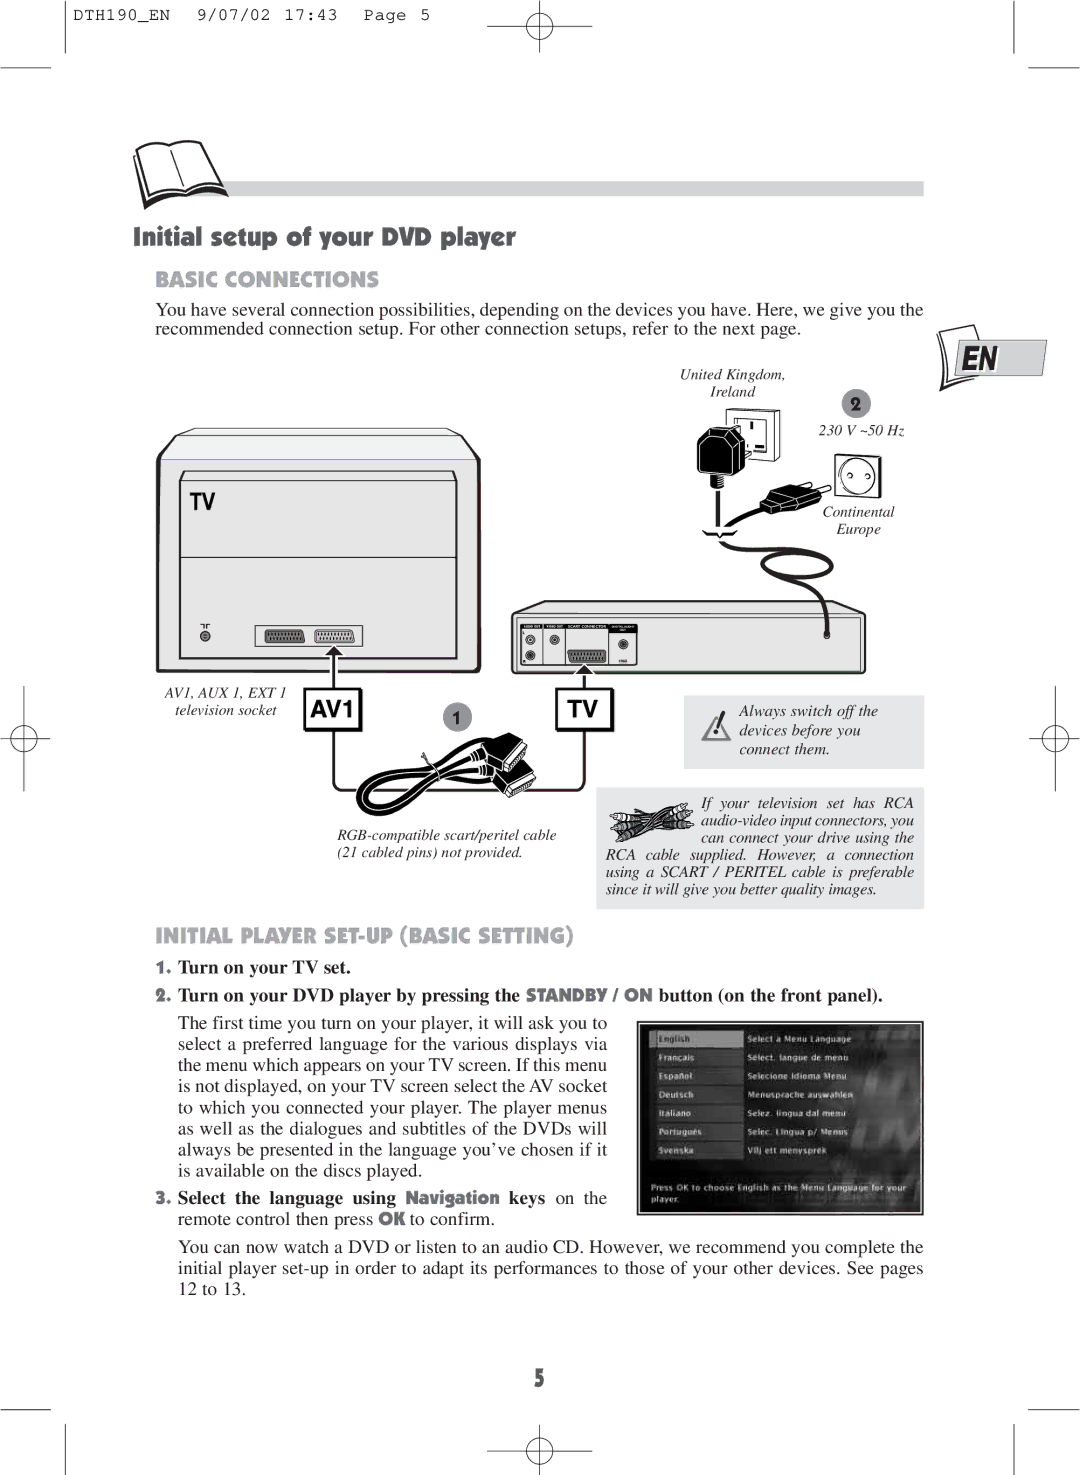
You have several connection possibilities, depending on the devices you have. Here, we give you the recommended connection setup. For other connection setups, refer to the next page.
United Kingdom,
Ireland
EN
2
230 V ~50 Hz
![]() Continental Europe
Continental Europe
AUDIO OUT | VIDEO OUT |
SCART CONNECTOR
DIGITAL AUDIO
OUT
AV1, AUX 1, EXT 1
television socket
1
Always switch off the devices before you connect them.
If your television set has RCA
![]()
![]()
![]()
![]()
![]()
![]()
![]() can connect your drive using the RCA cable supplied. However, a connection
can connect your drive using the RCA cable supplied. However, a connection
using a SCART / PERITEL cable is preferable since it will give you better quality images.
INITIAL PLAYER SET-UP (BASIC SETTING)
1.Turn on your TV set.
2.Turn on your DVD player by pressing the STANDBY / ON button (on the front panel).
The first time you turn on your player, it will ask you to select a preferred language for the various displays via the menu which appears on your TV screen. If this menu is not displayed, on your TV screen select the AV socket to which you connected your player. The player menus as well as the dialogues and subtitles of the DVDs will always be presented in the language you’ve chosen if it is available on the discs played.
3.Select the language using Navigation keys on the remote control then press OK to confirm.
You can now watch a DVD or listen to an audio CD. However, we recommend you complete the initial player
5