Connections and Setup |
| ||
|
|
| Television set |
Scart leads not |
|
|
|
provided |
|
|
|
EN | United Kingdom, |
|
|
Ireland | 3 | Video recorder | |
|
| ||
|
|
| |
DVD player |
| Continental |
|
| Europe |
| |
|
|
| 2 |
|
| 1a | 1b |
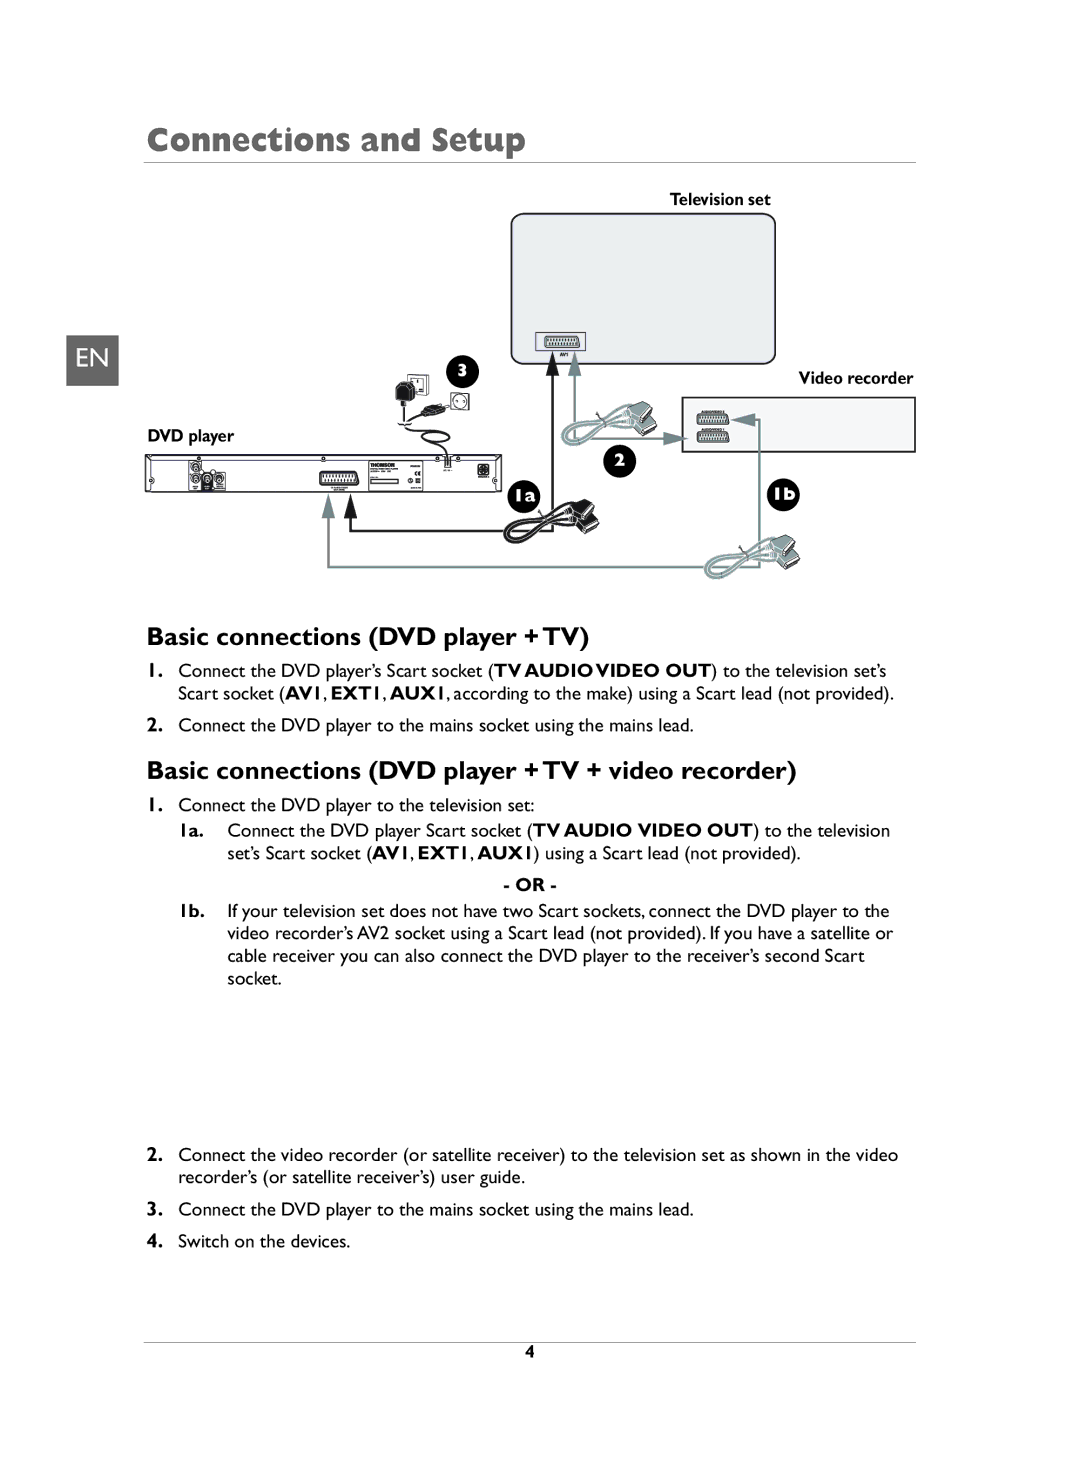
Basic connections (DVD player + TV)
1.Connect the DVD player’s Scart socket (TV AUDIO VIDEO OUT) to the television set’s Scart socket (AV1, EXT1, AUX1, according to the make) using a Scart lead (not provided).
2.Connect the DVD player to the mains socket using the mains lead.
Basic connections (DVD player + TV + video recorder)
1.Connect the DVD player to the television set:
1a. Connect the DVD player Scart socket (TV AUDIO VIDEO OUT) to the television set’s Scart socket (AV1, EXT1, AUX1) using a Scart lead (not provided).
- OR -
1b. If your television set does not have two Scart sockets, connect the DVD player to the video recorder’s AV2 socket using a Scart lead (not provided). If you have a satellite or cable receiver you can also connect the DVD player to the receiver’s second Scart socket.
Notes:
Depending on the video recorder or satellite or cable receiver, this type of connection may affect the quality of the pictures produced by the DVD player.
If your video recorder only has one Scart socket, but has a modulator, use the aerial cable to connect the video recorder to the television set, adjust the video recorder’s modulator, then connect the DVD player to the video recorder’s Scart socket.
2.Connect the video recorder (or satellite receiver) to the television set as shown in the video recorder’s (or satellite receiver’s) user guide.
3.Connect the DVD player to the mains socket using the mains lead.
4.Switch on the devices.
Note: If one of the devices is not working, check that all the cables have been inserted properly into the sockets which they should be connected to.
4
