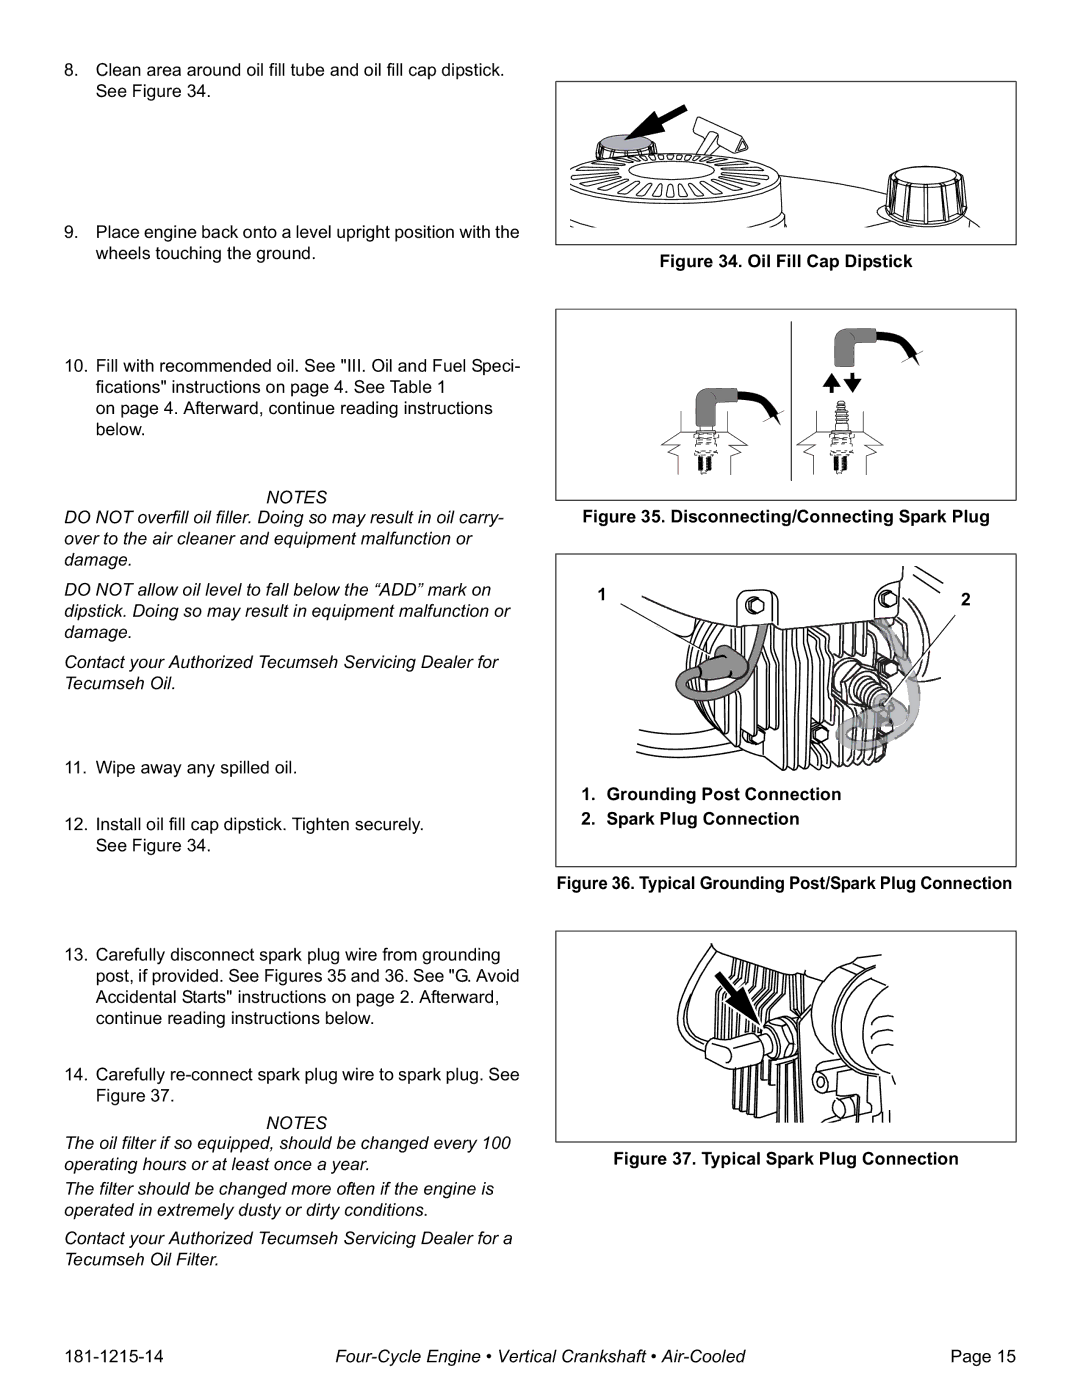
8.Clean area around oil fill tube and oil fill cap dipstick. See Figure 34.
9.Place engine back onto a level upright position with the wheels touching the ground.
10.Fill with recommended oil. See "III. Oil and Fuel Speci- fications" instructions on page 4. See Table 1
on page 4. Afterward, continue reading instructions below.
Figure 34. Oil Fill Cap Dipstick
NOTES
DO NOT overfill oil filler. Doing so may result in oil carry- over to the air cleaner and equipment malfunction or damage.
DO NOT allow oil level to fall below the “ADD” mark on dipstick. Doing so may result in equipment malfunction or damage.
Contact your Authorized Tecumseh Servicing Dealer for Tecumseh Oil.
11.Wipe away any spilled oil.
12.Install oil fill cap dipstick. Tighten securely. See Figure 34.
13.Carefully disconnect spark plug wire from grounding post, if provided. See Figures 35 and 36. See "G. Avoid Accidental Starts" instructions on page 2. Afterward, continue reading instructions below.
14.Carefully
NOTES
The oil filter if so equipped, should be changed every 100 operating hours or at least once a year.
The filter should be changed more often if the engine is operated in extremely dusty or dirty conditions.
Contact your Authorized Tecumseh Servicing Dealer for a Tecumseh Oil Filter.
Figure 35. Disconnecting/Connecting Spark Plug
1 | 2 |
|
1.Grounding Post Connection
2.Spark Plug Connection
Figure 36. Typical Grounding Post/Spark Plug Connection
Figure 37. Typical Spark Plug Connection
Page 15 |
