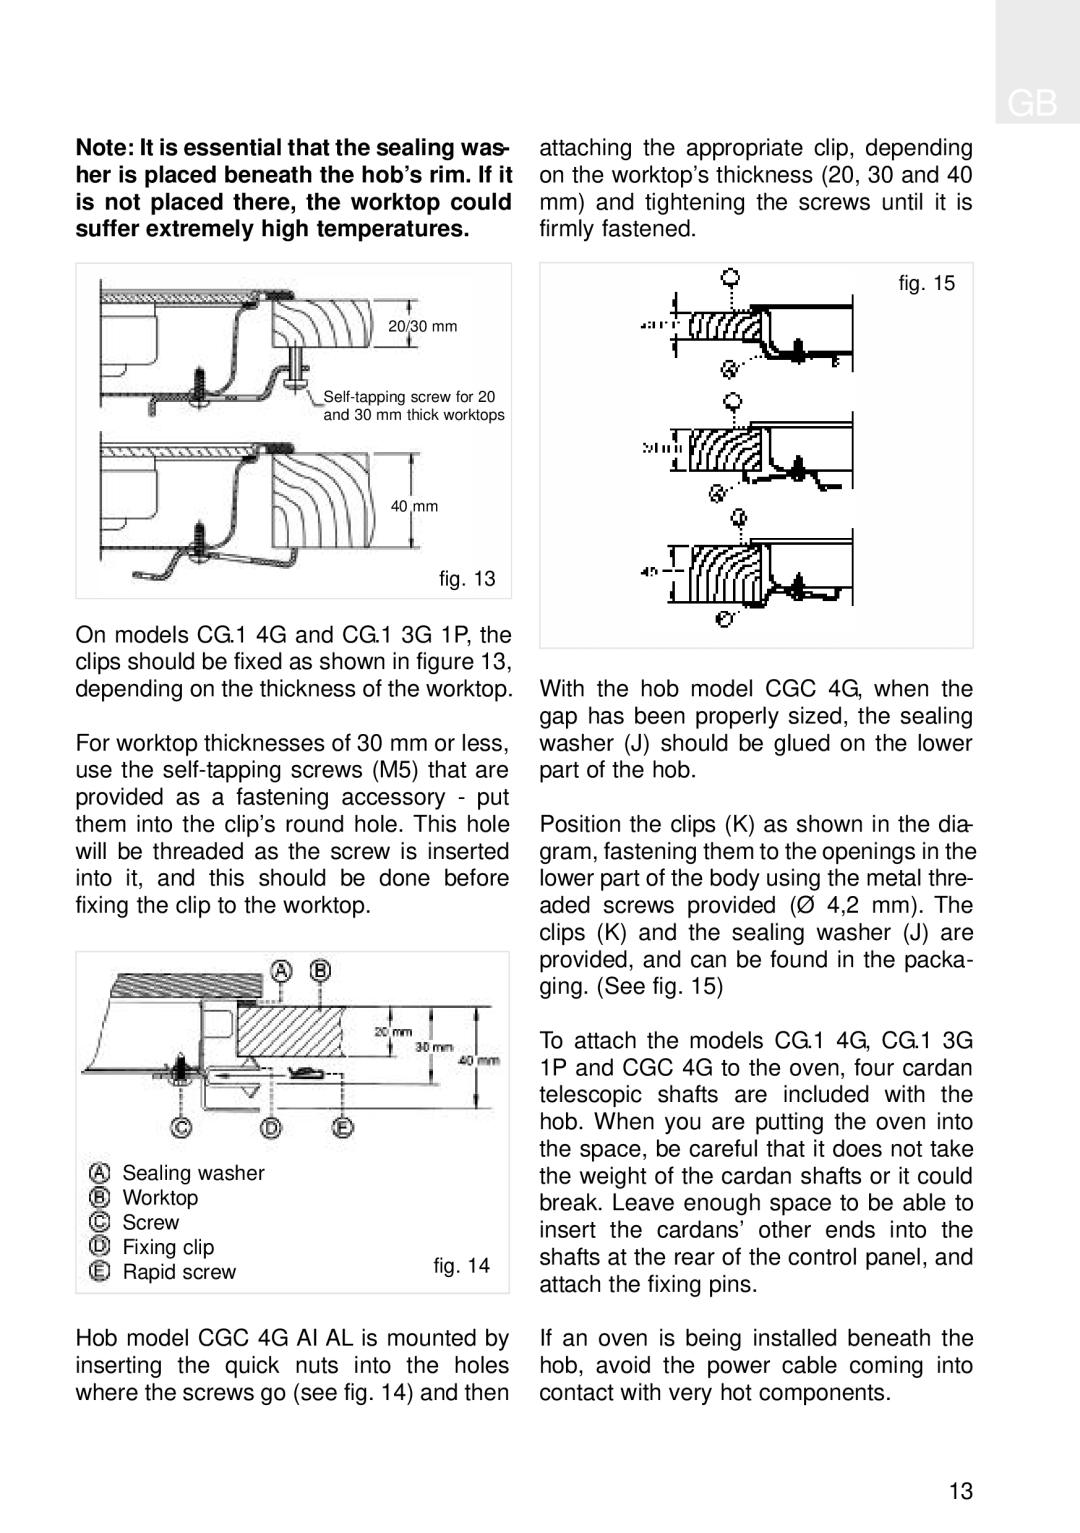
Note: It is essential that the sealing was- her is placed beneath the hob’s rim. If it is not placed there, the worktop could suffer extremely high temperatures.
20/30 mm
40 mm
fig. 13
On models CG.1 4G and CG.1 3G 1P, the clips should be fixed as shown in figure 13, depending on the thickness of the worktop.
For worktop thicknesses of 30 mm or less, use the
Sealing washer |
|
Worktop |
|
Screw |
|
Fixing clip | fig. 14 |
Rapid screw |
Hob model CGC 4G AI AL is mounted by inserting the quick nuts into the holes where the screws go (see fig. 14) and then
GB
attaching the appropriate clip, depending on the worktop’s thickness (20, 30 and 40
mm)and tightening the screws until it is firmly fastened.
fig. 15
With the hob model CGC 4G, when the gap has been properly sized, the sealing washer (J) should be glued on the lower part of the hob.
Position the clips (K) as shown in the dia- gram, fastening them to the openings in the lower part of the body using the metal thre- aded screws provided (Ø 4,2 mm). The clips (K) and the sealing washer (J) are provided, and can be found in the packa- ging. (See fig. 15)
To attach the models CG.1 4G, CG.1 3G 1P and CGC 4G to the oven, four cardan telescopic shafts are included with the hob. When you are putting the oven into the space, be careful that it does not take the weight of the cardan shafts or it could break. Leave enough space to be able to insert the cardans’ other ends into the shafts at the rear of the control panel, and attach the fixing pins.
If an oven is being installed beneath the hob, avoid the power cable coming into contact with very hot components.
13