GB
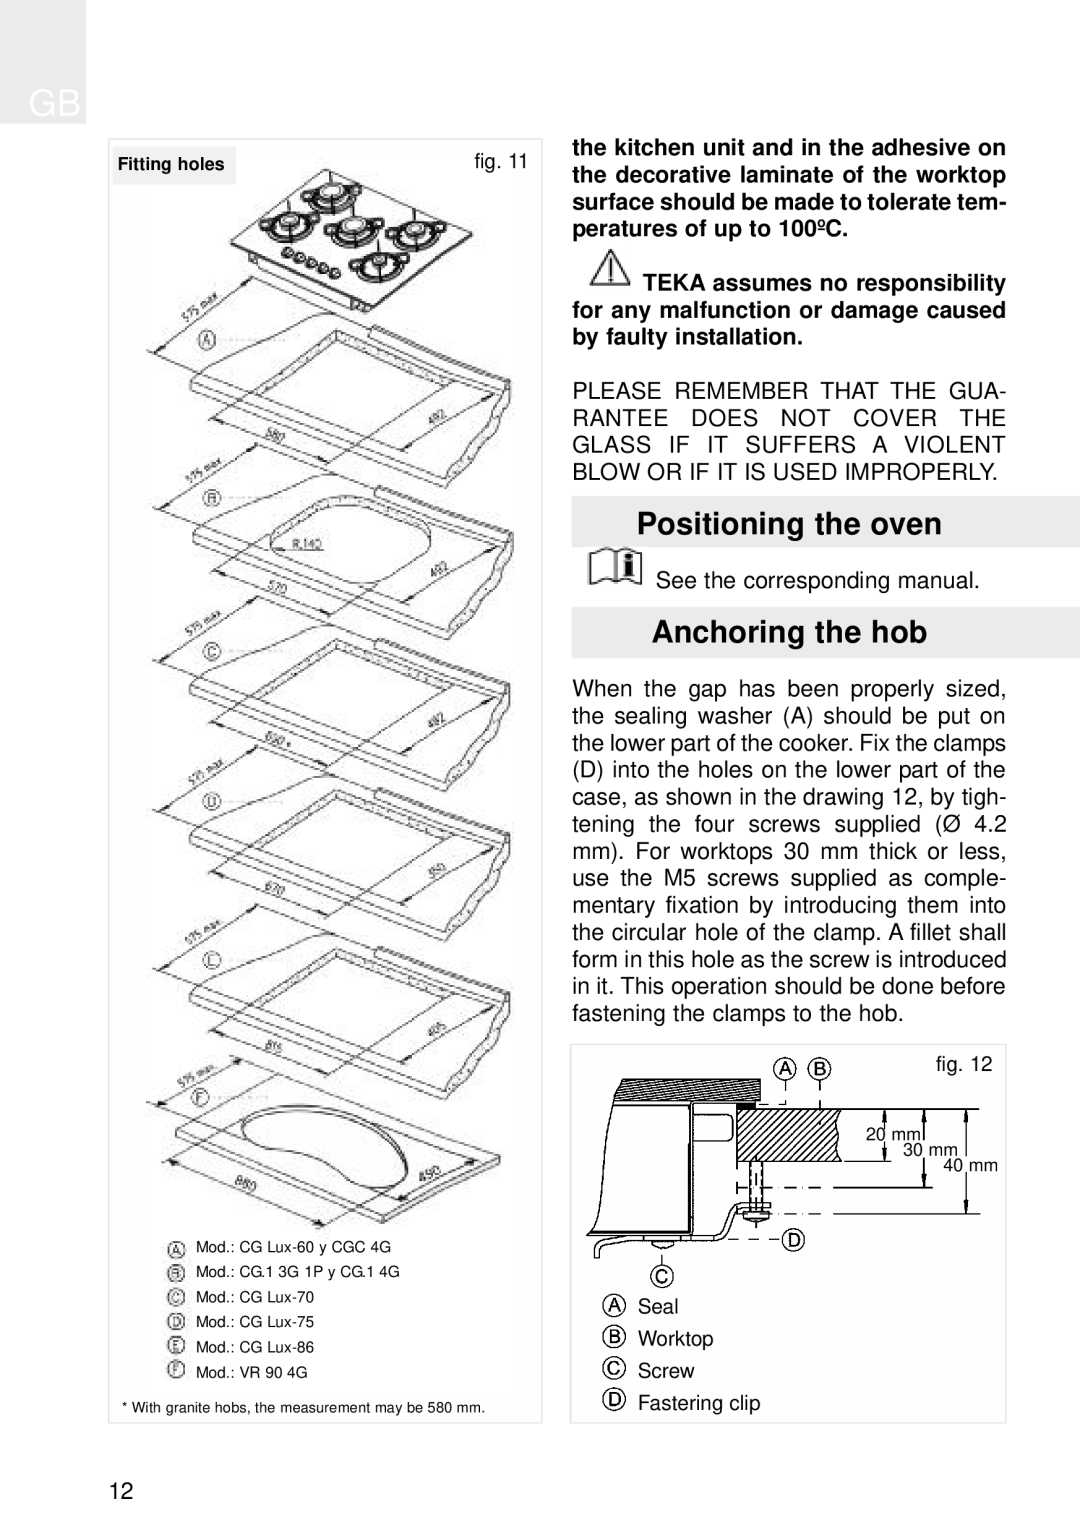
Fitting holes | fig. 11 |
|
|
Mod.: CG
Mod.: CG.1 3G 1P y CG.1 4G
Mod.: CG
Mod.: CG
Mod.: CG
Mod.: VR 90 4G
* With granite hobs, the measurement may be 580 mm.
the kitchen unit and in the adhesive on the decorative laminate of the worktop surface should be made to tolerate tem- peratures of up to 100ºC.
![]() TEKA assumes no responsibility for any malfunction or damage caused by faulty installation.
TEKA assumes no responsibility for any malfunction or damage caused by faulty installation.
PLEASE REMEMBER THAT THE GUA- RANTEE DOES NOT COVER THE GLASS IF IT SUFFERS A VIOLENT BLOW OR IF IT IS USED IMPROPERLY.
Positioning the oven
![]() See the corresponding manual.
See the corresponding manual.
Anchoring the hob
When the gap has been properly sized, the sealing washer (A) should be put on the lower part of the cooker. Fix the clamps
(D)into the holes on the lower part of the case, as shown in the drawing 12, by tigh- tening the four screws supplied (Ø 4.2 mm). For worktops 30 mm thick or less, use the M5 screws supplied as comple- mentary fixation by introducing them into the circular hole of the clamp. A fillet shall form in this hole as the screw is introduced in it. This operation should be done before fastening the clamps to the hob.
fig. 12
20 mm
30 mm
40 mm
Seal
Worktop
Screw
Fastering clip
12