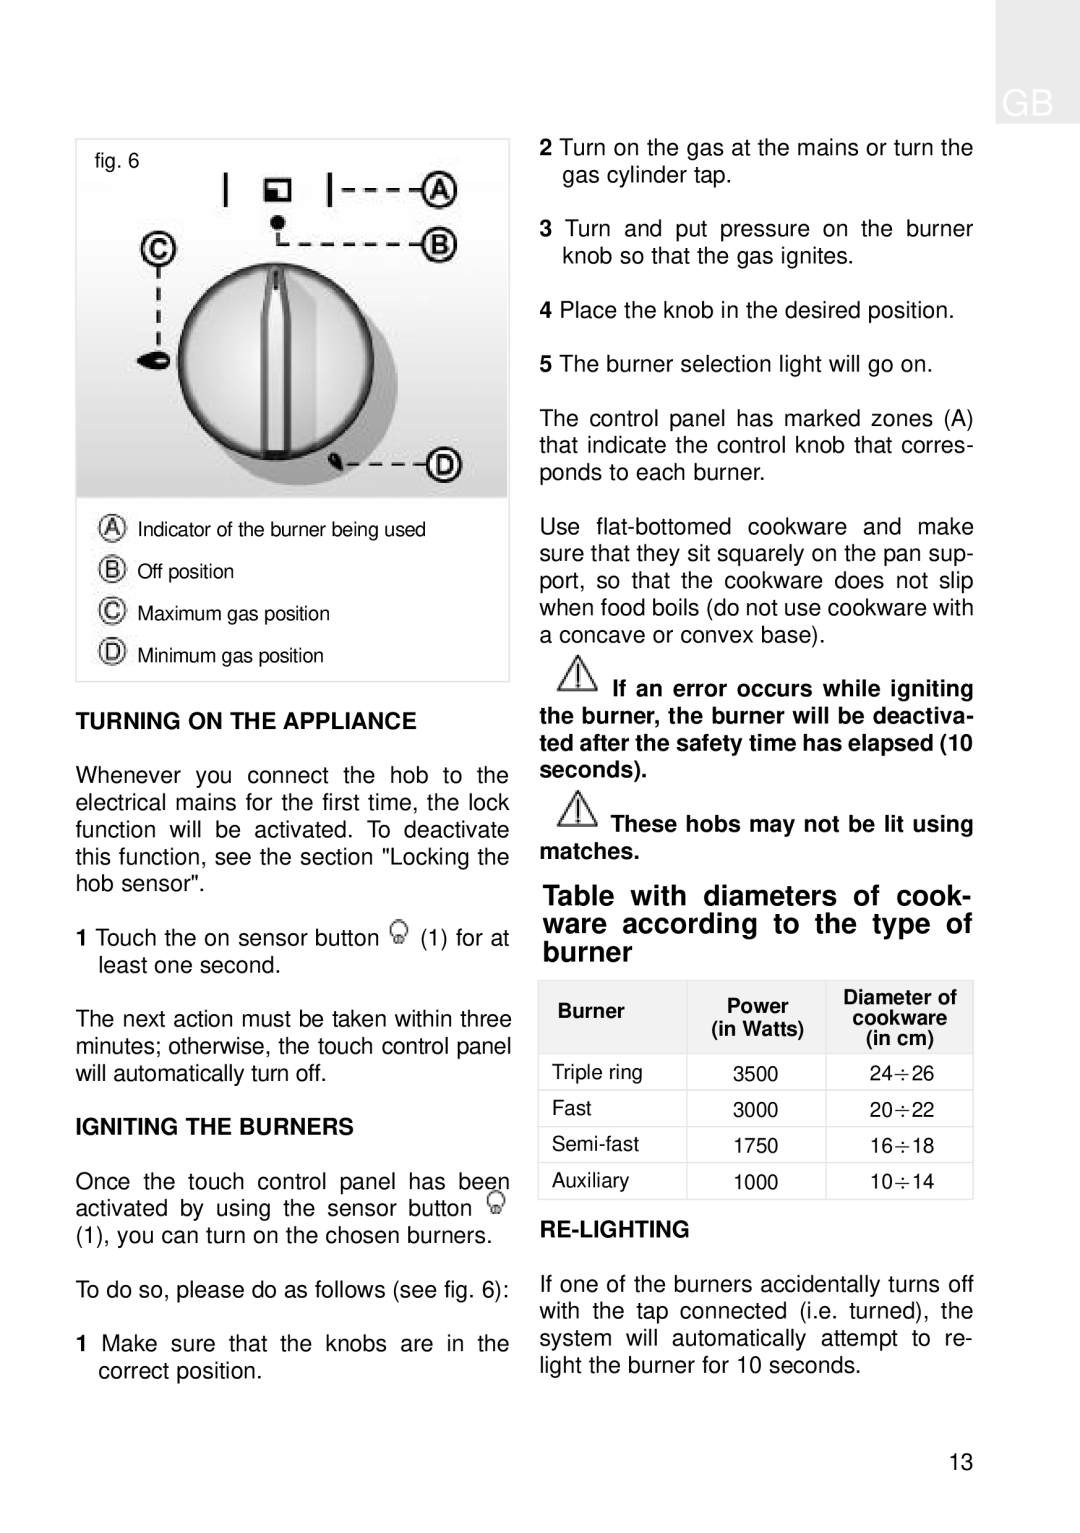
fig. 6
Indicator of the burner being used
Off position
Maximum gas position
Minimum gas position
TURNING ON THE APPLIANCE
Whenever you connect the hob to the electrical mains for the first time, the lock function will be activated. To deactivate this function, see the section "Locking the hob sensor".
1 Touch the on sensor button ![]() (1) for at least one second.
(1) for at least one second.
The next action must be taken within three minutes; otherwise, the touch control panel will automatically turn off.
IGNITING THE BURNERS
Once the touch control panel has been activated by using the sensor button ![]() (1), you can turn on the chosen burners.
(1), you can turn on the chosen burners.
To do so, please do as follows (see fig. 6):
1 Make sure that the knobs are in the correct position.
GB
2 Turn on the gas at the mains or turn the gas cylinder tap.
3 Turn and put pressure on the burner knob so that the gas ignites.
4 Place the knob in the desired position.
5 The burner selection light will go on.
The control panel has marked zones (A) that indicate the control knob that corres- ponds to each burner.
Use
![]() If an error occurs while igniting the burner, the burner will be deactiva- ted after the safety time has elapsed (10 seconds).
If an error occurs while igniting the burner, the burner will be deactiva- ted after the safety time has elapsed (10 seconds).
![]() These hobs may not be lit using matches.
These hobs may not be lit using matches.
Table with diameters of cook- ware according to the type of burner
Burner | Power | Diameter of |
cookware | ||
| (in Watts) | (in cm) |
|
|
|
|
|
Triple ring | 3500 | _ |
24 : 26 | ||
Fast | 3000 | _ |
20 : 22 | ||
1750 | _ | |
16 : 18 | ||
Auxiliary | 1000 | _ |
10 : 14 |
RE-LIGHTING
If one of the burners accidentally turns off with the tap connected (i.e. turned), the system will automatically attempt to re- light the burner for 10 seconds.
13
