Fix Duct to transition and seal with tape.
For both ins tallation method :
10. Wiring the HOOD:
WARNIN G:
To Avoid Electrical Shock Hazard Turn off power at the service panel before wiring this unit .
120 VAC, 15 or 20 Amp circuit required .
ELECTRICAL GROUNDING INSTRUCTIONS THIS APPLIANCE IS FITTED WITH AN ELECTRICAL JUNCTION BOX WITH 3 WIRES, ONE OF WHICH (GREEN/YELLOW) SERVES TO GROUND THE APPLIANCE.
![]() WARNIN G:
WARNIN G:
TO PROTECT | YOU AGAINST ELECTRIC | SHOCK, | ||
THE GREEN AND YELLOW | WIRE | MUST | BE | |
CONNECTED TO THE GROUNDING | WIRE | IN | ||
YOUR HOME | ELECTRICAL SYSTEM, AND IT MUST | |||
UNDER NO CIRCUNSTANCES BE CUT OR REMOVED. | ||||
Failure to do so can result | in death or |
| ||
electrical shock. |
|
|
| |
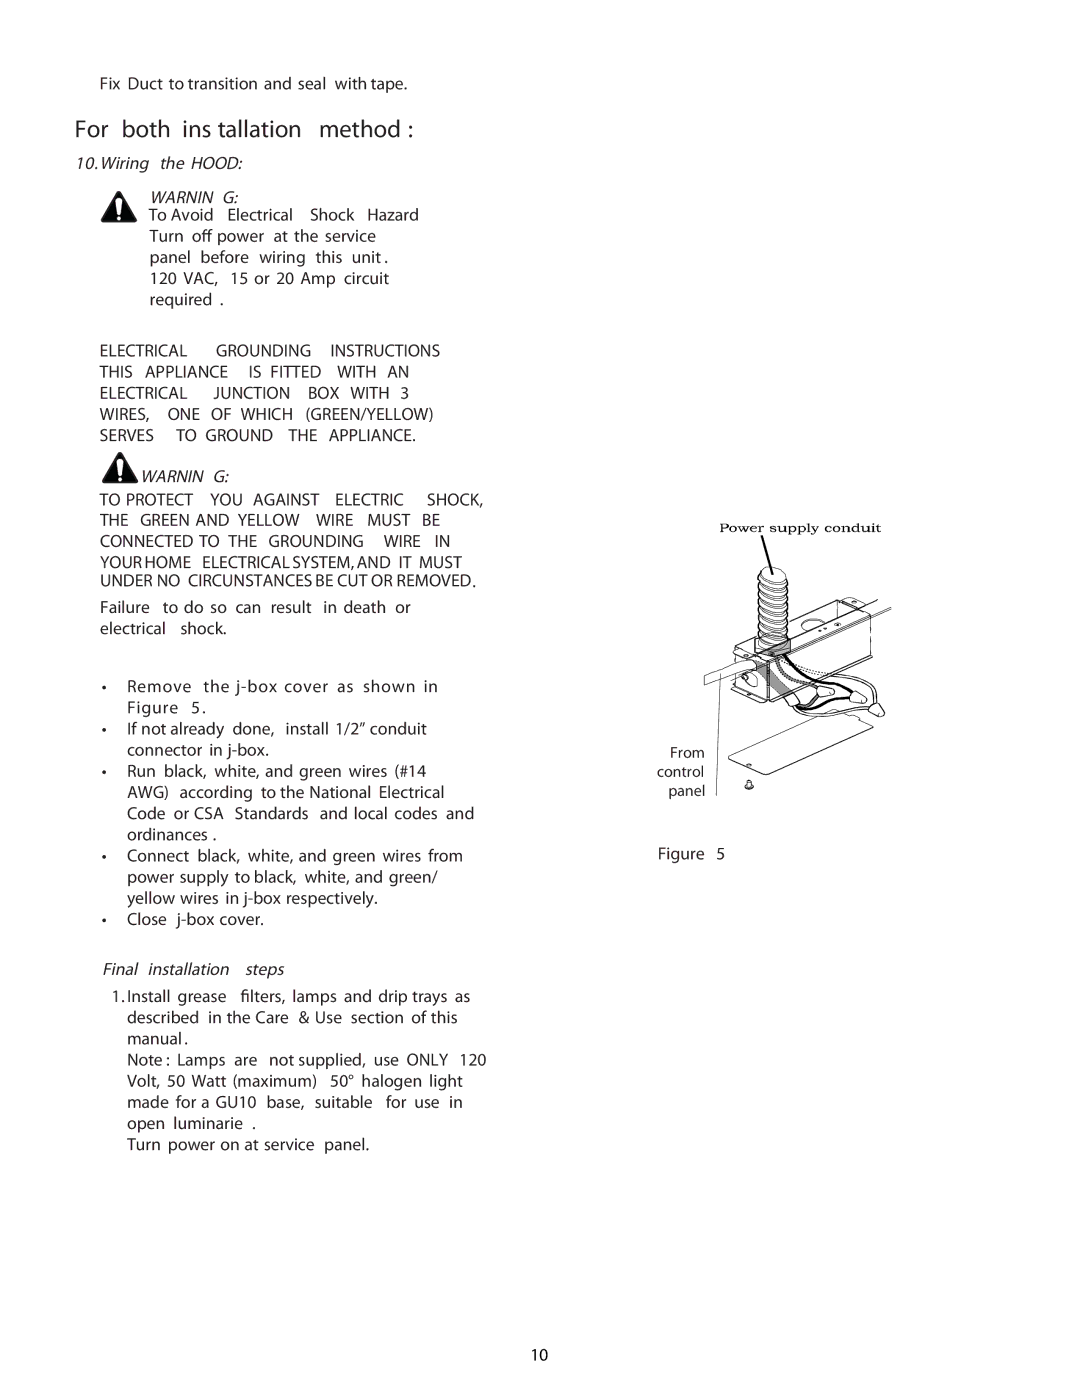
tRemove the
tIf not already done, install 1/2” conduit connector in
tRun black, white, and green wires (#14 AWG) according to the National Electrical Code or CSA Standards and local codes and ordinances .
tConnect black, white, and green wires from power supply to black, white, and green/ yellow wires in
tClose
Final installation | steps |
|
|
1. Install grease | filters, lamps and drip trays as | ||
described in the Care & Use section of this | |||
manual . |
|
|
|
Note : Lamps are not supplied, use ONLY | 120 | ||
Volt, 50 Watt (maximum) 50° halogen light | |||
made for a GU10 base, | suitable for use | in | |
open luminarie . |
|
| |
Turn power on at service | panel. |
| |
From control panel
Figure 5
10