All installations and services must be performed by qualified service personnel.
H. HEAT EXCHANGER CLEANING INSTRUCTIONS:
cWARNING: THE HEAT EXCHANGER MUST BE CLEANED BY A QUALIFIED SERVICE PERSON.
It is important to inspect and clean the heat exchanger once a year, or as necessary, to remove any build-up of soot. A layer of soot on the inside of the heat exchanger will act as an insulator and reduce heat transfer, resulting in less efficiency.
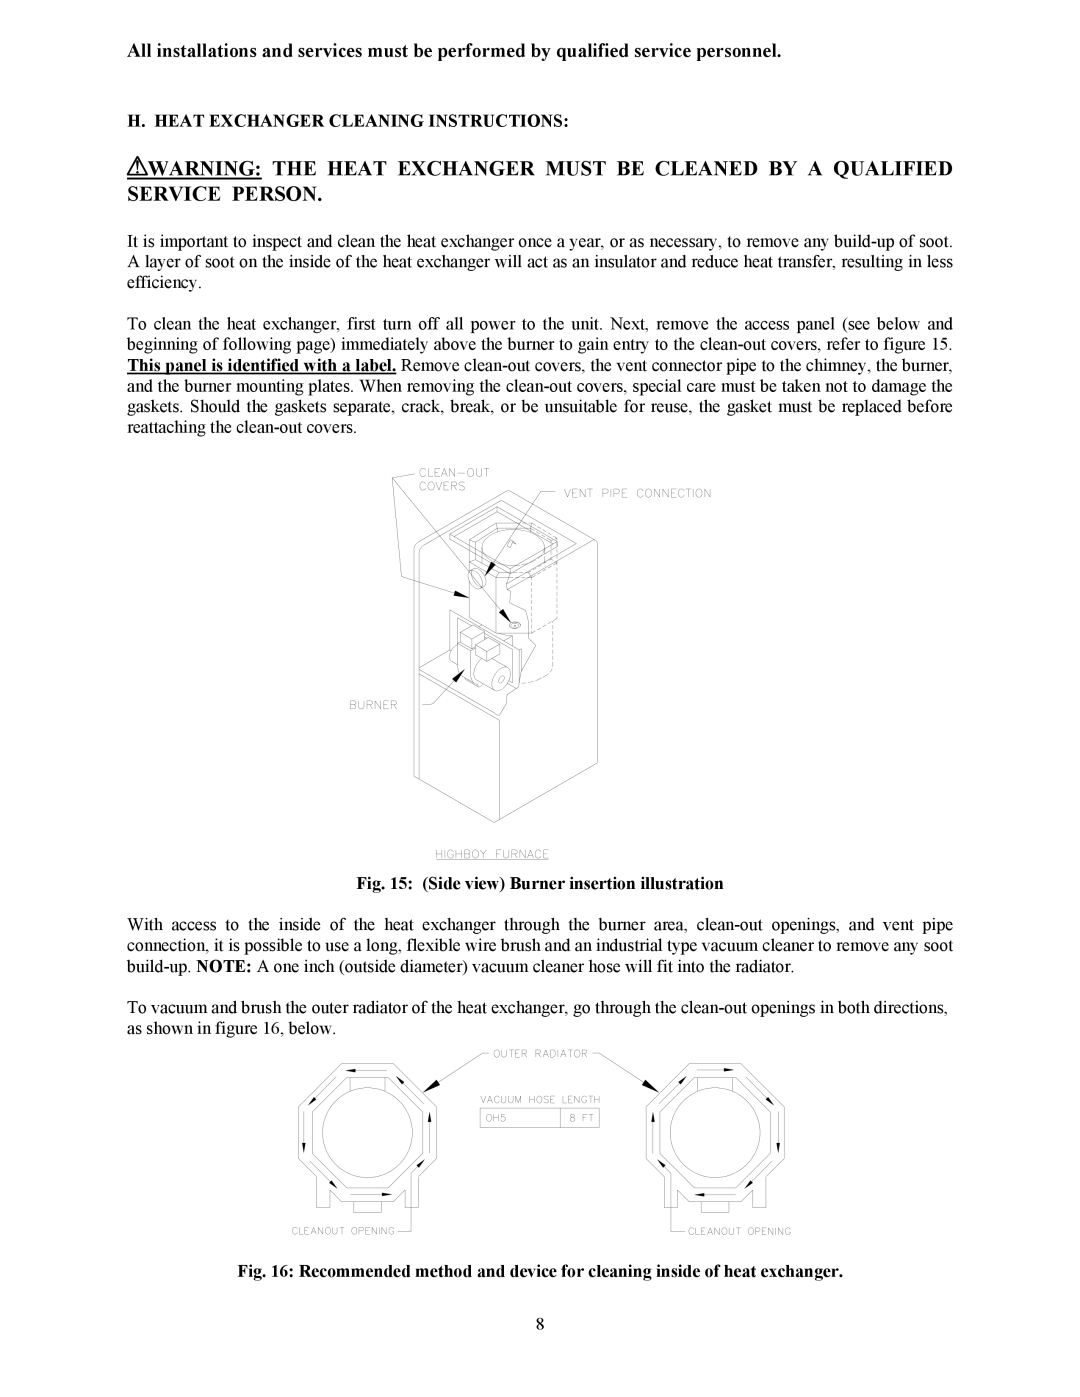
To clean the heat exchanger, first turn off all power to the unit. Next, remove the access panel (see below and beginning of following page) immediately above the burner to gain entry to the clean-out covers, refer to figure 15. This panel is identified with a label. Remove clean-out covers, the vent connector pipe to the chimney, the burner, and the burner mounting plates. When removing the clean-out covers, special care must be taken not to damage the gaskets. Should the gaskets separate, crack, break, or be unsuitable for reuse, the gasket must be replaced before reattaching the clean-out covers.
Fig. 15: (Side view) Burner insertion illustration
With access to the inside of the heat exchanger through the burner area, clean-out openings, and vent pipe connection, it is possible to use a long, flexible wire brush and an industrial type vacuum cleaner to remove any soot build-up. NOTE: A one inch (outside diameter) vacuum cleaner hose will fit into the radiator.
To vacuum and brush the outer radiator of the heat exchanger, go through the clean-out openings in both directions, as shown in figure 16, below.
Fig. 16: Recommended method and device for cleaning inside of heat exchanger.