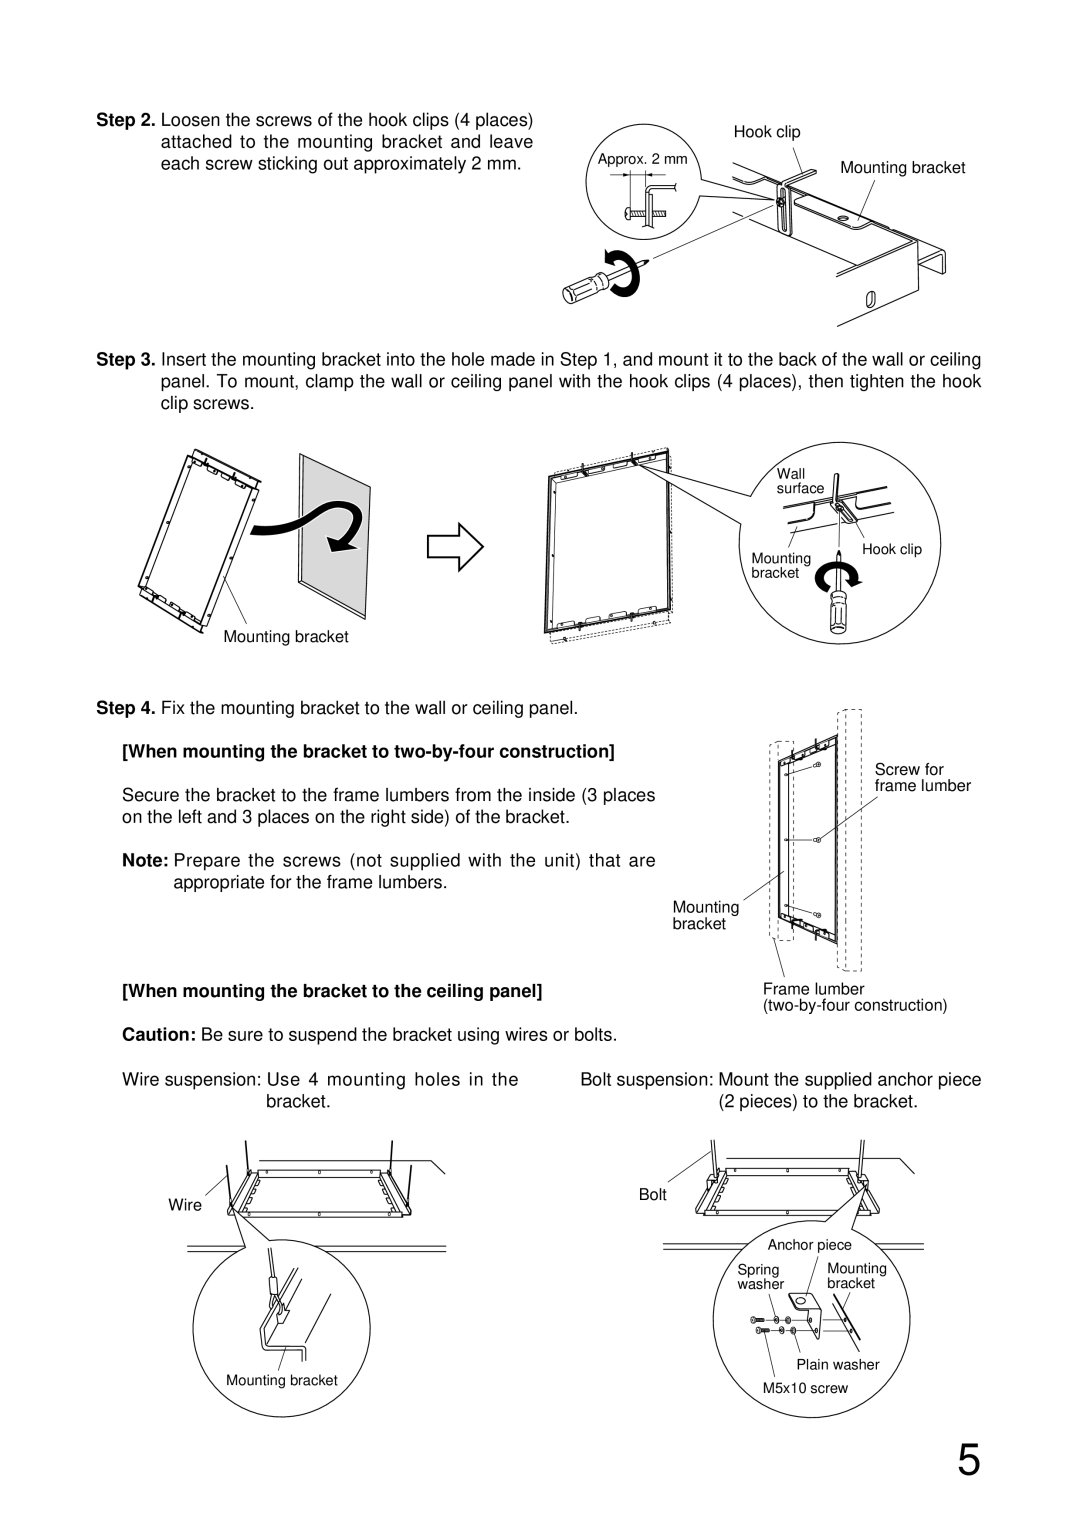
Step 2. Loosen the screws of the hook clips (4 places) attached to the mounting bracket and leave each screw sticking out approximately 2 mm.
Hook clip
Approx. 2 mm
Mounting bracket
Step 3. Insert the mounting bracket into the hole made in Step 1, and mount it to the back of the wall or ceiling panel. To mount, clamp the wall or ceiling panel with the hook clips (4 places), then tighten the hook clip screws.
Wall surface
Mounting bracket
Mounting bracket
Hook clip
Step 4. Fix the mounting bracket to the wall or ceiling panel.
[When mounting the bracket to two-by-four construction]
Secure the bracket to the frame lumbers from the inside (3 places on the left and 3 places on the right side) of the bracket.
Note: Prepare the screws (not supplied with the unit) that are appropriate for the frame lumbers.
Screw for frame lumber
| Mounting |
| bracket |
[When mounting the bracket to the ceiling panel] | Frame lumber |
| |
Caution: Be sure to suspend the bracket using wires or bolts. |
|
Wire suspension: Use 4 mounting holes in the bracket.
Bolt suspension: Mount the supplied anchor piece (2 pieces) to the bracket.
Wire
Bolt
Anchor piece
Spring Mounting
washer bracket
Mounting bracket
Plain washer
M5x10 screw
5