CIRCUIT CHECKS
HIGH VOLTAGE CHECK
CAUTION: There is no HIGH VOLTAGE ADJUSTMENT on this chassis. Checking should be done following the steps below.
1.Connect an accurate high voltage meter to the second an- ode of the picture tube.
2.Turn on the receiver. Set the BRIGHTNESS and CON- TRAST controls to minimum (zero beam current).
3.High voltage must be measured below (B) kV.
Refer to
(See SETTING & ADJUSTING DATA on page 14)
4.Vary the BRIGHTNESS control to both extremes to be sure the high voltage does not exceed the limit under any con- ditions.
FS CIRCUIT CHECK
The Fail Safe (FS) circuit check is indispensable for the final check in servicing. Checking should be done following the steps below.
1.Turn the receiver on and press the RESET button.
2.Temporarily short
3.The receiver must remain in this state even after removing the jumper wire. This is the evidence that the FS circuit is functioning properly.
4.To obtain a picture again, temporarily turn the receiver off and allow the FS circuit more than 5 seconds to reset. Then turn the power switch on to produce a normal pic- ture.
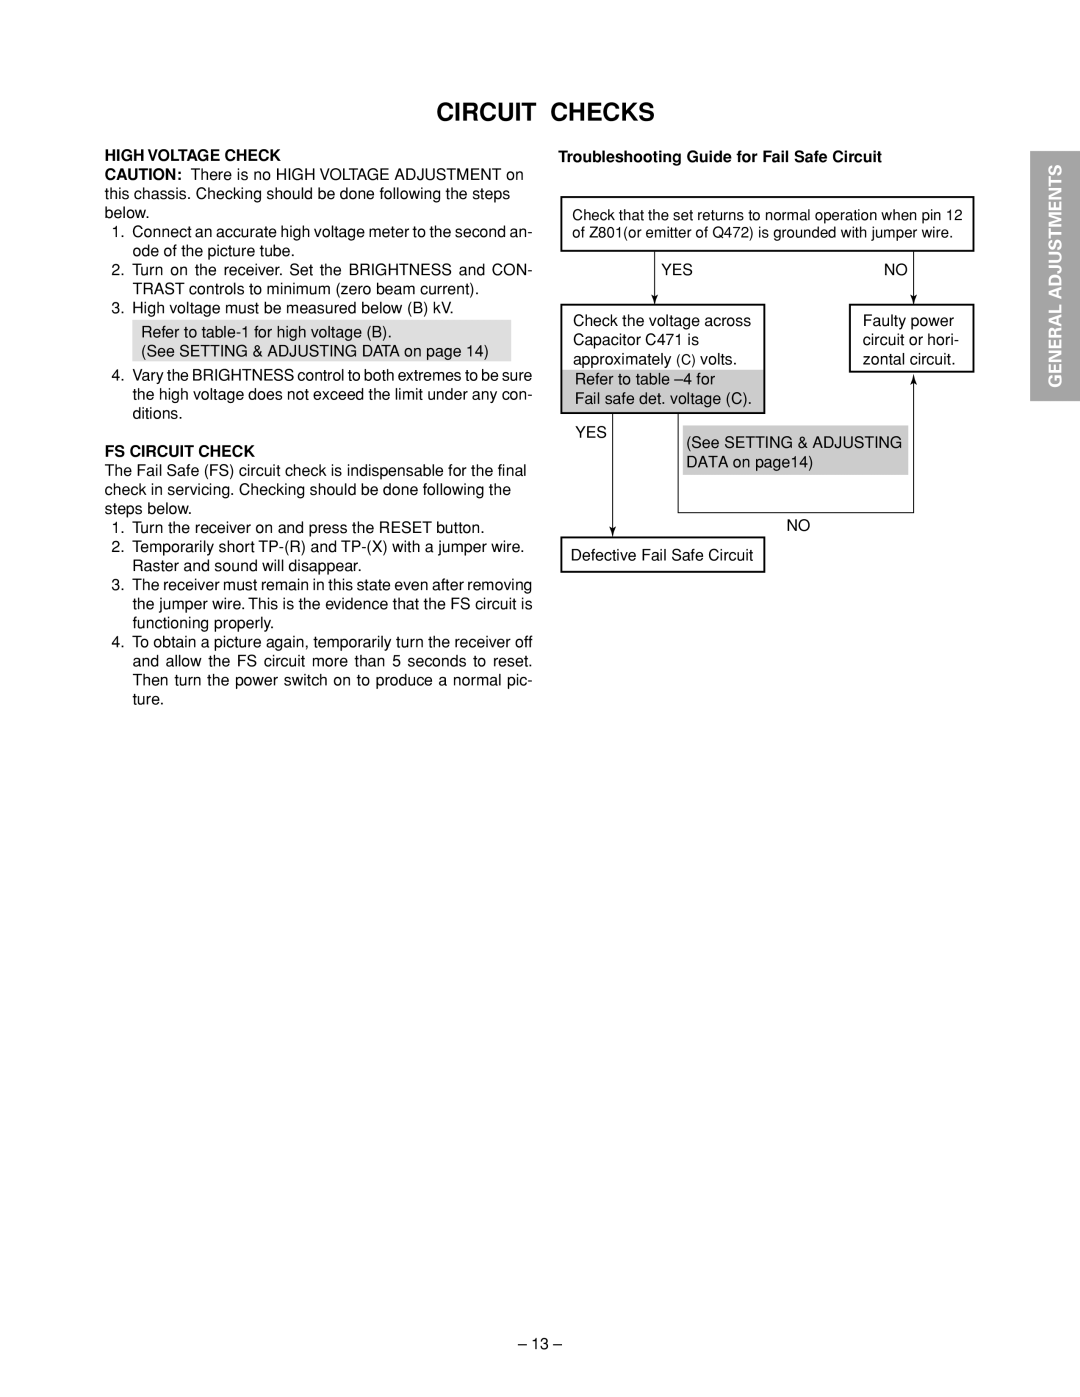
Troubleshooting Guide for Fail Safe Circuit
Check that the set returns to normal operation when pin 12 of Z801(or emitter of Q472) is grounded with jumper wire.
| YES | NO |
| ||||
|
|
|
|
| |||
|
|
|
|
|
|
|
|
Check the voltage across |
| Faulty power | |||||
Capacitor C471 is |
| circuit or hori- | |||||
approximately (C) volts. |
| zontal circuit. | |||||
|
|
|
|
|
|
| |
Refer to table |
|
|
|
| |||
|
|
|
| ||||
Fail safe det. voltage (C). |
|
|
|
| |||
YES |
|
|
|
|
|
|
|
|
| (See SETTING & ADJUSTING |
|
| |||
|
|
|
|
| |||
|
|
| DATA on page14) |
|
|
| |
|
|
|
|
|
|
|
|
NO
Defective Fail Safe Circuit
SPECIFIC INFORMATIONS GENERAL ADJUSTMENTS
– 13 –
