2. PRINTER SETUP
ENGLISH VERSION
2.7 Loading the Media
2.7Loading the Media (Cont.)
NOTES:
1.The sensor type used in the last print job has been selected. To change the sensor type, refer to
Section 2.9.1 Media Sensor Calibration.
2.The Feed Gap Sensor is positioned 6.35 mm right from the media centre.
Feed Gap Sensor
6.35mm
3.The Black Mark Sensor is movable in a range of media width.
Black Mark Sensor is movable in the full range.
NOTE:
Be careful the Media Guides do not squeeze the media. Doing so bends the media, causing a paper jam or feed failure.
6.Adjust the media sensor position and select a sensor type to be used. (Refer to Section 2.9.1)
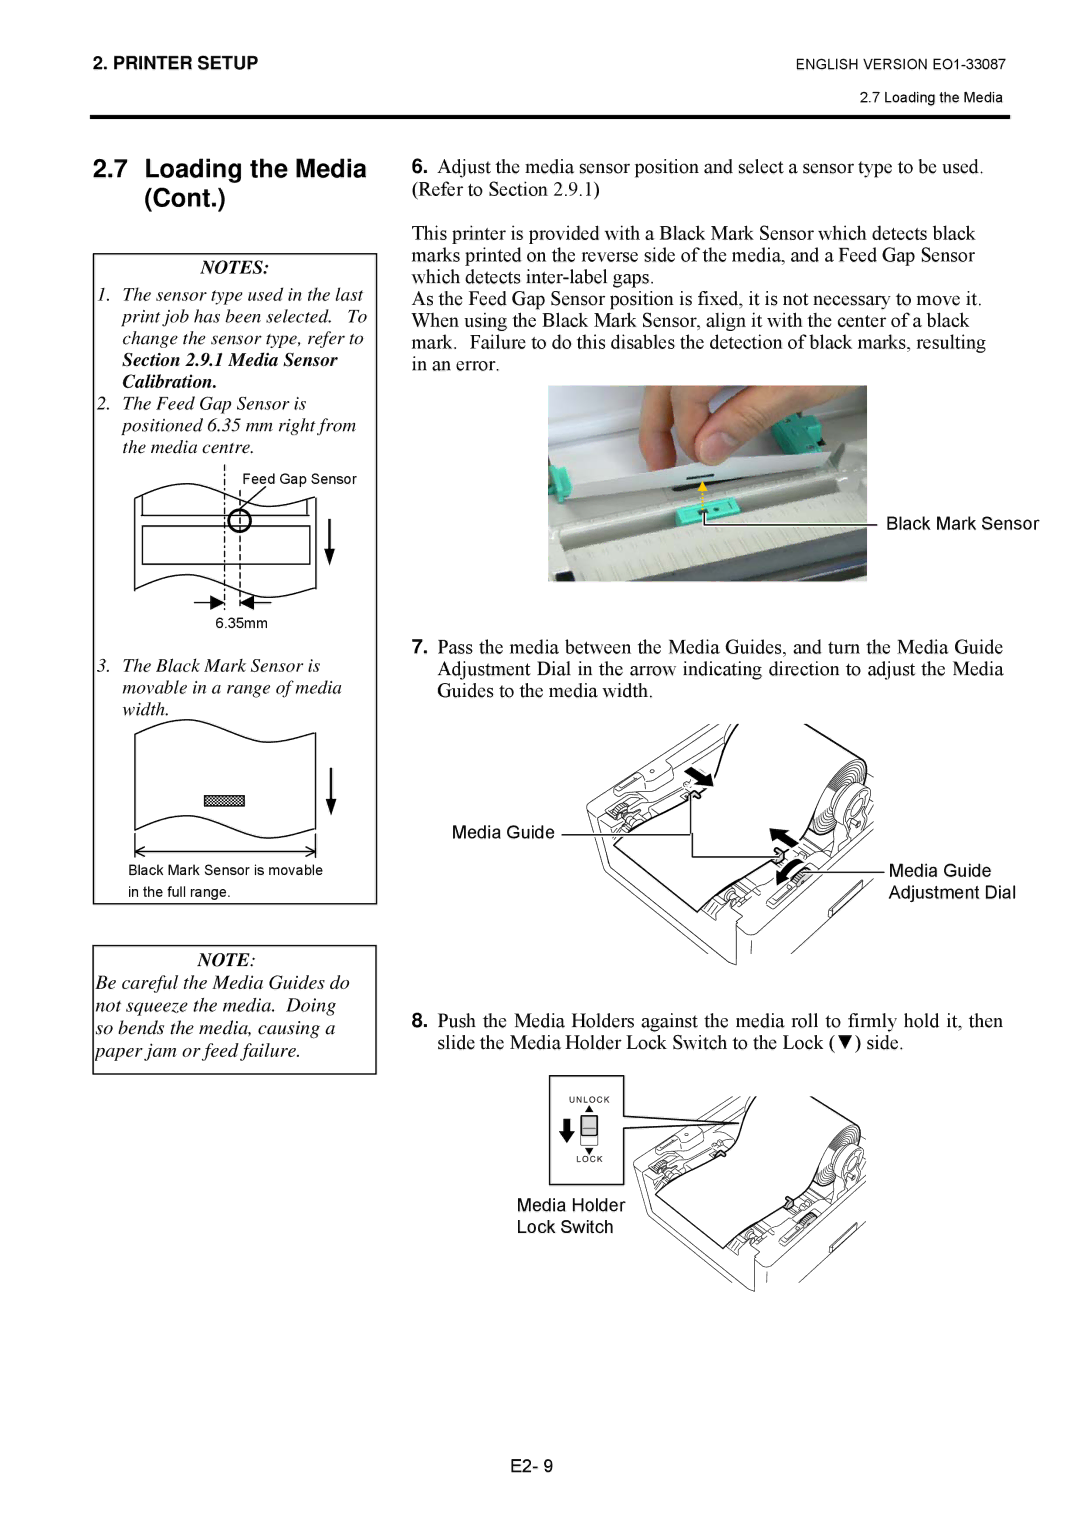
This printer is provided with a Black Mark Sensor which detects black marks printed on the reverse side of the media, and a Feed Gap Sensor which detects
As the Feed Gap Sensor position is fixed, it is not necessary to move it. When using the Black Mark Sensor, align it with the center of a black mark. Failure to do this disables the detection of black marks, resulting in an error.
Black Mark Sensor
7.Pass the media between the Media Guides, and turn the Media Guide Adjustment Dial in the arrow indicating direction to adjust the Media Guides to the media width.
Media Guide
Media Guide
Adjustment Dial
8.Push the Media Holders against the media roll to firmly hold it, then slide the Media Holder Lock Switch to the Lock (▼) side.
Media Holder Lock Switch
E2- 9