2. PRINTER SETUP | ENGLISH VERSION |
2.7 Loading the Media
2.7Loading the Media (Cont.)
NOTE:
Be sure to set the Selection Switch to REWINDER position.
ADJUSTMENT:
If the media skews when using the
When the media skews to the right:
Loosen the
When the media skews to the left: Loosen the
WARNING!
The cutter is sharp, so care must be taken not to injure yourself when handling the cutter.
CAUTION!
1.Be sure to cut the backing paper of the label. Cutting labels will cause the glue to stick to the cutter which may affect the cutter quality and shorten the cutter life.
2.Use of tag paper when the thickness exceeds the specified value may affect the cutter life.
NOTE:
When using the Rotary Cutter, be sure to install the Ribbon Saving Module
Failure to do this may cause a paper jam or ribbon error.
Build-in rewinder mode
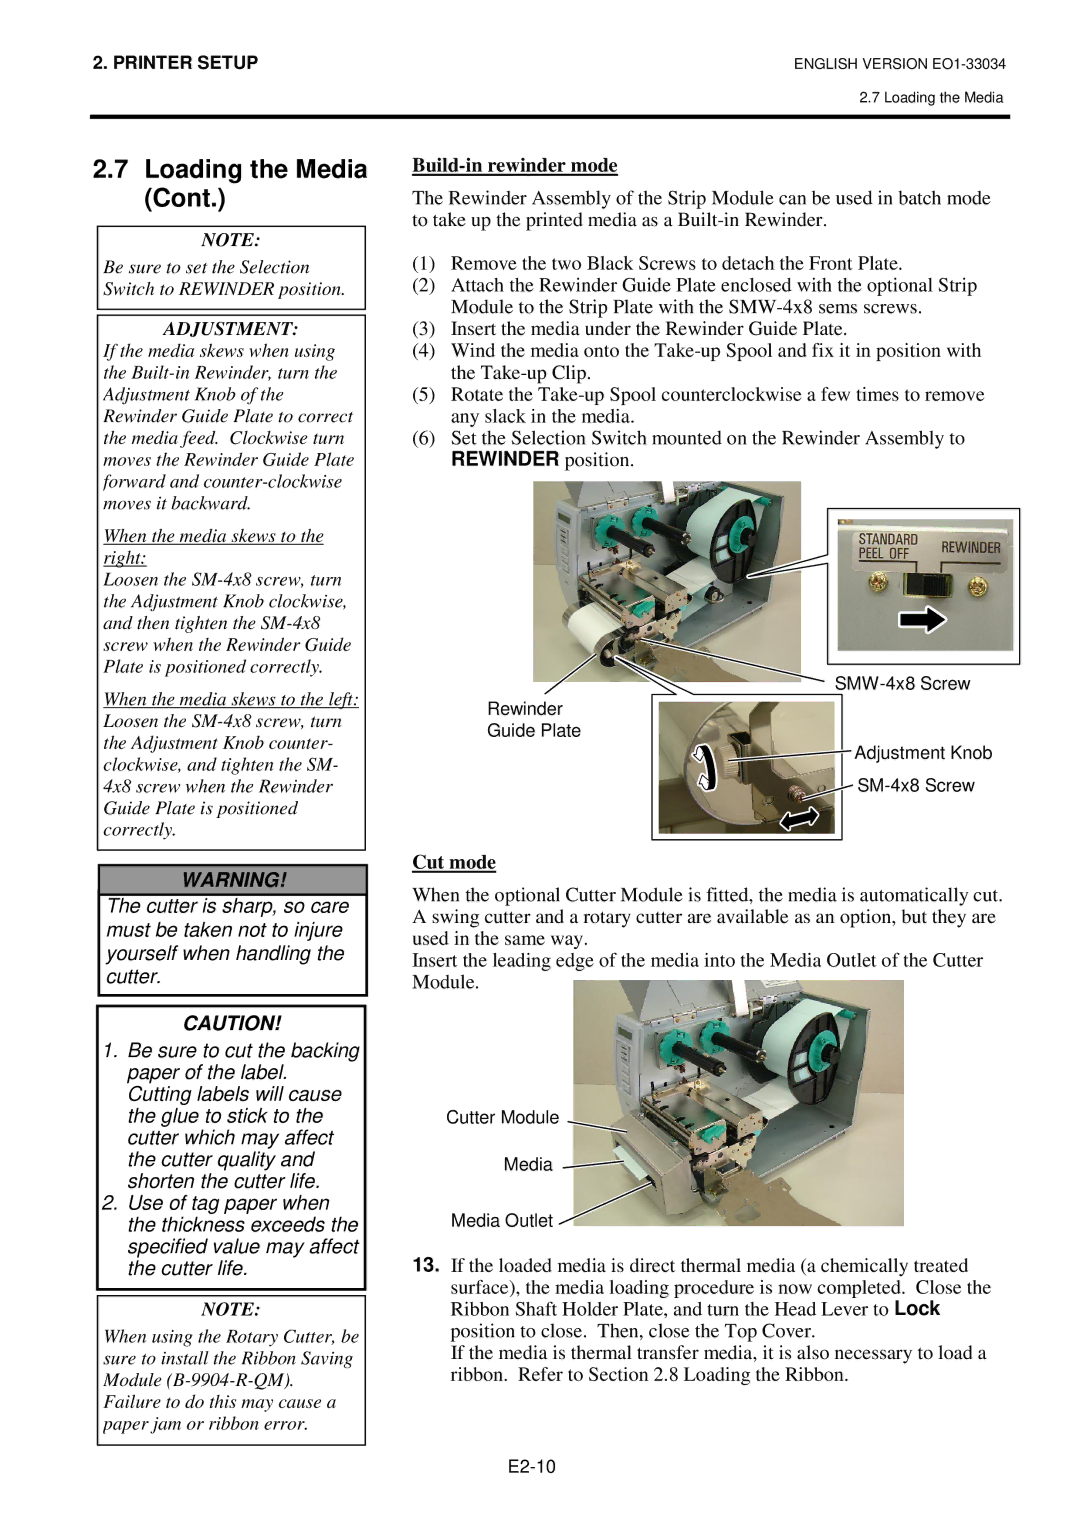
The Rewinder Assembly of the Strip Module can be used in batch mode to take up the printed media as a
(1)Remove the two Black Screws to detach the Front Plate.
(2)Attach the Rewinder Guide Plate enclosed with the optional Strip Module to the Strip Plate with the
(3)Insert the media under the Rewinder Guide Plate.
(4)Wind the media onto the
(5)Rotate the
(6)Set the Selection Switch mounted on the Rewinder Assembly to REWINDER position.
Rewinder
Guide Plate
![]() Adjustment Knob
Adjustment Knob
![]()
Cut mode
When the optional Cutter Module is fitted, the media is automatically cut. A swing cutter and a rotary cutter are available as an option, but they are used in the same way.
Insert the leading edge of the media into the Media Outlet of the Cutter Module.
Cutter Module
Media
Media Outlet ![]()
13.If the loaded media is direct thermal media (a chemically treated surface), the media loading procedure is now completed. Close the Ribbon Shaft Holder Plate, and turn the Head Lever to Lock position to close. Then, close the Top Cover.
If the media is thermal transfer media, it is also necessary to load a ribbon. Refer to Section 2.8 Loading the Ribbon.
