Chapter2Connections
Step2 Connect the player to your TV.
Introduction
 Via HDMI input
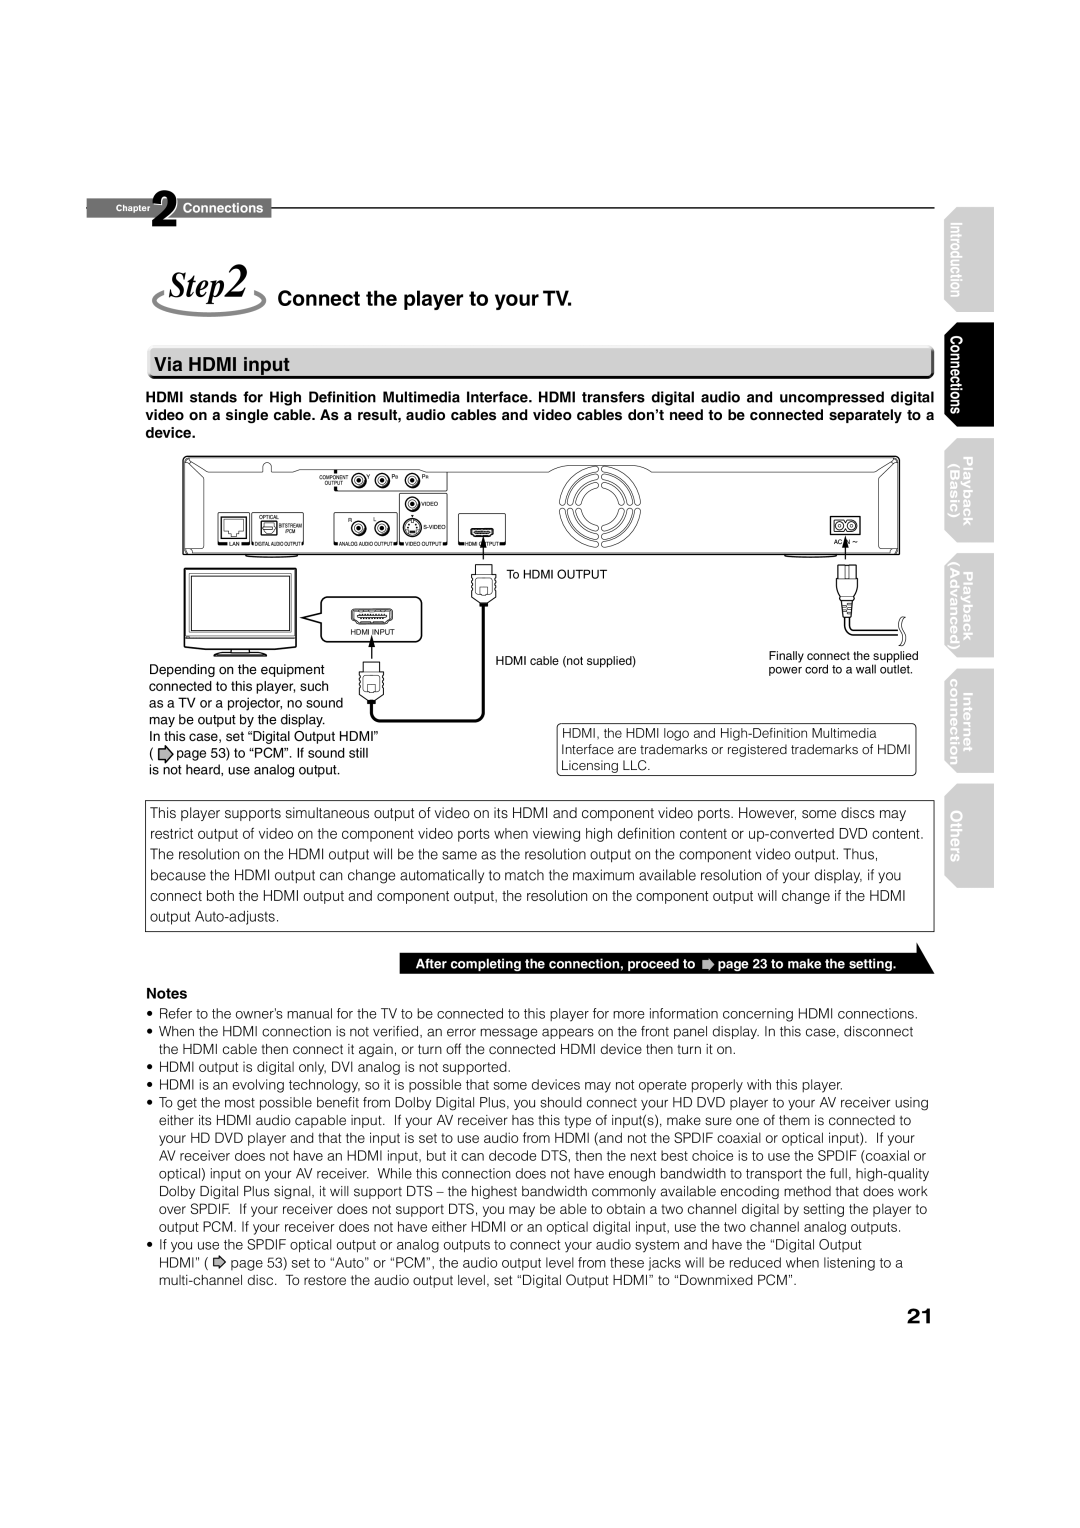
HDMI stands for High Definition Multimedia Interface. HDMI transfers digital audio and uncompressed digital video on a single cable. As a result, audio cables and video cables don’t need to be connected separately to a device.
Connections
HDMI INPUT
Depending on the equipment connected to this player, such as a TV or a projector, no sound may be output by the display.
In this case, set “Digital Output HDMI” ( ![]() page 53) to “PCM”. If sound still is not heard, use analog output.
page 53) to “PCM”. If sound still is not heard, use analog output.
To HDMI OUTPUT
HDMI cable (not supplied) | Finally connect the supplied | |
power cord to a wall outlet. | ||
|
HDMI, the HDMI logo and
(Basic) | Playback |
(Advanced) | Playback |
connection | Internet |
This player supports simultaneous output of video on its HDMI and component video ports. However, some discs may restrict output of video on the component video ports when viewing high definition content or
After completing the connection, proceed to ![]() page 23 to make the setting.
page 23 to make the setting.
Notes
•Refer to the owner’s manual for the TV to be connected to this player for more information concerning HDMI connections.
•When the HDMI connection is not verified, an error message appears on the front panel display. In this case, disconnect the HDMI cable then connect it again, or turn off the connected HDMI device then turn it on.
•HDMI output is digital only, DVI analog is not supported.
•HDMI is an evolving technology, so it is possible that some devices may not operate properly with this player.
•To get the most possible benefit from Dolby Digital Plus, you should connect your HD DVD player to your AV receiver using either its HDMI audio capable input. If your AV receiver has this type of input(s), make sure one of them is connected to your HD DVD player and that the input is set to use audio from HDMI (and not the SPDIF coaxial or optical input). If your AV receiver does not have an HDMI input, but it can decode DTS, then the next best choice is to use the SPDIF (coaxial or optical) input on your AV receiver. While this connection does not have enough bandwidth to transport the full,
•If you use the SPDIF optical output or analog outputs to connect your audio system and have the “Digital Output HDMI” ( ![]() page 53) set to “Auto” or “PCM”, the audio output level from these jacks will be reduced when listening to a
page 53) set to “Auto” or “PCM”, the audio output level from these jacks will be reduced when listening to a
Others
21