Preparation
Proceed the following steps to set the player ready.
Step 1: Connecting to a TV
Step 2: Connecting to audio system
Step 3: LAN connection
Step 4: Power connection
Step 5: Powering on
Step 6: Setting up the player
Resolution and connections
Page 15
Page 16
Page 17
Page 17
Page 18
Page 18
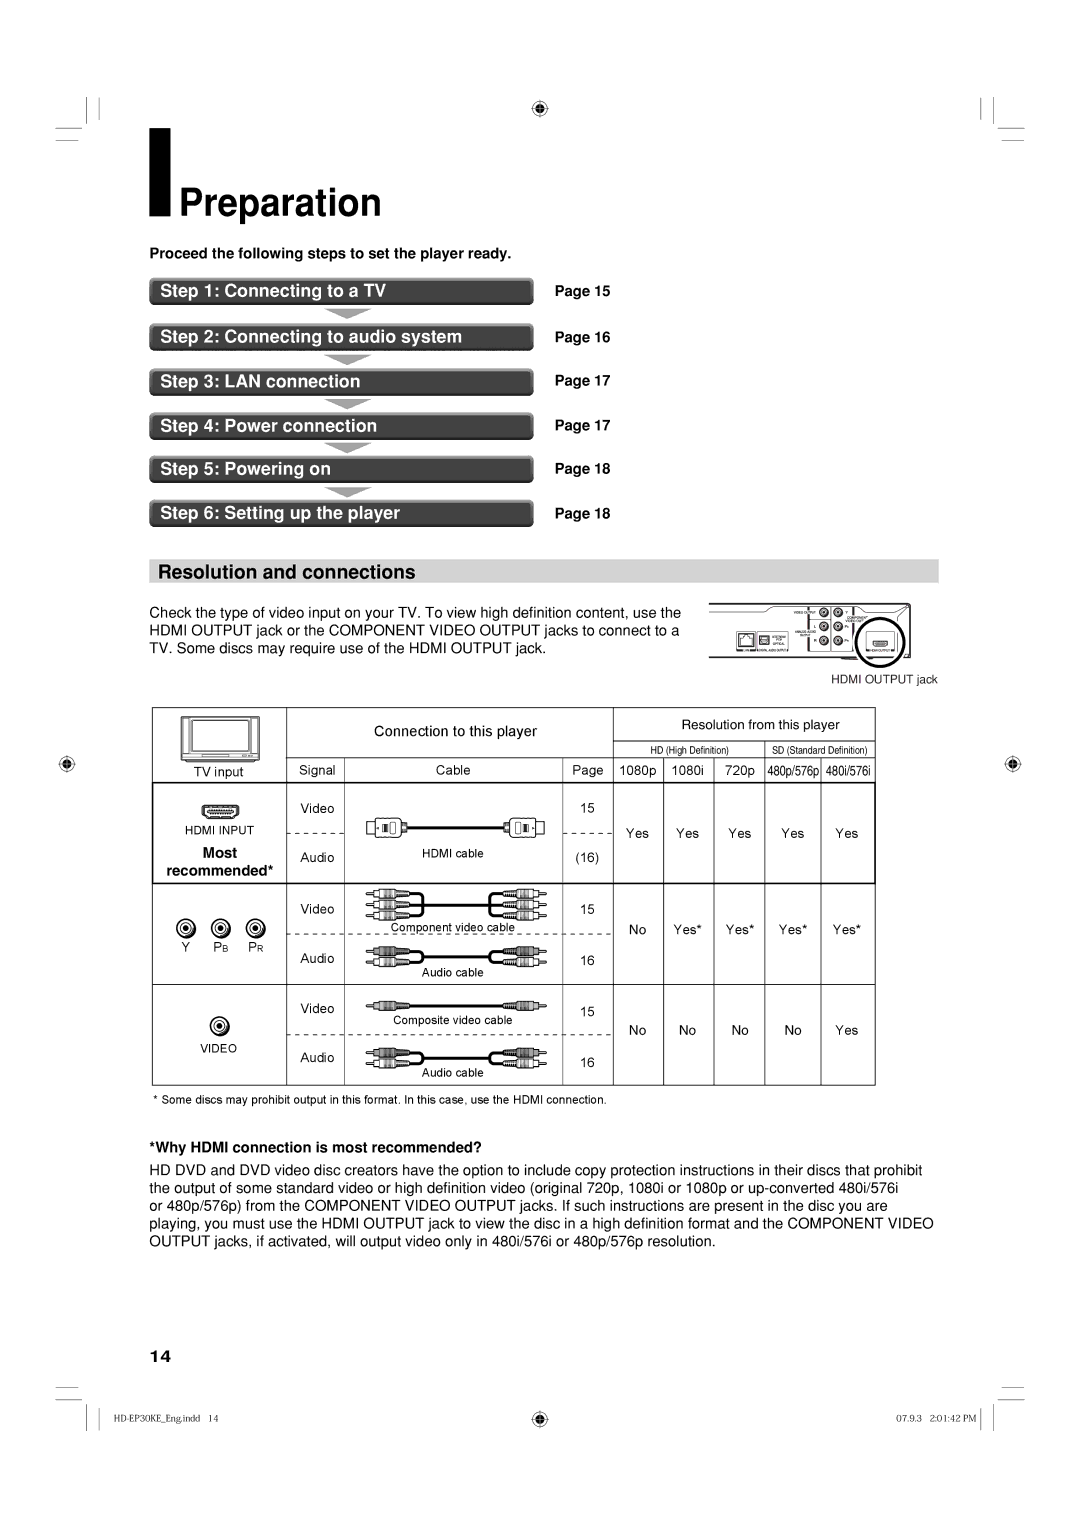
Check the type of video input on your TV. To view high definition content, use the
HDMI OUTPUT jack or the COMPONENT VIDEO OUTPUT jacks to connect to a
TV. Some discs may require use of the HDMI OUTPUT jack.
HDMI OUTPUT jack
|
| Connection to this player |
|
| Resolution from this player | |||
|
|
|
|
|
|
|
| |
|
|
|
| HD (High Definition) | SD (Standard Definition) | |||
TV input | Signal | Cable | Page | 1080p | 1080i | 720p | 480p/576p | 480i/576i |
| Video |
| 15 |
|
|
|
|
|
HDMI INPUT |
|
|
| Yes | Yes | Yes | Yes | Yes |
Most | Audio | HDMI cable | (16) |
|
|
|
|
|
recommended* |
|
|
|
|
|
| ||
|
|
|
|
|
|
|
| |
| Video |
| 15 |
|
|
|
|
|
|
| Component video cable |
| No | Yes* | Yes* | Yes* | Yes* |
Y PB PR | Audio |
| 16 |
|
|
|
|
|
| Audio cable |
|
|
|
|
| ||
|
|
|
|
|
|
|
| |
| Video | Composite video cable | 15 |
|
|
|
|
|
|
|
| No | No | No | No | Yes | |
|
|
|
| |||||
VIDEO | Audio |
|
|
|
|
|
|
|
|
| 16 |
|
|
|
|
| |
|
| Audio cable |
|
|
|
|
| |
|
|
|
|
|
|
|
| |
* Some discs may prohibit output in this format. In this case, use the HDMI connection. |
|
|
|
|
| |||
*Why HDMI connection is most recommended?
HD DVD and DVD video disc creators have the option to include copy protection instructions in their discs that prohibit the output of some standard video or high definition video (original 720p, 1080i or 1080p or
14
07.9.3 2:01:42 PM ![]()