Remote control
Inserting Batteries
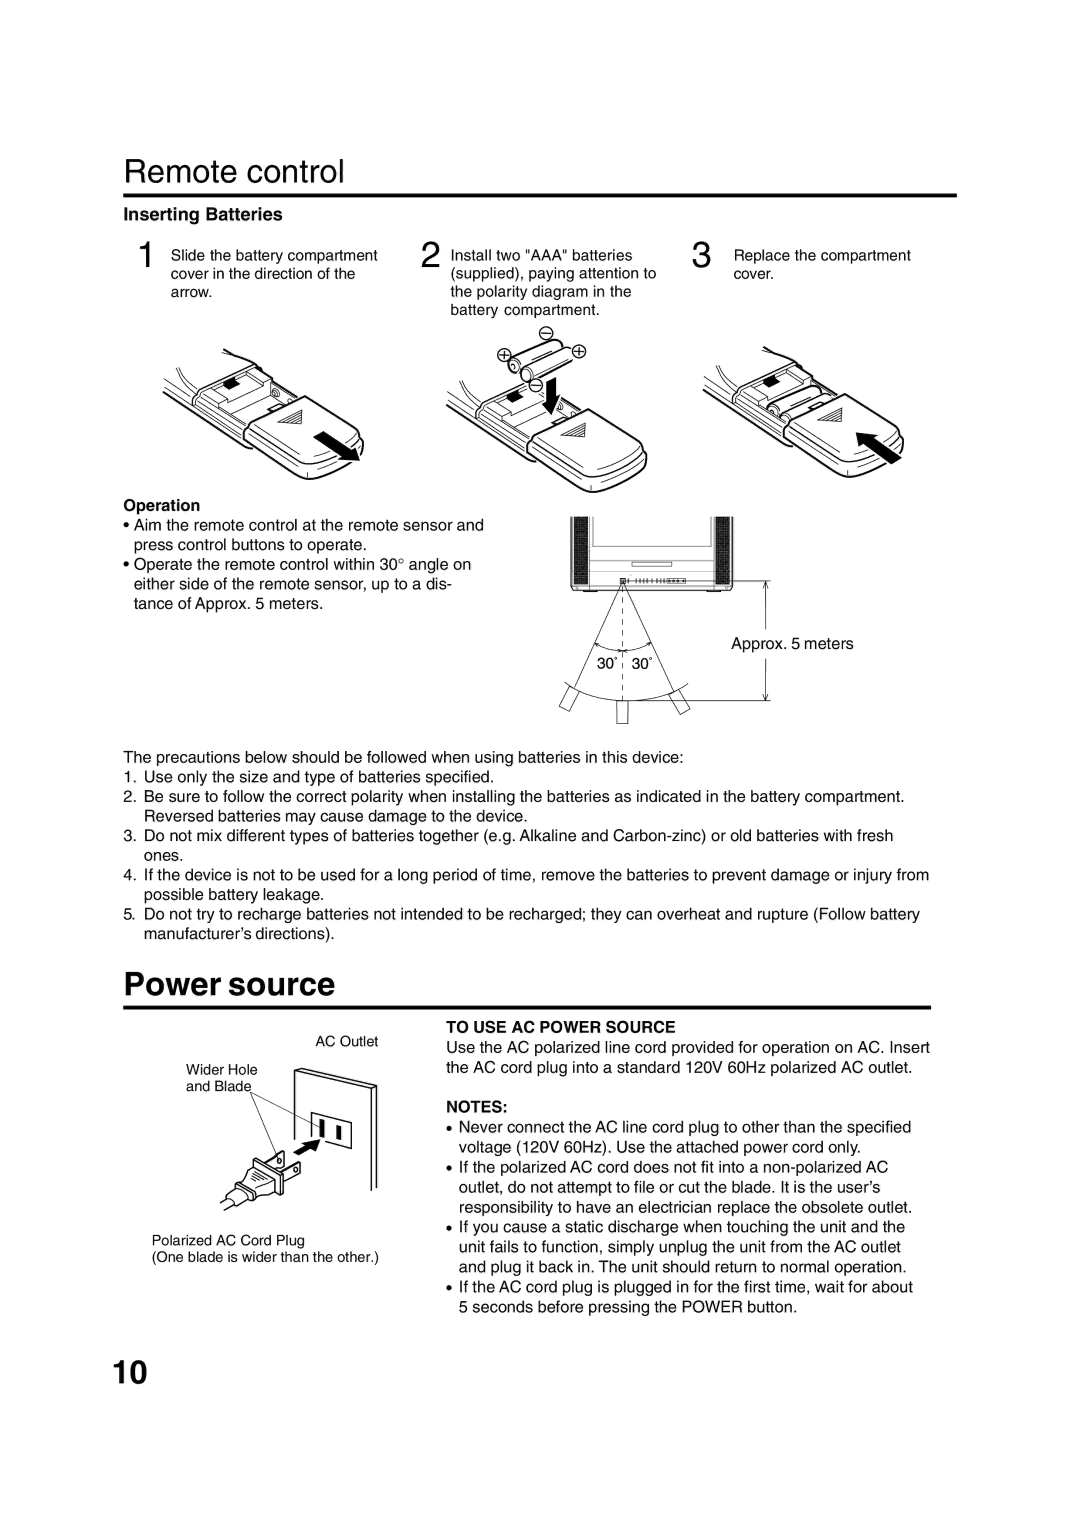
1 Slide the battery compartment cover in the direction of the arrow.
2 Install two "AAA" batteries | 3 Replace the compartment |
(supplied), paying attention to | cover. |
the polarity diagram in the |
|
battery compartment. |
|
Operation
• Aim the remote control at the remote sensor and press control buttons to operate.
• Operate the remote control within 30° angle on either side of the remote sensor, up to a dis- tance of Approx. 5 meters.
Approx. 5 meters
The precautions below should be followed when using batteries in this device:
1.Use only the size and type of batteries specified.
2.Be sure to follow the correct polarity when installing the batteries as indicated in the battery compartment. Reversed batteries may cause damage to the device.
3.Do not mix different types of batteries together (e.g. Alkaline and
4.If the device is not to be used for a long period of time, remove the batteries to prevent damage or injury from possible battery leakage.
5.Do not try to recharge batteries not intended to be recharged; they can overheat and rupture (Follow battery manufacturer’s directions).
Power source
AC Outlet
Wider Hole
and Blade
Polarized AC Cord Plug
(One blade is wider than the other.)
TO USE AC POWER SOURCE
Use the AC polarized line cord provided for operation on AC. Insert the AC cord plug into a standard 120V 60Hz polarized AC outlet.
NOTES:
•Never connect the AC line cord plug to other than the specified voltage (120V 60Hz). Use the attached power cord only.
•If the polarized AC cord does not fit into a
•If you cause a static discharge when touching the unit and the unit fails to function, simply unplug the unit from the AC outlet and plug it back in. The unit should return to normal operation.
•If the AC cord plug is plugged in for the first time, wait for about 5 seconds before pressing the POWER button.
10
