Using handy features
■ Using auto setting (Only for input from computer) |
| Adjusting Keystone distortion [Auto] |
| |||
This function sets up the projector to the optimum state such as | Remote | 2 Press the | button. |
|
| |
sampling phase, frequency, screen position, and clamp for each | Control | The keystone distortion is automatically corrected. The | icon appears during this | |||
type of the input signal by using simple operations. |
| |||||
| correction. |
|
|
| ||
|
|
|
|
|
| |
Press the remote control’s AUTO SET button. |
| When adjustment is finished, the Keystone menu appears again. For fine adjust- | ||||
| ment, select | button and adjust image manually by the | ||||
For computer input, the | icon will appear during processing. |
| buttons. |
|
|
|
You can set as well by selecting [Auto setting] in the Image |
|
|
|
|
| |
adjustment menu p.35 . |
|
| Adjusting Keystone distortion [Manual] |
| ||
|
|
|
| |||
Notes |
|
| 1 Press the KEYSTONE button. |
|
| |
|
| 2 Select | button. |
| ||
• The image may not be projected or auto adjustment/setting may not be performed |
| |||||
|
|
|
| |||
correctly for input signals other than those supported by the projector p.50 , p.51 . | 3 Use the | buttons for keystone adjustment. |
| |||
• If auto setting fails adjustment, adjust manually with [Position] in the Image | Note |
|
|
| ||
adjustment menu p.35 . |
|
|
|
|
| |
|
|
| • Depending on the amount of keystone adjustment and the content of images, some | |||
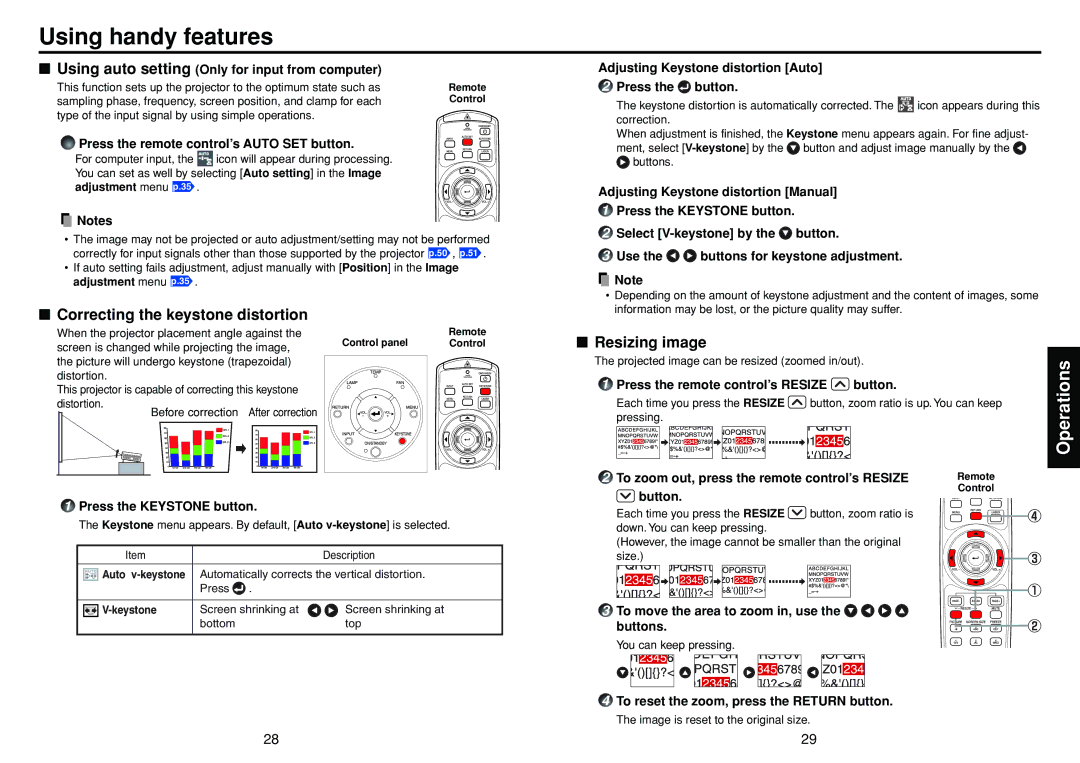
■ | Correcting the keystone distortion | information may be lost, or the picture quality may suffer. |
|
When the projector placement angle against the | Control panel | Remote | ■ Resizing image |
|
|
| |
screen is changed while projecting the image, | Control |
|
|
| |||
the picture will undergo keystone (trapezoidal) |
|
| The projected image can be resized (zoomed in/out). |
| |||
distortion. |
|
|
| 1 Press the remote control’s RESIZE | button. |
| |
This projector is capable of correcting this keystone |
|
|
| ||||
|
|
|
|
|
| ||
distortion. |
|
|
| Each time you press the RESIZE | button, zoom ratio is up. You can keep | ||
Before correction After correction |
|
| pressing. |
|
|
| |
|
|
|
|
|
|
| |
|
|
|
| 2 To zoom out, press the remote control’s RESIZE | Remote | ||
|
|
|
| button. |
|
| Control |
1 Press the KEYSTONE button. |
|
|
|
|
| ||
|
| Each time you press the RESIZE | button, zoom ratio is |
| |||
The Keystone menu appears. By default, [Auto |
| ||||||
down. You can keep pressing. |
|
|
| ||||
|
|
|
| (However, the image cannot be smaller than the original |
| ||
Item |
| Description |
| size.) |
|
|
|
Auto | Automatically corrects the vertical distortion. |
|
|
|
|
| |
| Press . |
|
|
|
|
|
|
Screen shrinking at | Screen shrinking at |
| 3 To move the area to zoom in, use the |
|
| ||
| bottom | top |
| buttons. |
|
|
|
|
|
|
| You can keep pressing. |
|
|
|
4 To reset the zoom, press the RETURN button.
The image is reset to the original size.
Operations
28 | 29 |