Using handy features (Continued)
Adjusting Keystone distortion [Auto]
2Press the  button.
The keystone distortion is automatically corrected. The ![]() icon appears during this correction.
icon appears during this correction.
When adjustment is finished, the Keystone menu appears again. For fine adjust-
ment, select ![]() button and adjust image manually by the
button and adjust image manually by the ![]()
![]() buttons.
buttons.
Adjusting Keystone distortion [Manual]
2Select ![]() button.
button.
3Use the ![]()
![]() buttons for keystone adjustment.
buttons for keystone adjustment.
![]() Note
Note
•Depending on the amount of keystone adjustment and the content of images, some information may be lost, or the picture quality may suffer.
■Resizing image
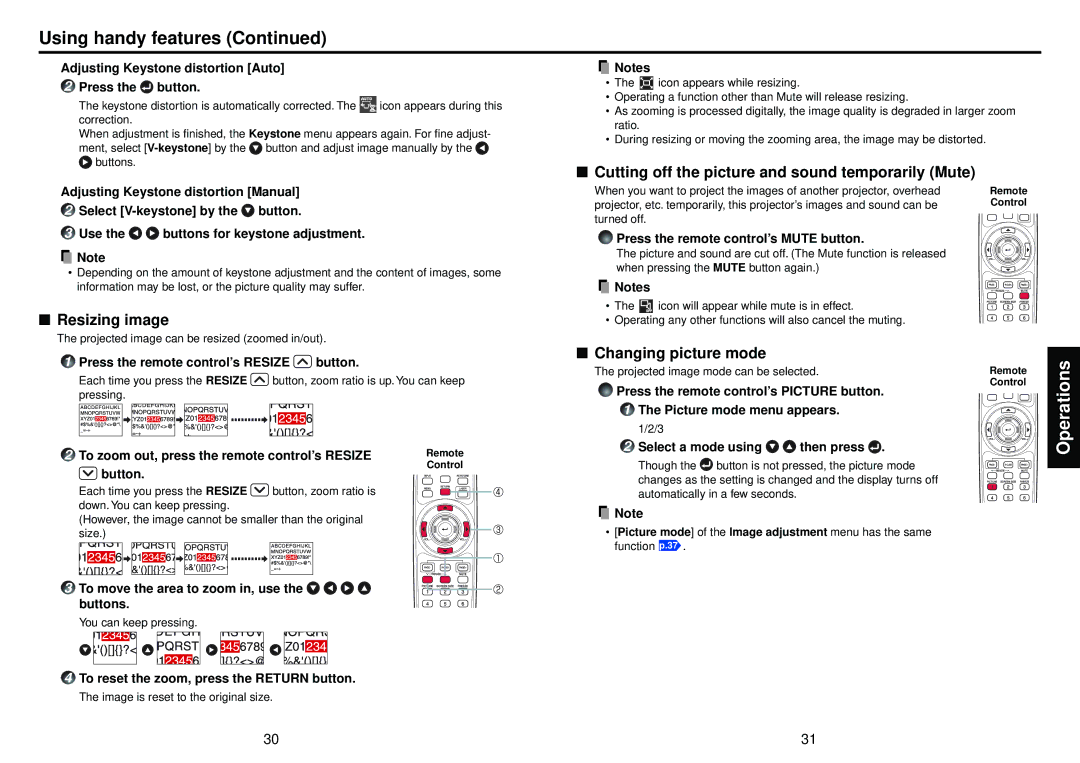
The projected image can be resized (zoomed in/out).
![]() Notes
Notes
•The ![]()
![]() icon appears while resizing.
icon appears while resizing.
•Operating a function other than Mute will release resizing.
•As zooming is processed digitally, the image quality is degraded in larger zoom ratio.
•During resizing or moving the zooming area, the image may be distorted.
■Cutting off the picture and sound temporarily (Mute)
When you want to project the images of another projector, overhead | Remote |
projector, etc. temporarily, this projector’s images and sound can be | Control |
turned off. |
|
Press the remote control’s MUTE button.
The picture and sound are cut off. (The Mute function is released when pressing the MUTE button again.)
![]() Notes
Notes
• | The |
| icon will appear while mute is in effect. |
• | Operating any other functions will also cancel the muting. | ||
1Press the remote control’s RESIZE ![]() button.
button.
Each time you press the RESIZE ![]() button, zoom ratio is up. You can keep pressing.
button, zoom ratio is up. You can keep pressing.
2 To zoom out, press the remote control’s RESIZE | Remote | |
button. |
| Control |
|
| |
Each time you press the RESIZE | button, zoom ratio is |
|
down. You can keep pressing.
(However, the image cannot be smaller than the original size.)
3 To move the area to zoom in, use the ![]()
![]()
![]()
![]() buttons.
buttons.
You can keep pressing.
4To reset the zoom, press the RETURN button.
The image is reset to the original size.
■Changing picture mode
The projected image mode can be selected.
Press the remote control’s PICTURE button.
1The Picture mode menu appears.
1/2/3
2Select a mode using![]()
![]() then press
then press ![]() .
.
Though the ![]() button is not pressed, the picture mode changes as the setting is changed and the display turns off automatically in a few seconds.
button is not pressed, the picture mode changes as the setting is changed and the display turns off automatically in a few seconds.
![]() Note
Note
•[Picture mode] of the Image adjustment menu has the same function p.37 .
Remote Control
Operations
30 | 31 |
