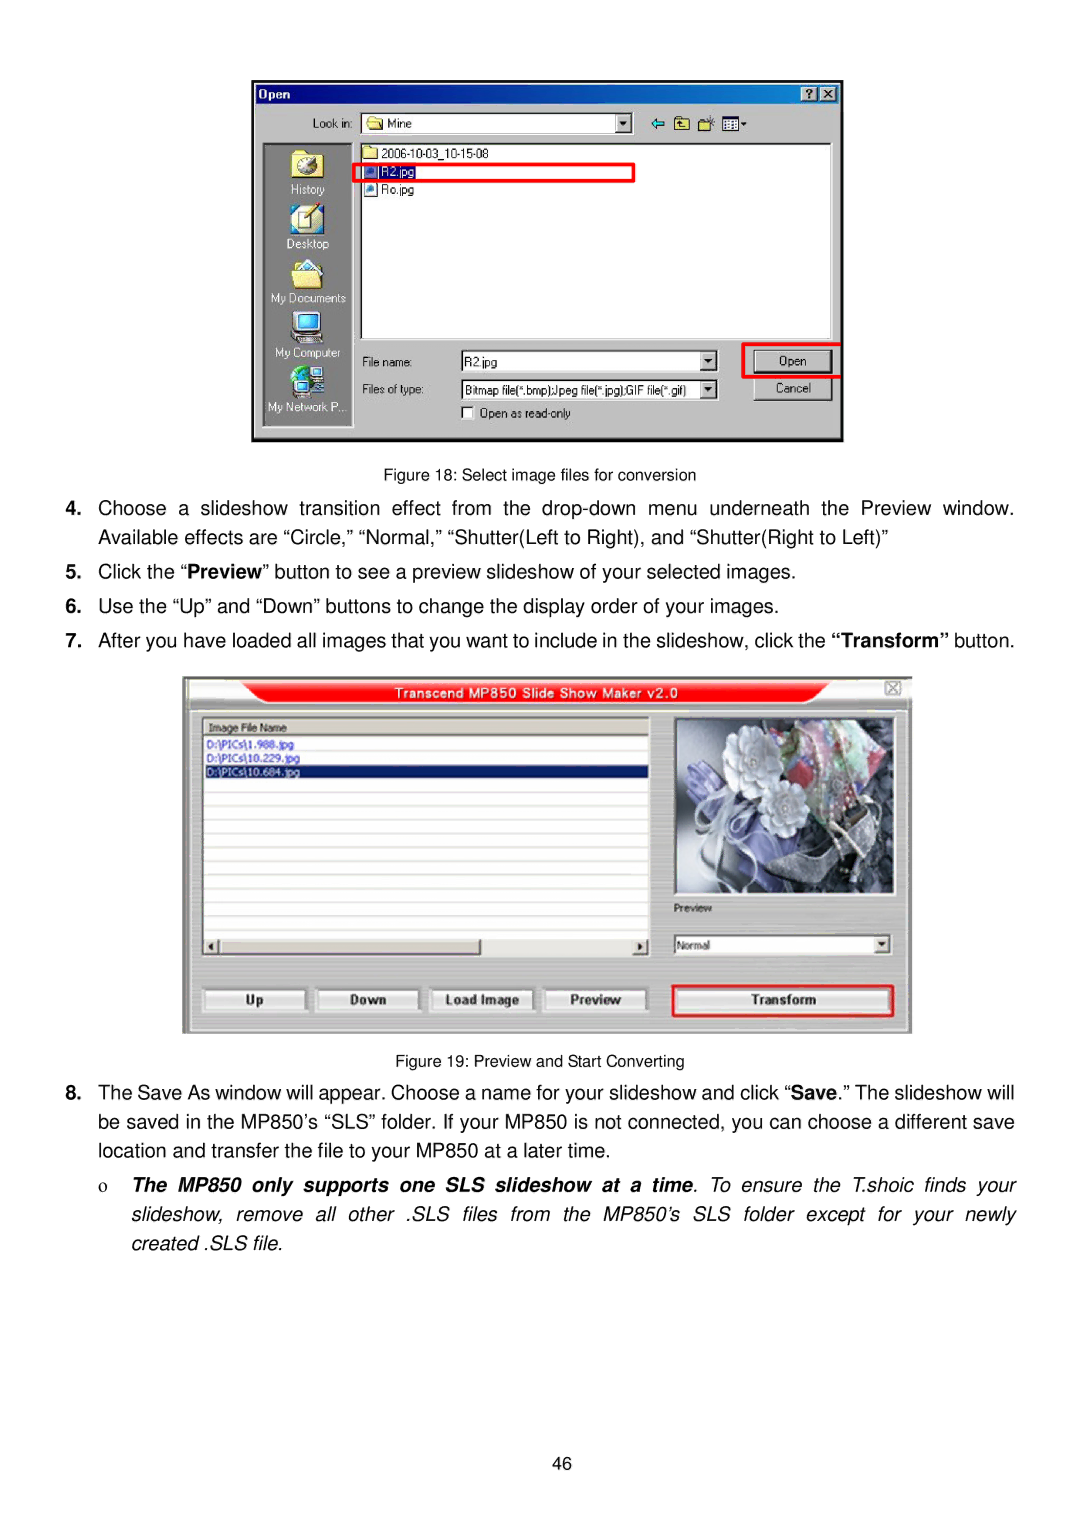
Figure 18: Select image files for conversion
4.Choose a slideshow transition effect from the
5.Click the “Preview” button to see a preview slideshow of your selected images.
6.Use the “Up” and “Down” buttons to change the display order of your images.
7.After you have loaded all images that you want to include in the slideshow, click the “Transform” button.
Figure 19: Preview and Start Converting
8.The Save As window will appear. Choose a name for your slideshow and click “Save.” The slideshow will be saved in the MP850’s “SLS” folder. If your MP850 is not connected, you can choose a different save location and transfer the file to your MP850 at a later time.
οThe MP850 only supports one SLS slideshow at a time. To ensure the T.shoic finds your slideshow, remove all other .SLS files from the MP850’s SLS folder except for your newly created .SLS file.
46
