Connection
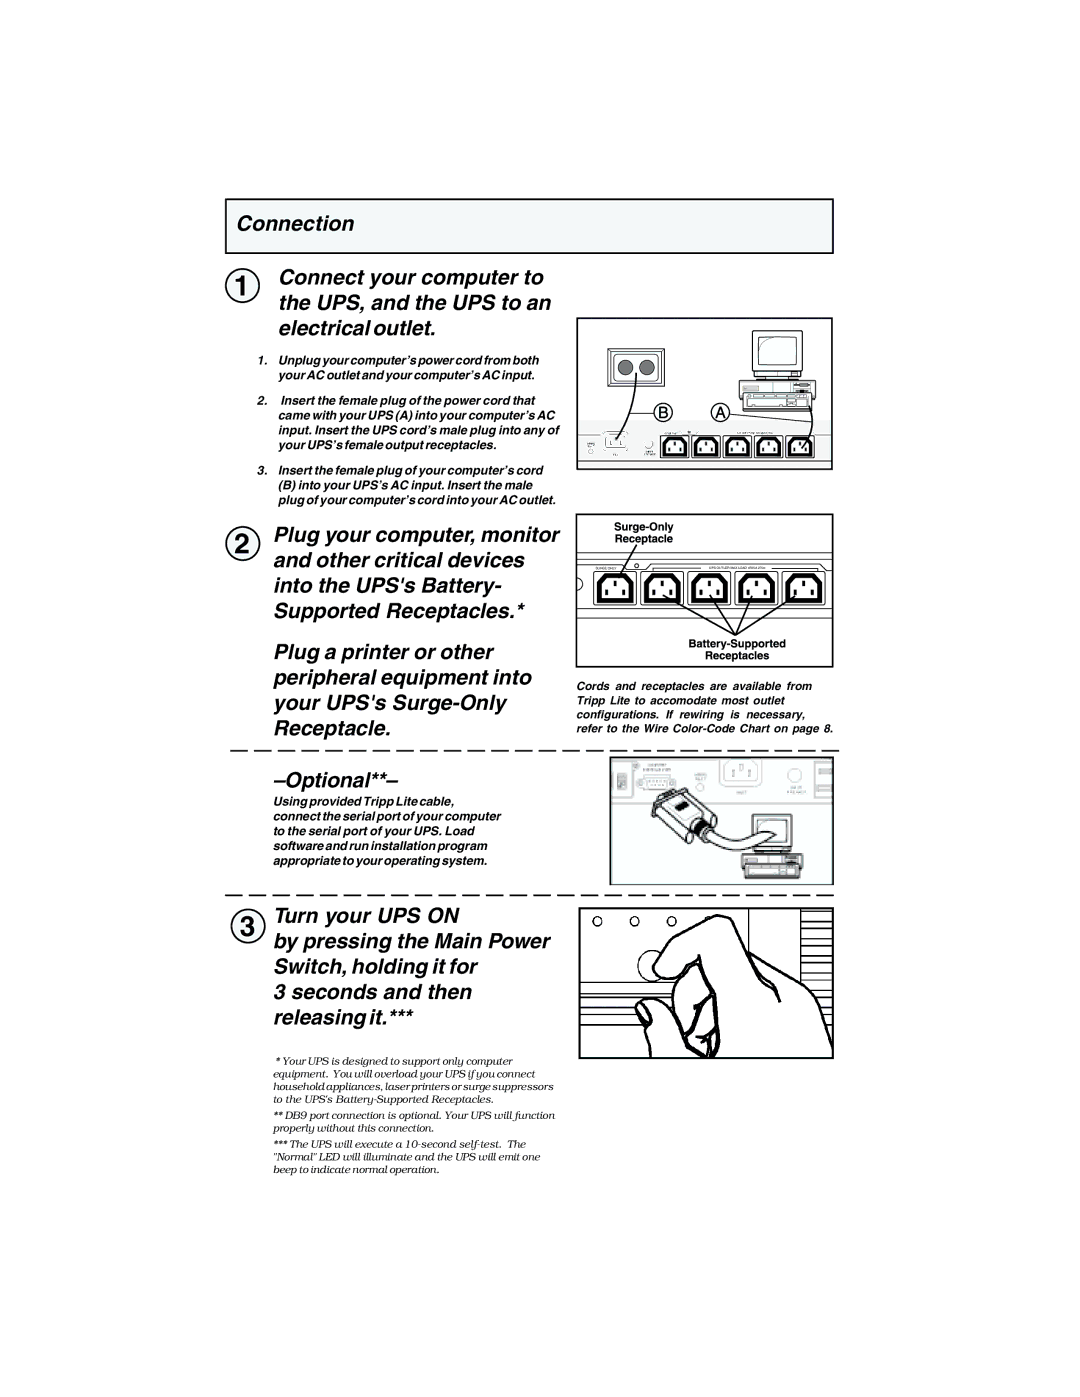
1 | Connect your computer to |
| the UPS, and the UPS to an |
electrical outlet.
1.Unplug your computer’s power cord from both your AC outlet and your computer’s AC input.
2.Insert the female plug of the power cord that came with your UPS (A) into your computer’s AC input. Insert the UPS cord’s male plug into any of your UPS’s female output receptacles.
3.Insert the female plug of your computer’s cord
(B) into your UPS’s AC input. Insert the male plug of your computer’s cord into your AC outlet.
2 | Plug your computer, monitor |
| and other critical devices |
into the UPS's Battery- Supported Receptacles.*
Plug a printer or other peripheral equipment into your UPS's
SURGE ONLY | UPS OUTLER MAX LOAD 450VA 270w |
Cords and receptacles are available from Tripp Lite to accomodate most outlet configurations. If rewiring is necessary, refer to the Wire
–Optional**–
Using provided Tripp Lite cable, connect the serial port of your computer to the serial port of your UPS. Load software and run installation program appropriate to your operating system.
3 Turn your UPS ON
by pressing the Main Power Switch, holding it for
3 seconds and then releasing it.***
*Your UPS is designed to support only computer equipment. You will overload your UPS if you connect household appliances, laser printers or surge suppressors to the UPS's
**DB9 port connection is optional. Your UPS will function properly without this connection.
***The UPS will execute a