
OMNI1500LCD specifications
The Tripp Lite OMNI1500LCD is a versatile and reliable uninterruptible power supply (UPS) designed to safeguard sensitive electronic equipment from power disturbances, ensuring uninterrupted operation during outages and surges. Notably, this robust unit boasts a capacity of 1500 VA/900 Watts, making it ideal for home office setups, networking gear, and critical electronic devices.One of the defining features of the OMNI1500LCD is its user-friendly LCD display. This front-facing screen delivers real-time information about power status, battery condition, and load levels, enabling users to monitor the performance of their connected devices easily. The display allows users to access vital statistics at a glance, enhancing the proactive management of power usage.
The unit incorporates advanced line-interactive technology, which means it can detect and correct minor voltage fluctuations without switching to battery mode. This capability helps prolong battery life while maintaining a stable power supply, thereby protecting equipment from damage caused by sudden spikes or sags in voltage.
The OMNI1500LCD features multiple outlets, including 10 total outlets (5 with battery backup and surge protection and 5 with surge protection only). This design ensures ample connections for essential equipment while safeguarding against harmful electrical surges. Additionally, it includes an easy-to-use USB port that facilitates communication with connected devices for more detailed monitoring and management.
Another standout feature is the built-in battery management for improved lifespan and performance. The unit automatically performs self-diagnostics and provides alerts for battery replacement, ensuring users remain informed about their UPS's condition. The UPS also incorporates a smart, efficient charging system that allows for rapid recharging of its internal batteries, providing users with minimal downtime.
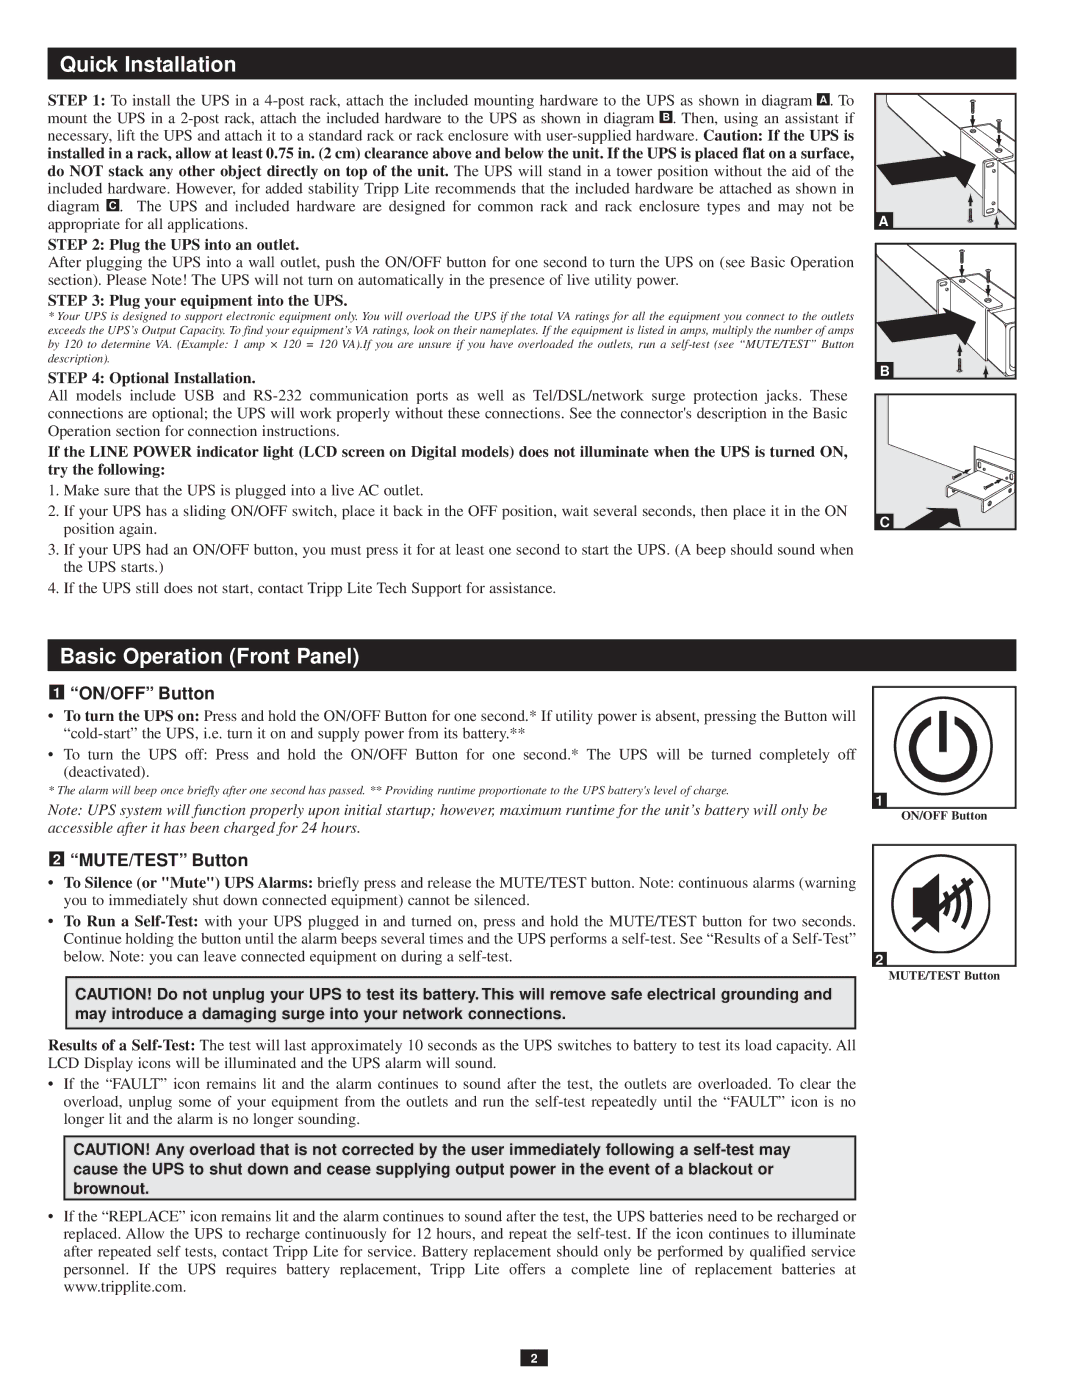
With a compact and lightweight design, the Tripp Lite OMNI1500LCD easily fits into various environments, enhancing both functionality and versatility. It includes features like an adjustable alarm system, allowing users to customize alerts based on their requirements, and mounting options for better placement flexibility.
In conclusion, the Tripp Lite OMNI1500LCD is an essential tool for anyone looking to ensure reliable power delivery and protection for sensitive electronics. With its innovative features and robust design, it effectively meets the demands of today's technology-driven environments, delivering peace of mind and security against unexpected power issues.