Installation rapide |
| |
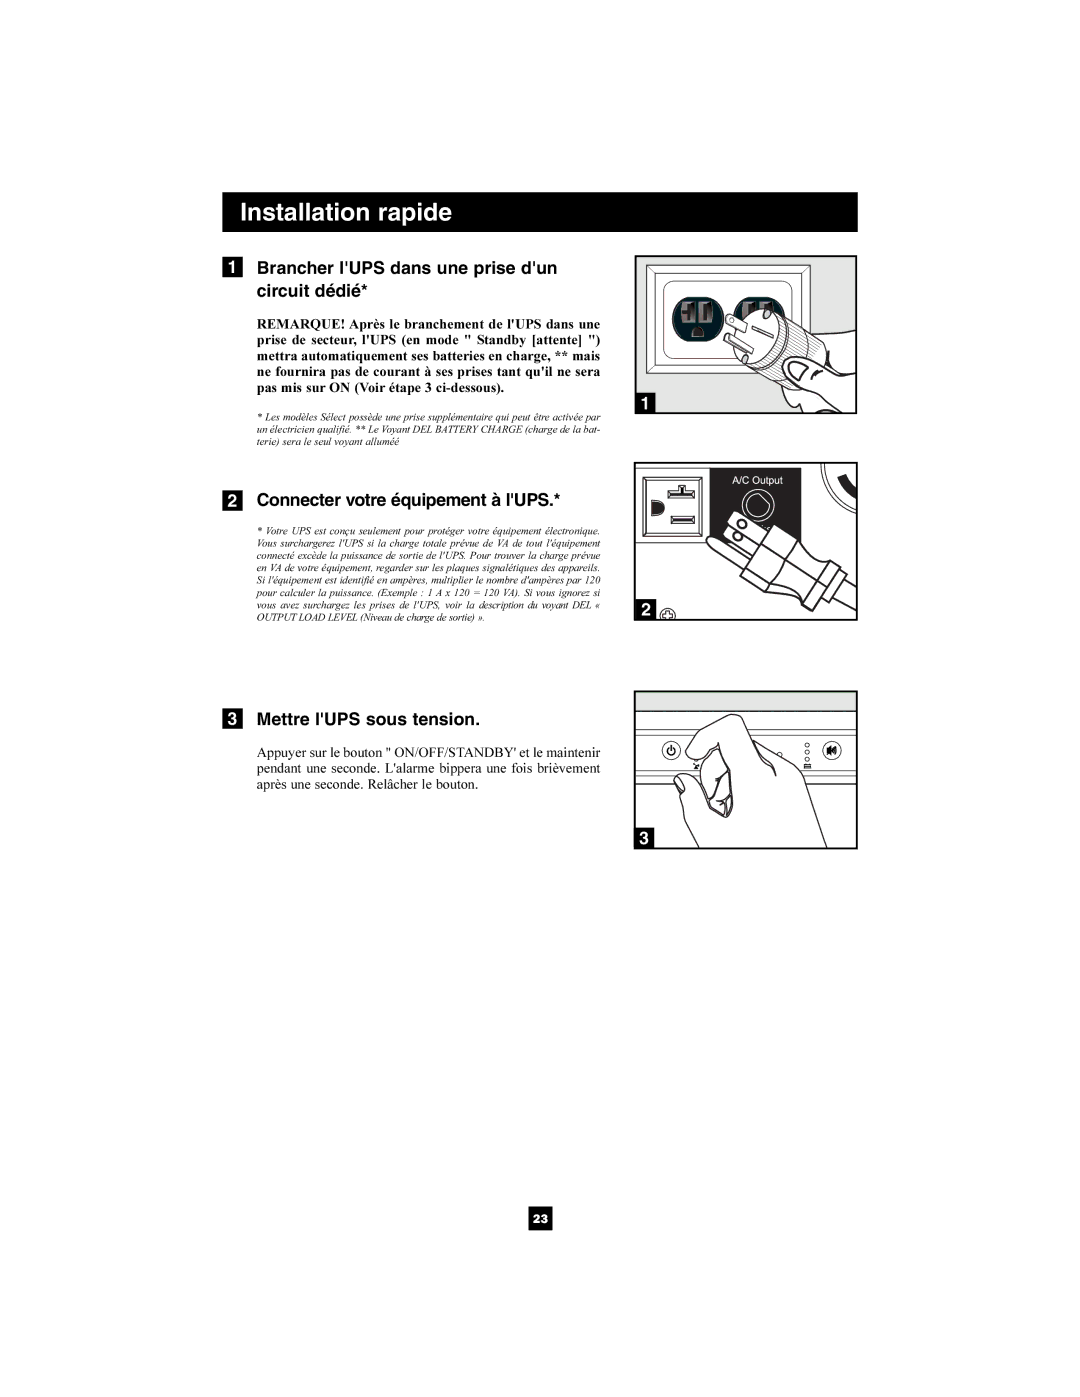
1 Brancher l'UPS dans une prise d'un |
| |
circuit dédié* |
| |
REMARQUE! Après le branchement de l'UPS dans une |
| |
prise de secteur, l'UPS (en mode " Standby [attente] ") |
| |
mettra automatiquement ses batteries en charge, ** mais |
| |
ne fournira pas de courant à ses prises tant qu'il ne sera |
| |
pas mis sur ON (Voir étape 3 | 1 | |
* Les modèles Sélect possède une prise supplémentaire qui peut être activée par | ||
| ||
un électricien qualifié. ** Le Voyant DEL BATTERY CHARGE (charge de la bat- |
| |
terie) sera le seul voyant alluméé |
| |
2 Connecter votre équipement à l'UPS.* |
| |
* Votre UPS est conçu seulement pour protéger votre équipement électronique. |
| |
Vous surchargerez l'UPS si la charge totale prévue de VA de tout l'équipement |
| |
connecté excède la puissance de sortie de l'UPS. Pour trouver la charge prévue |
| |
en VA de votre équipement, regarder sur les plaques signalétiques des appareils. |
| |
Si l'équipement est identifié en ampères, multiplier le nombre d'ampères par 120 |
| |
pour calculer la puissance. (Exemple : 1 A x 120 = 120 VA). Si vous ignorez si |
| |
vous avez surchargez les prises de l'UPS, voir la description du voyant DEL « | 2 | |
OUTPUT LOAD LEVEL (Niveau de charge de sortie) ». | ||
|
3Mettre l'UPS sous tension.
Appuyer sur le bouton " ON/OFF/STANDBY' et le maintenir pendant une seconde. L'alarme bippera une fois brièvement après une seconde. Relâcher le bouton.
3
23