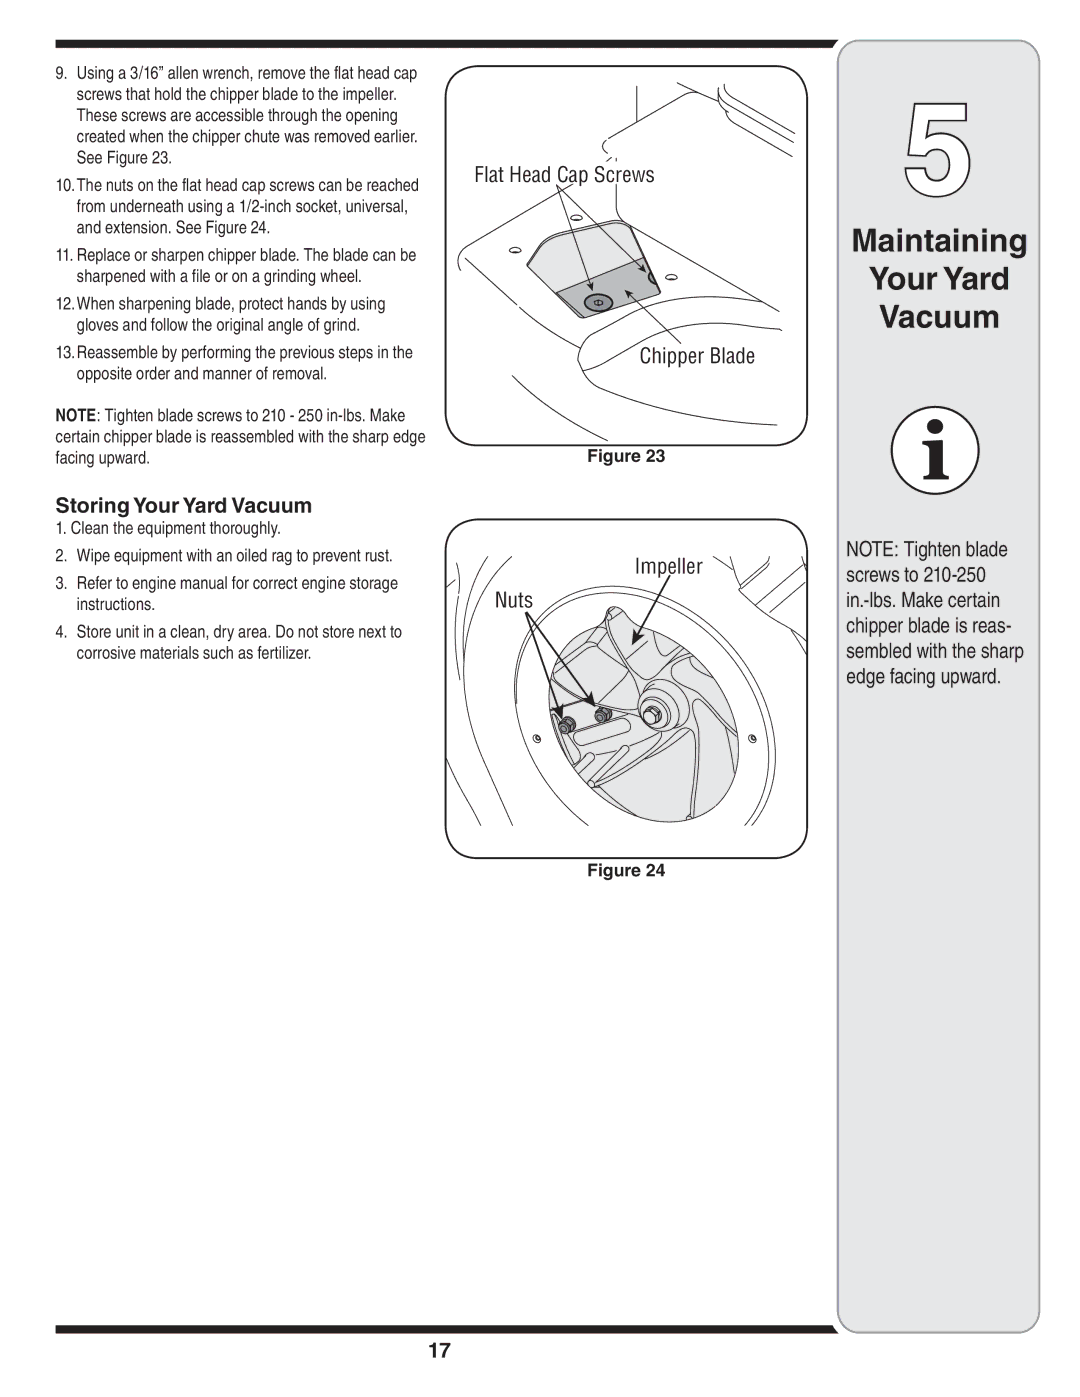
9.Using a 3/16” allen wrench, remove the flat head cap screws that hold the chipper blade to the impeller. These screws are accessible through the opening created when the chipper chute was removed earlier. See Figure 23.
10.The nuts on the flat head cap screws can be reached from underneath using a
11.Replace or sharpen chipper blade. The blade can be sharpened with a file or on a grinding wheel.
12.When sharpening blade, protect hands by using gloves and follow the original angle of grind.
13.Reassemble by performing the previous steps in the opposite order and manner of removal.
NOTE: Tighten blade screws to 210 - 250
Storing Your Yard Vacuum
1.Clean the equipment thoroughly.
2.Wipe equipment with an oiled rag to prevent rust.
3.Refer to engine manual for correct engine storage instructions.
4.Store unit in a clean, dry area. Do not store next to corrosive materials such as fertilizer.
��������������������![]()
![]()
![]() �������������
�������������
Figure 23
�������� ![]()
![]()
����
Figure 24
5
Maintaining
Your Yard
Vacuum
NOTE: Tighten blade screws to
17