3
Setting Up | � |
Your Yard |
|
Vacuum |
|
NOTE: The bag/chute switch button attached to the mounting
� 
![]()
![]()
![]()
![]()
![]()
![]()
![]()
![]()
![]()
![]()
![]()
![]()
![]()
![]()
![]()
![]()
![]()
![]()
![]()
![]()
![]()
![]()
![]()
![]()
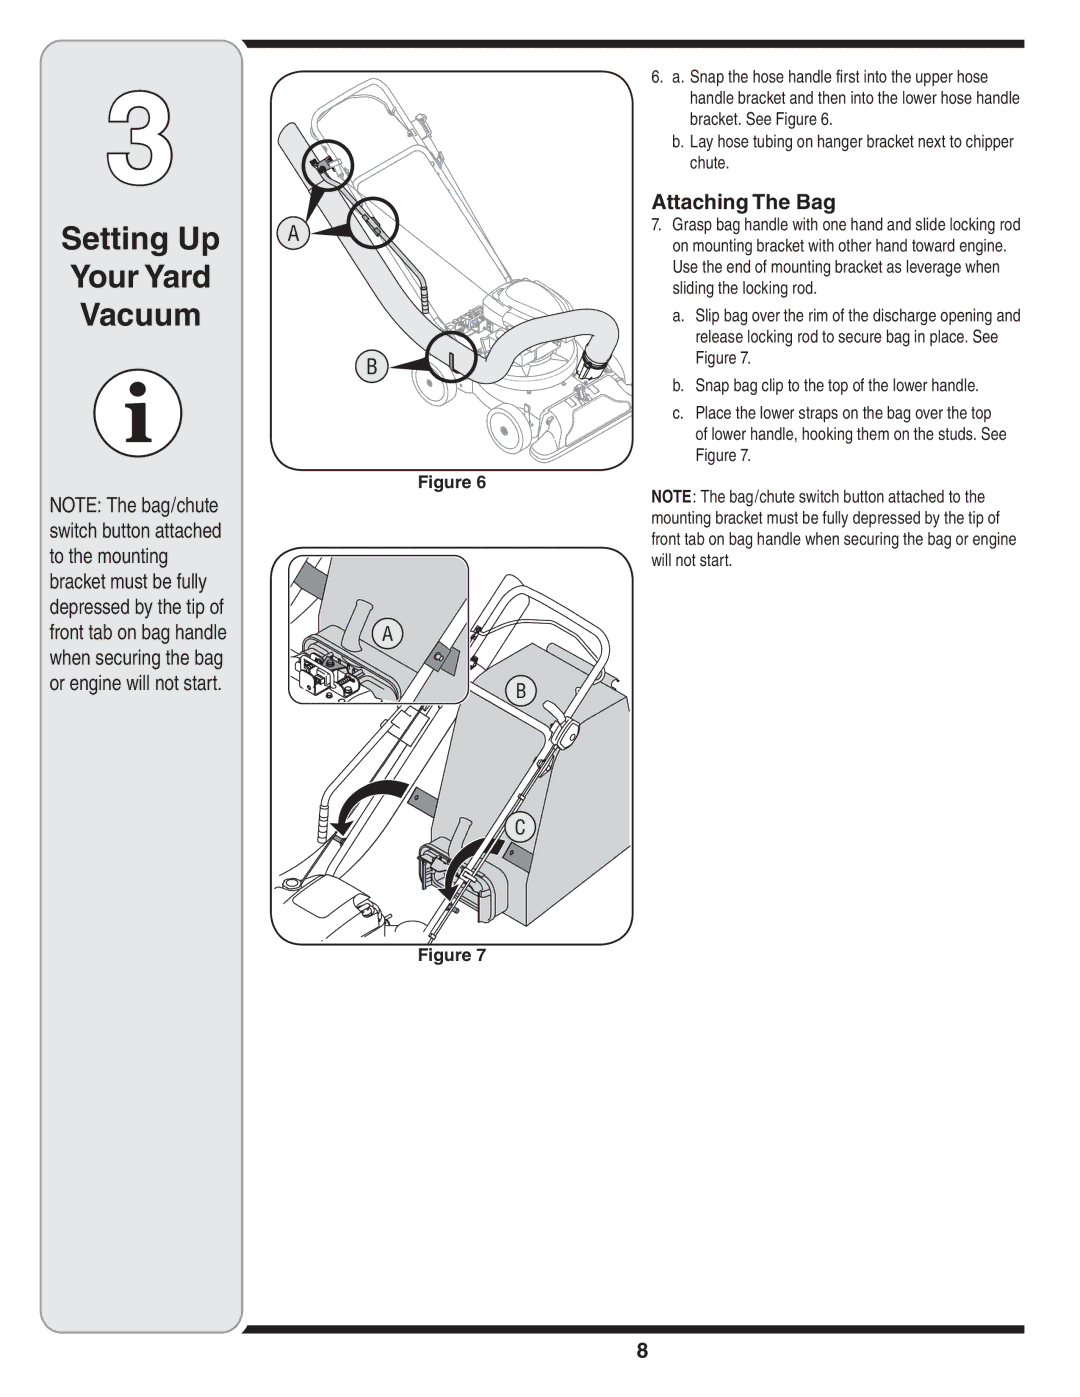
Figure 6
6.a. Snap the hose handle first into the upper hose handle bracket and then into the lower hose handle bracket. See Figure 6.
b.Lay hose tubing on hanger bracket next to chipper chute.
Attaching The Bag
7.Grasp bag handle with one hand and slide locking rod on mounting bracket with other hand toward engine. Use the end of mounting bracket as leverage when sliding the locking rod.
a.Slip bag over the rim of the discharge opening and release locking rod to secure bag in place. See Figure 7.
b.Snap bag clip to the top of the lower handle.
c.Place the lower straps on the bag over the top of lower handle, hooking them on the studs. See Figure 7.
NOTE: The bag/chute switch button attached to the mounting bracket must be fully depressed by the tip of front tab on bag handle when securing the bag or engine will not start.
bracket must be fully depressed by the tip of front tab on bag handle when securing the bag or engine will not start.
�
� ![]()
![]()
�
Figure 7
8