12Section 5: Maintenance
WARNING
Before inspecting, cleaning or servicing the machine, shut off engine, wait for all moving parts to come to a stop, disconnect spark plug wire and move wire away from spark plug. Remove key on electric start models.
Failure to follow these instructions can result in serious personal injury or property damage.
REMOVING AND REPLACING THE TRIMMER HEAD
1.Stop the engine and wait for all moving parts to stop. Disconnect spark plug wire and move it away from the spark plug. Remove the ignition key on electric start models.
INSPECTING/REPLACING THE DRIVE BELT
The drive belt should not require inspec- tion for many hours of operation. If replacement becomes necessary, follow the instructions given here.
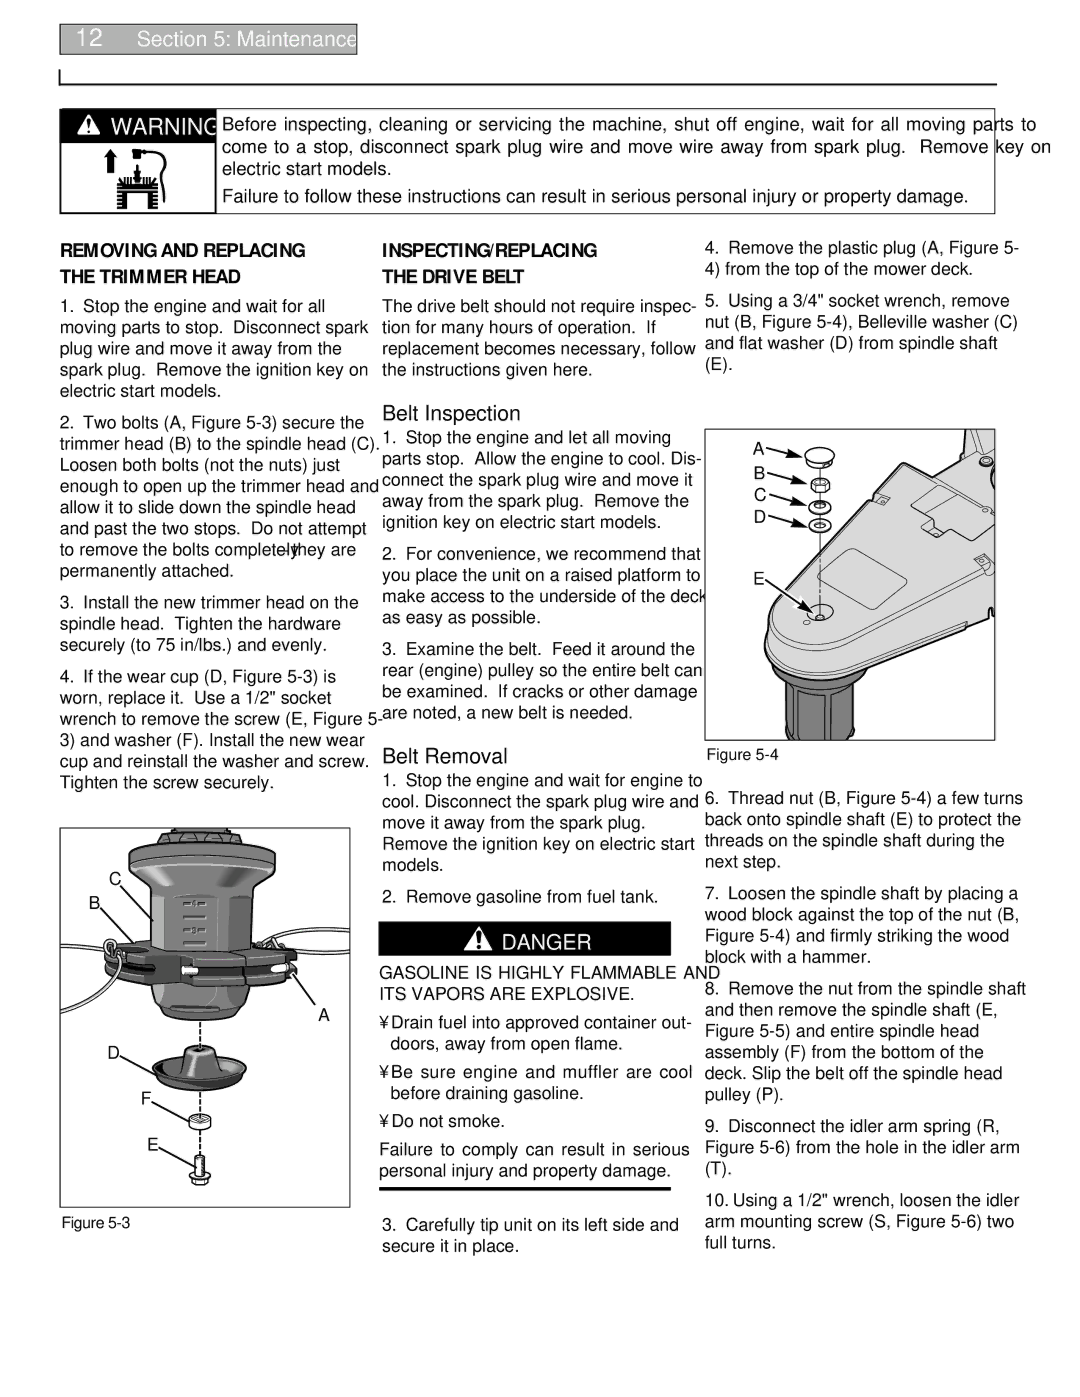
4.Remove the plastic plug (A, Figure 5- 4) from the top of the mower deck.
5.Using a 3/4" socket wrench, remove nut (B, Figure
(E).
2.Two bolts (A, Figure
3.Install the new trimmer head on the spindle head. Tighten the hardware securely (to 75 in/lbs.) and evenly.
4.If the wear cup (D, Figure
C
B
A
D
F
E
Figure
Belt Inspection
1.Stop the engine and let all moving parts stop. Allow the engine to cool. Dis- connect the spark plug wire and move it away from the spark plug. Remove the ignition key on electric start models.
2.For convenience, we recommend that you place the unit on a raised platform to make access to the underside of the deck as easy as possible.
3.Examine the belt. Feed it around the rear (engine) pulley so the entire belt can be examined. If cracks or other damage are noted, a new belt is needed.
Belt Removal
1.Stop the engine and wait for engine to cool. Disconnect the spark plug wire and move it away from the spark plug.
Remove the ignition key on electric start models.
2.Remove gasoline from fuel tank.
![]() DANGER
DANGER
GASOLINE IS HIGHLY FLAMMABLE AND ITS VAPORS ARE EXPLOSIVE.
•Drain fuel into approved container out- doors, away from open flame.
•Be sure engine and muffler are cool before draining gasoline.
•Do not smoke.
Failure to comply can result in serious personal injury and property damage.
3.Carefully tip unit on its left side and secure it in place.
A |
B |
C |
D |
E |
Figure |
6.Thread nut (B, Figure
7.Loosen the spindle shaft by placing a wood block against the top of the nut (B, Figure
8.Remove the nut from the spindle shaft and then remove the spindle shaft (E, Figure
9.Disconnect the idler arm spring (R, Figure
(T).
10.Using a 1/2" wrench, loosen the idler arm mounting screw (S, Figure