16Section 5: Maintenance
WARNING
Before inspecting, cleaning or servicing the machine, shut off engine, wait for all moving parts to come to a stop, disconnect spark plug wire and move wire away from spark plug. Remove key on electric start models.
Failure to follow these instructions can result in serious personal injury or property damage.
CHANGING TRIMMER LINES
When trimmer lines wear, it takes longer to complete mowing and trimming pro- jects. A good rule of thumb is to change the lines when they reach half their orig- inal length.
Use the
To Change Trimmer Lines:
1.Stop engine, allow all parts to stop moving and then disconnect the spark plug wire. Remove the ignition key on electric start models. DO NOT touch the metal wear cup on the bottom of the spindle
NOTE: The two line holders on the trimmer head are permanently secured. Do not attempt to remove the line holders.
WARNING
Offsetting the trimmer lines causes the lines to rotate faster than when they project an equal length on each side. This increases the chance of loose materials being dislodged and propelled at high speeds.
Failure of the operator to wear safety goggles and appropriate clothing and to keep bystanders away can result in severe personal injury or property damage.
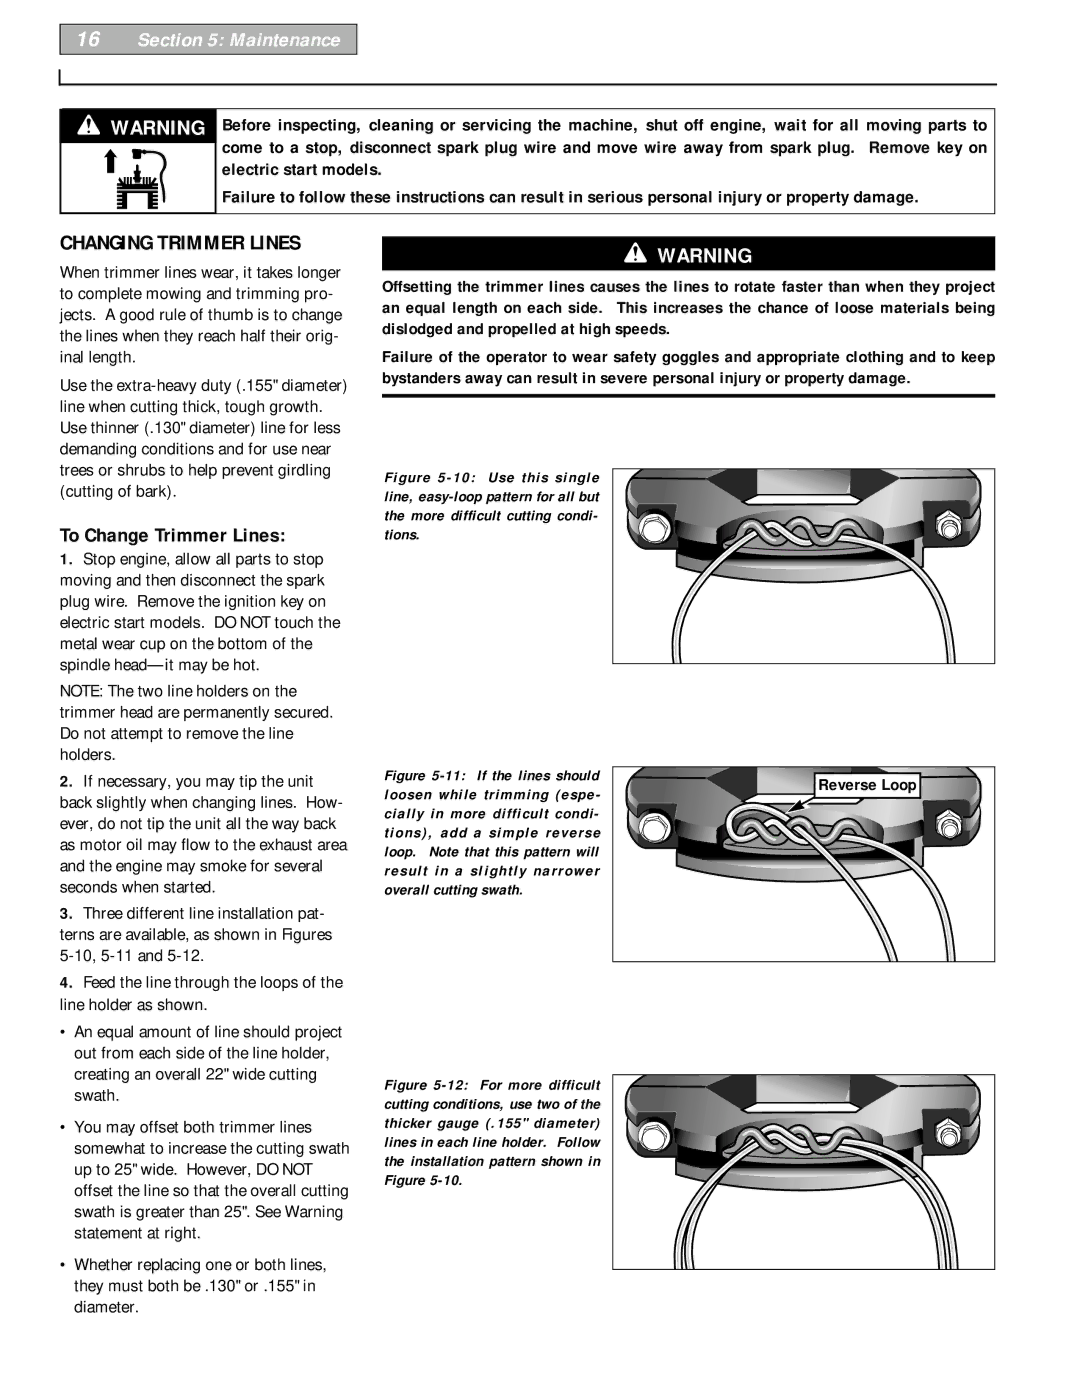
Figure 5-10: Use this single line, easy-loop pattern for all but the more difficult cutting condi- tions.
2.If necessary, you may tip the unit back slightly when changing lines. How- ever, do not tip the unit all the way back as motor oil may flow to the exhaust area and the engine may smoke for several seconds when started.
3.Three different line installation pat- terns are available, as shown in Figures
4.Feed the line through the loops of the line holder as shown.
Figure 5-11: If the lines should loosen while trimming (espe- cially in more difficult condi- tions), add a simple reverse loop. Note that this pattern will result in a slightly narrower overall cutting swath.
Reverse Loop |
•An equal amount of line should project out from each side of the line holder, creating an overall 22" wide cutting swath.
•You may offset both trimmer lines somewhat to increase the cutting swath up to 25" wide. However, DO NOT offset the line so that the overall cutting swath is greater than 25". See Warning statement at right.
•Whether replacing one or both lines, they must both be .130" or .155" in diameter.