WARNING: When removing the cut- ting blade for sharpening or replace- ment, protect hands by using heavy gloves or a rag to grasp the cutting blade.
•Remove the bolt which hold the blade
•Remove the blade from the blade adaptor and pulley.
Installing the blade
•Before reassembling the
•Lubricating the bolt hole and hex bolt.
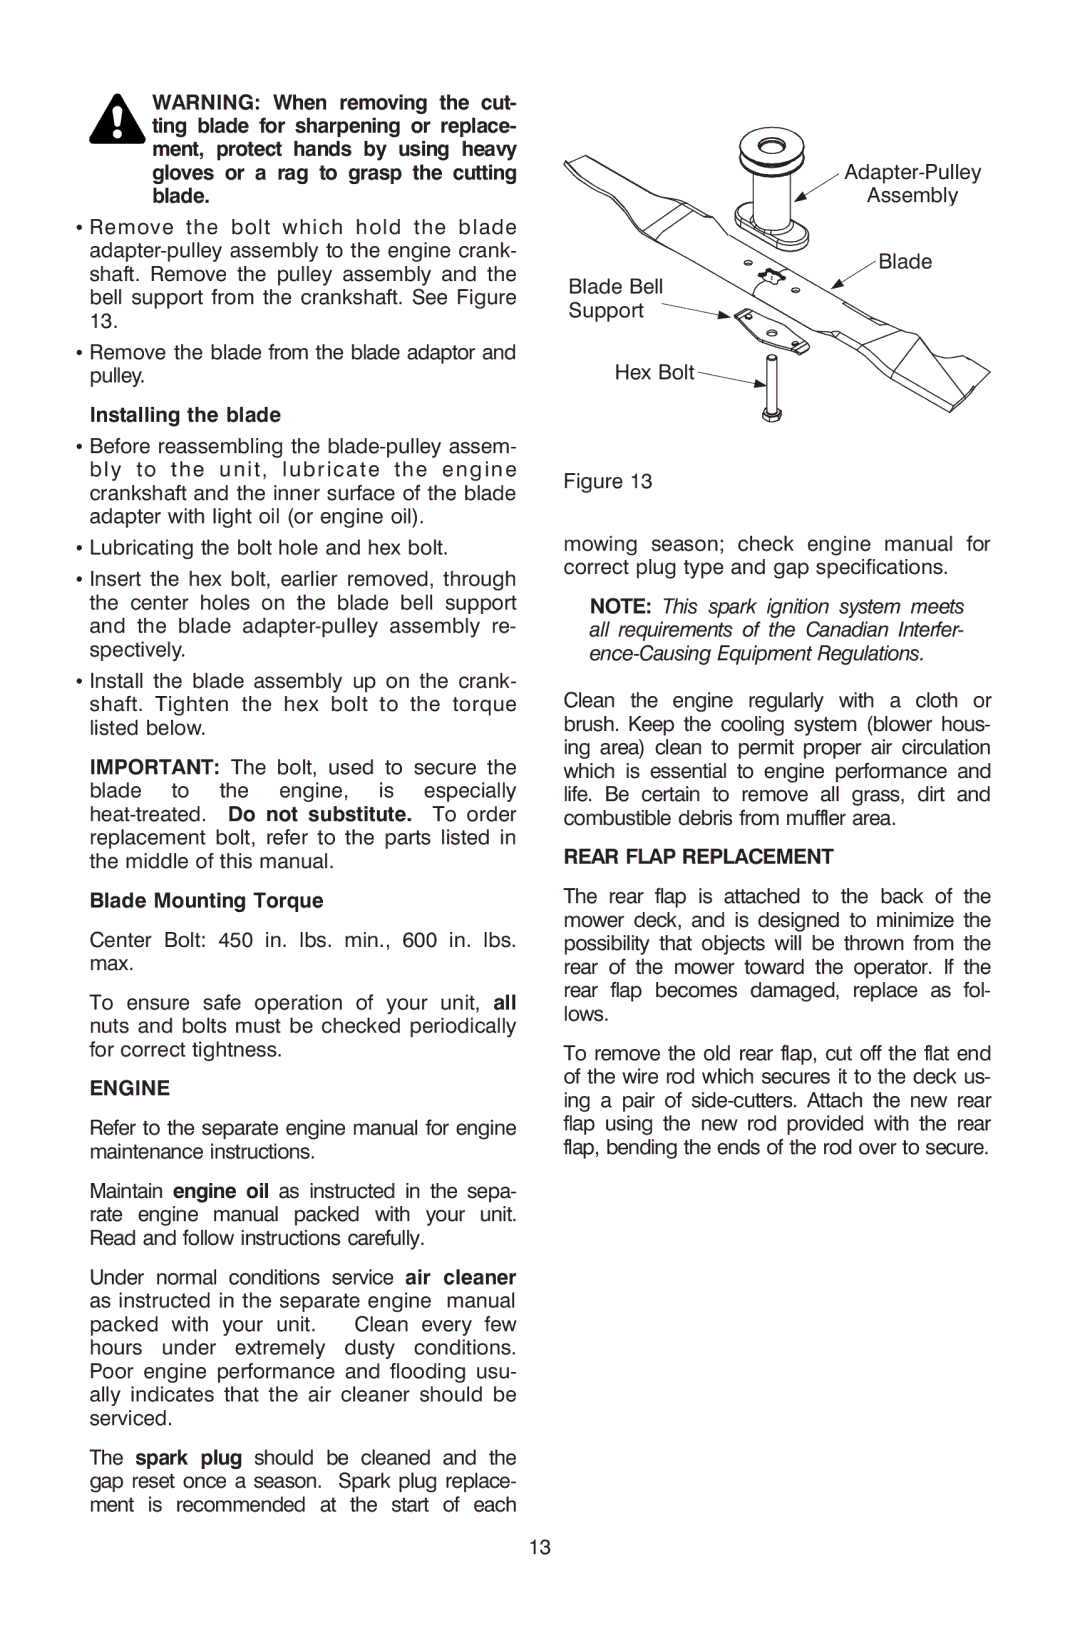
•Insert the hex bolt, earlier removed, through the center holes on the blade bell support and the blade
•Install the blade assembly up on the crank- shaft. Tighten the hex bolt to the torque listed below.
IMPORTANT: The bolt, used to secure the blade to the engine, is especially
Blade Mounting Torque
Center Bolt: 450 in. lbs. min., 600 in. lbs. max.
To ensure safe operation of your unit, all nuts and bolts must be checked periodically for correct tightness.
ENGINE
Refer to the separate engine manual for engine maintenance instructions.
Maintain engine oil as instructed in the sepa- rate engine manual packed with your unit. Read and follow instructions carefully.
Under normal conditions service air cleaner as instructed in the separate engine manual
packed with your unit. Clean every few hours under extremely dusty conditions. Poor engine performance and flooding usu- ally indicates that the air cleaner should be serviced.
The spark plug should be cleaned and the gap reset once a season. Spark plug replace- ment is recommended at the start of each
Assembly
Blade
Blade Bell
Support
Hex Bolt ![]()
Figure 13
mowing season; check engine manual for correct plug type and gap specifications.
NOTE: This spark ignition system meets all requirements of the Canadian Interfer-
Clean the engine regularly with a cloth or brush. Keep the cooling system (blower hous- ing area) clean to permit proper air circulation which is essential to engine performance and life. Be certain to remove all grass, dirt and combustible debris from muffler area.
REAR FLAP REPLACEMENT
The rear flap is attached to the back of the mower deck, and is designed to minimize the possibility that objects will be thrown from the rear of the mower toward the operator. If the rear flap becomes damaged, replace as fol- lows.
To remove the old rear flap, cut off the flat end of the wire rod which secures it to the deck us- ing a pair of
13