True Food Service Equipment, Inc.
INSTALLATION / OPERATION INSTRUCTIONS
LOCATING
Step 2
A.Place packing material behind cabinet as a cushion. Carefully lay the unit on its back to remove skid.
When lifting unit remember to
leave the cabinet upright for 24 hours before
plugging into power source.
B.Remove skid by unscrewing all base rail anchor brackets. Place skid to the side.
C.Carefully lift cabinet upright.
Removing skid from bottom of cabinet.
INSTALLATION OF LEGS AND CASTORS
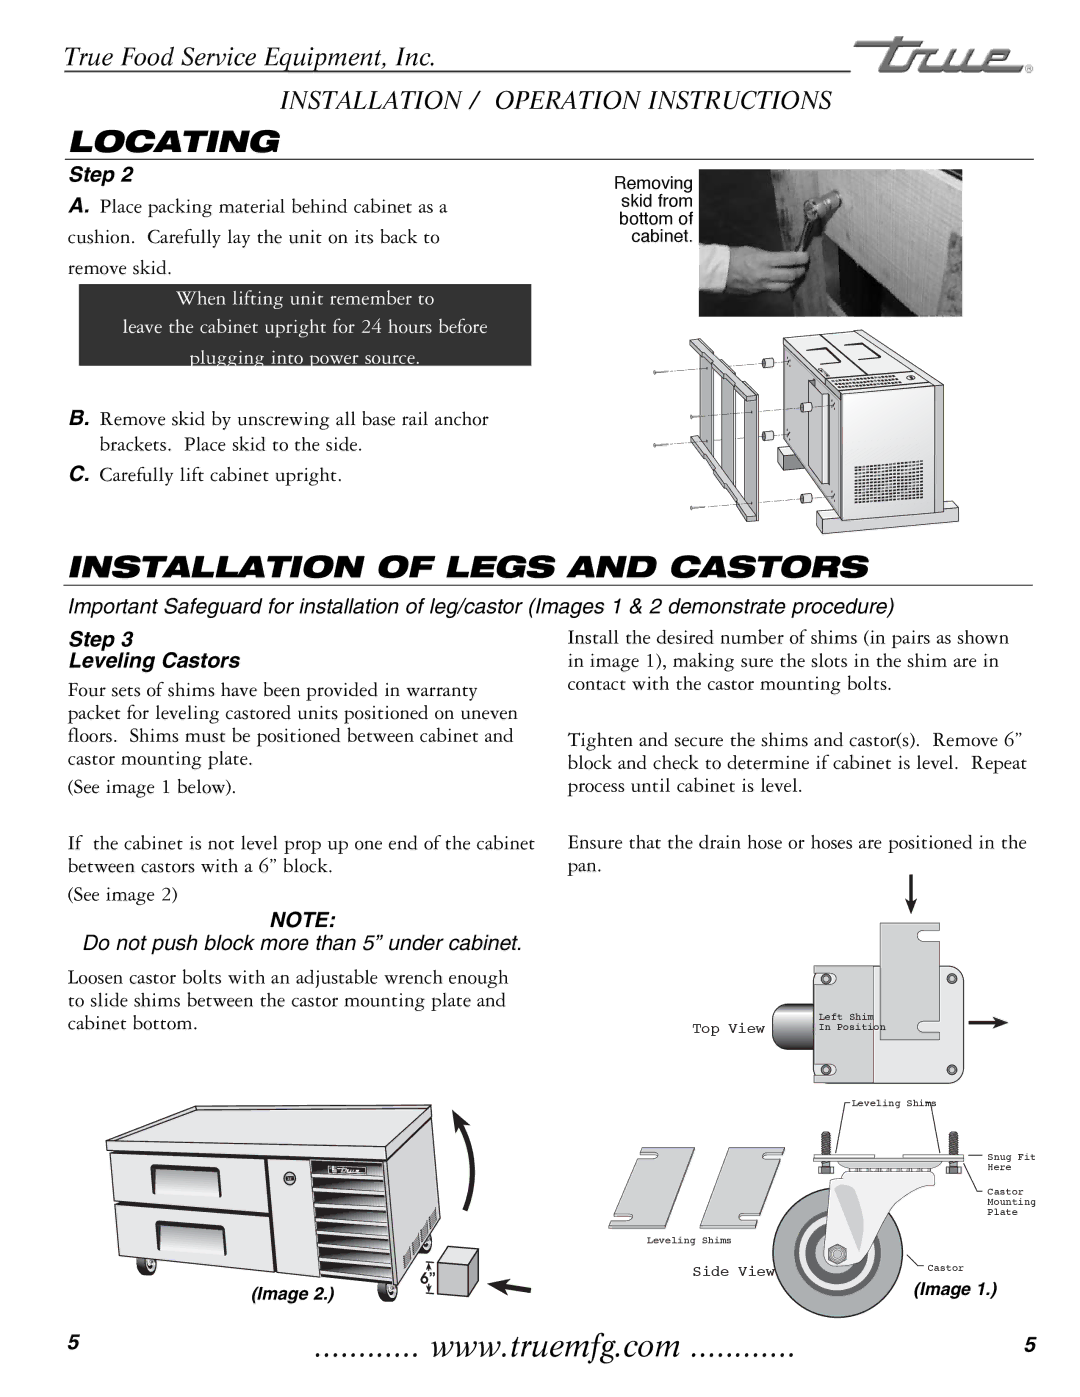
Important Safeguard for installation of leg/castor (Images 1 & 2 demonstrate procedure)
Step 3
Leveling Castors
Four sets of shims have been provided in warranty packet for leveling castored units positioned on uneven floors. Shims must be positioned between cabinet and castor mounting plate.
(See image 1 below).
If the cabinet is not level prop up one end of the cabinet between castors with a 6” block.
(See image 2)
NOTE:
Do not push block more than 5” under cabinet.
Loosen castor bolts with an adjustable wrench enough to slide shims between the castor mounting plate and cabinet bottom.
Install the desired number of shims (in pairs as shown in image 1), making sure the slots in the shim are in contact with the castor mounting bolts.
Tighten and secure the shims and castor(s). Remove 6” block and check to determine if cabinet is level. Repeat process until cabinet is level.
Ensure that the drain hose or hoses are positioned in the pan.
Top View | Left Shim |
In Position |
Leveling Shims
35° F°
6”
(Image 2.)
Leveling Shims
Side View
Snug | Fit |
Here |
|
Castor
Mounting
Plate
![]() Castor
Castor
(Image 1.)
5 | www.truemfg.com | 5 |
