75R, 75WC and 75BEV Models
7 Level the Unit
8 Install the Unit
Leveling Information
Note: It is recommended that the unit is level.
Installation of the 75R/75WC/75BEV
1. Plug in the power cord. |
1.Use a level to check the levelness of the unit from front to back and from side to side. Level should be placed along top edge and side edge as shown (see Figure 19).
Check |
Level |
Figure 19 |
2. | Gently push the unit into position. Be careful not to |
| entangle the electrical cord. |
3. | |
| side. Make any necessary adjustments. The unit’s top |
| surface should be approximately 1/8" below the |
| countertop. |
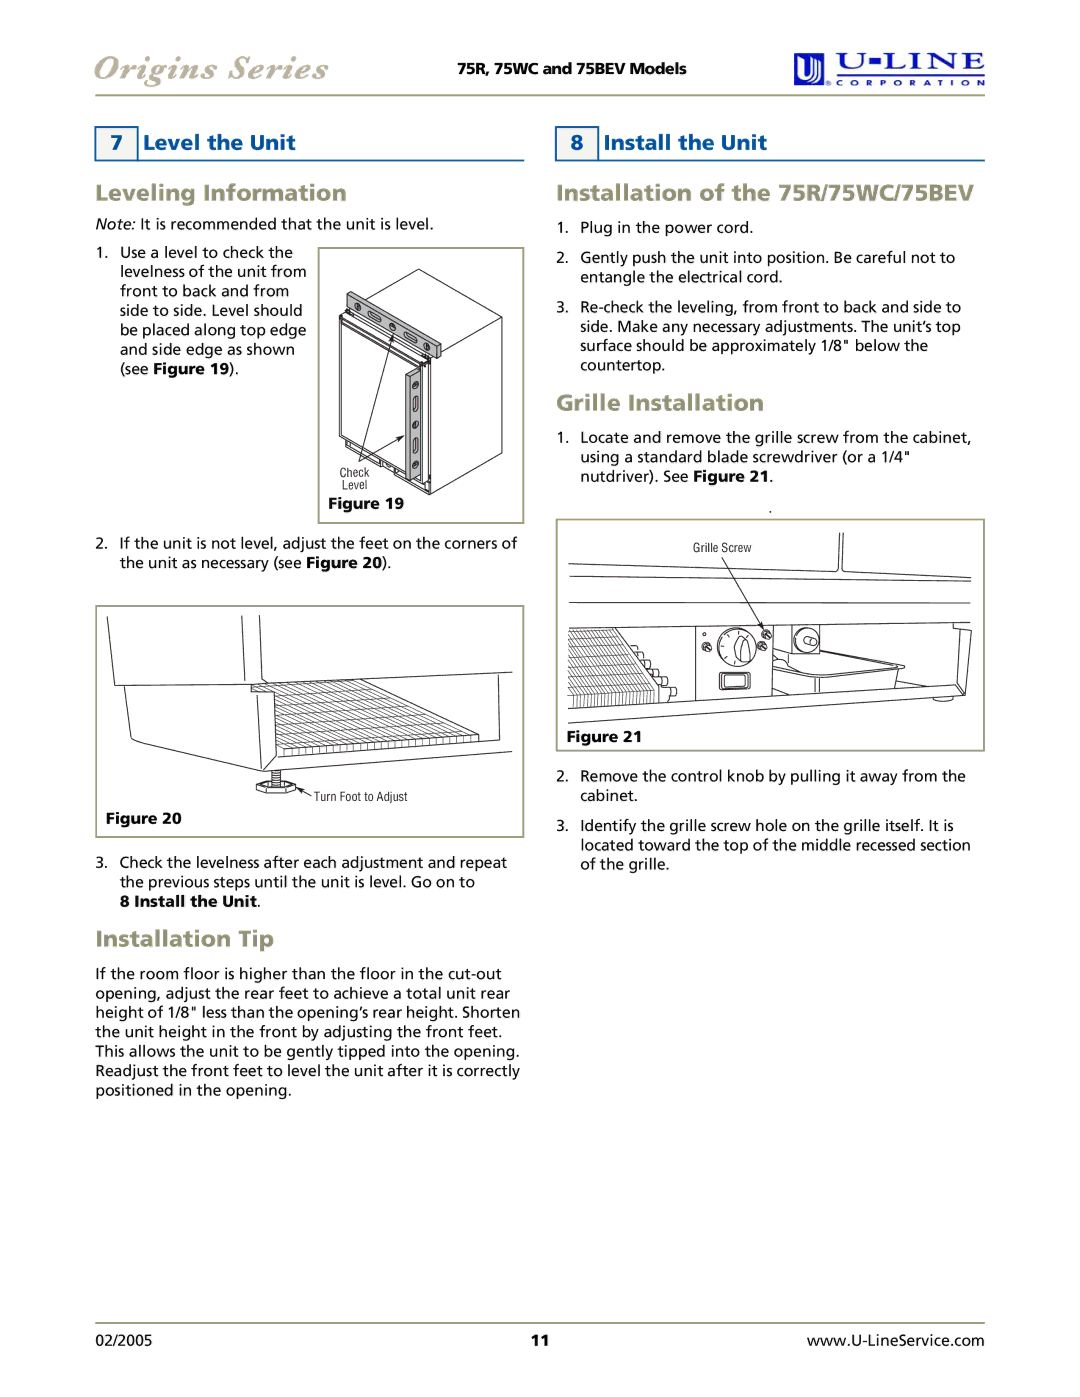
Grille Installation
1.Locate and remove the grille screw from the cabinet, using a standard blade screwdriver (or a 1/4" nutdriver). See Figure 21.
. |
2.If the unit is not level, adjust the feet on the corners of the unit as necessary (see Figure 20).
Turn Foot to Adjust |
Figure 20 |
3.Check the levelness after each adjustment and repeat the previous steps until the unit is level. Go on to
8 Install the Unit.
Installation Tip
If the room floor is higher than the floor in the
Grille Screw |
Figure 21 |
2.Remove the control knob by pulling it away from the cabinet.
3.Identify the grille screw hole on the grille itself. It is located toward the top of the middle recessed section of the grille.
02/2005 | 11 |