Uniden owner manual DIN-EInstallation, Mounting Using the DIN-ESleeve, UNIDEN Model PRO630XL

Models: PRO630XL

1 28
Download 28 pages 62.81 Kb
Page 11
Image 11
DIN-E Installation

UNIDEN Model PRO630XL

DIN-E Installation

Mounting Using the DIN-E Sleeve

If you are unsure about how to install your PRO630XL in your vehicle using the DIN-E sleeve, consult your automobile manufacturer, dealer, or a qualified installer. Before installing, confirm that your PRO630XL fits in the desired mounting area and you have all the necessary materials to complete the task. Your PRO630XL requires a 53 x 183 x 135 mm mounting area. Allow an additional 60 mm space behind the unit for connectors and wires.

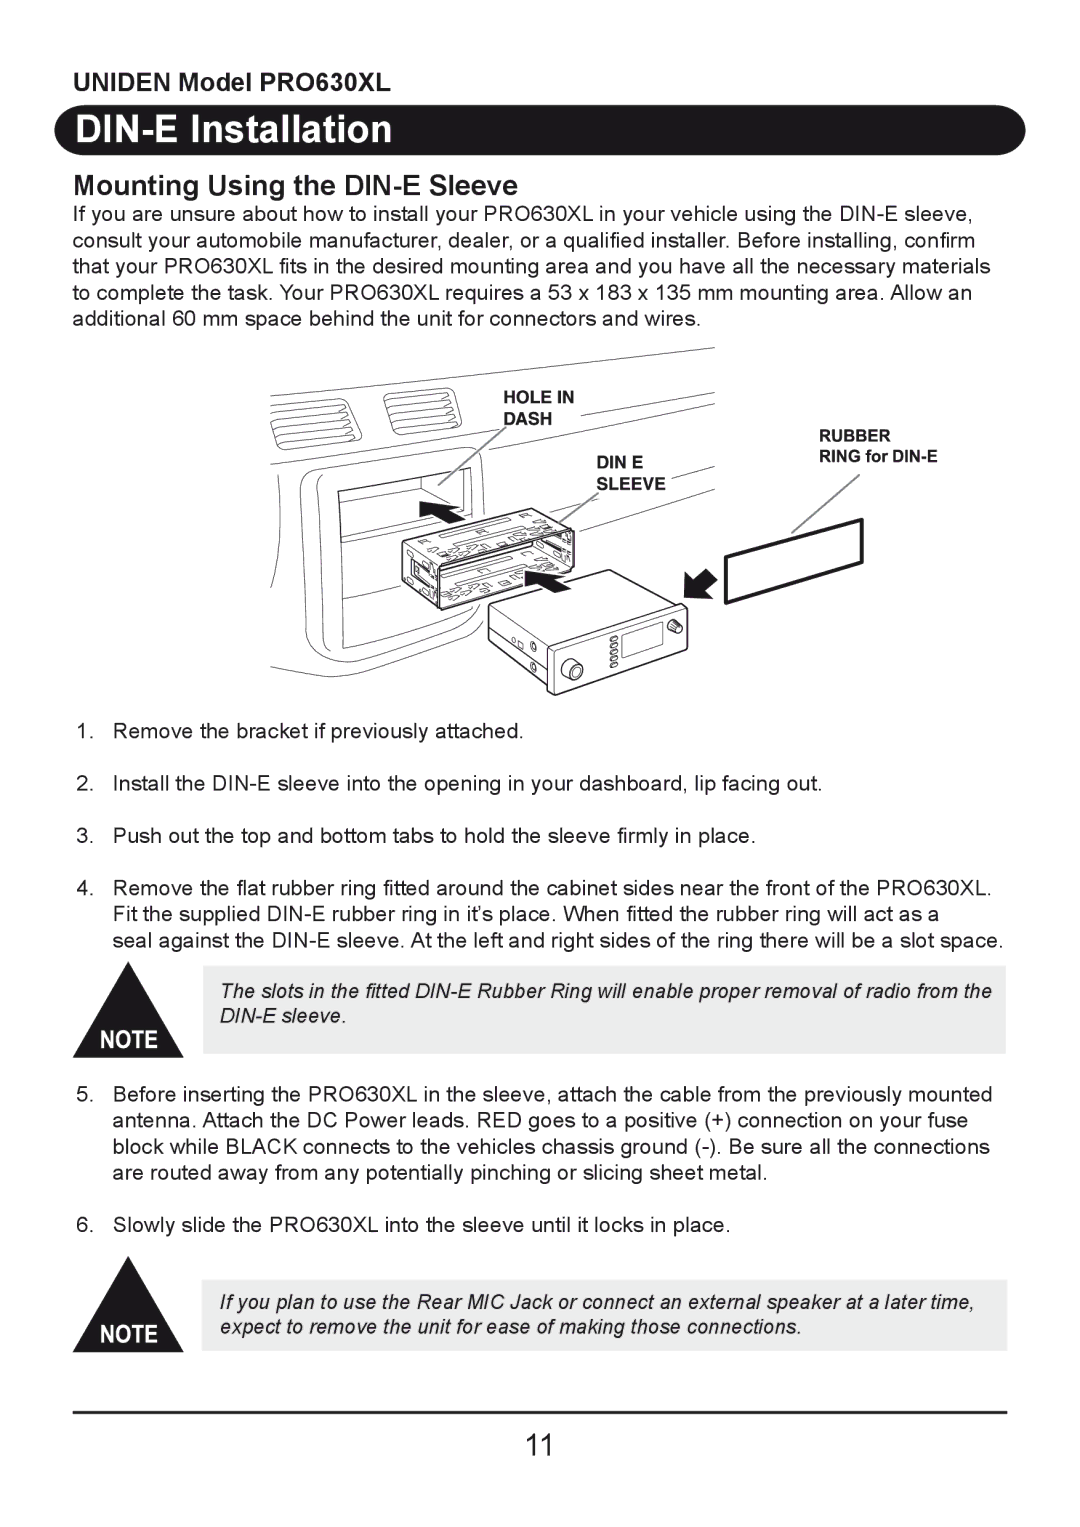
1.Remove the bracket if previously attached.

2.Install the DIN-E sleeve into the opening in your dashboard, lip facing out.

3.Push out the top and bottom tabs to hold the sleeve firmly in place.

4.Remove the flat rubber ring fitted around the cabinet sides near the front of the PRO630XL. Fit the supplied DIN-E rubber ring in it’s place. When fitted the rubber ring will act as a seal against the DIN-E sleeve. At the left and right sides of the ring there will be a slot space.

The slots in the fitted DIN-E Rubber Ring will enable proper removal of radio from the DIN-E sleeve.

5.Before inserting the PRO630XL in the sleeve, attach the cable from the previously mounted antenna. Attach the DC Power leads. RED goes to a positive (+) connection on your fuse block while BLACK connects to the vehicles chassis ground (-). Be sure all the connections are routed away from any potentially pinching or slicing sheet metal.

6.Slowly slide the PRO630XL into the sleeve until it locks in place.

If you plan to use the Rear MIC Jack or connect an external speaker at a later time, expect to remove the unit for ease of making those connections.

11

Page 11
Image 11
Uniden owner manual DIN-EInstallation, Mounting Using the DIN-ESleeve, UNIDEN Model PRO630XL