Step 2: Basic Operation (cont’d)
1)Battery Indicator
Green LED: Battery charging; charge battery until green LED turns off.
Red LED: Battery low (portable mode); camera will turn off within 3 minutes.
Connect the power adapter for charging or continuous use. LED off: Battery fully charged.
2)Link Indicator
Flashing LED: Pairing sequence is in process. See Advanced Operation - Pairing Camera section as a guide.
Blue LED: Camera is picked up by the LCD monitor.
LED OFF: Camera is in
3)Power Indicator
LED turns ON when camera is powered ON.
4)Power / Lullaby Play Switch
Slide down once to power ON the camera. To power OFF, slide down and hold the switch for 2 seconds, until the power indicator turns off. After power on; slide down to turn on the lullaby play of the camera, slide & hold
5)Link Button
Press to pair the camera with the LCD monitor. See Advanced Operation - Pairing Camera.
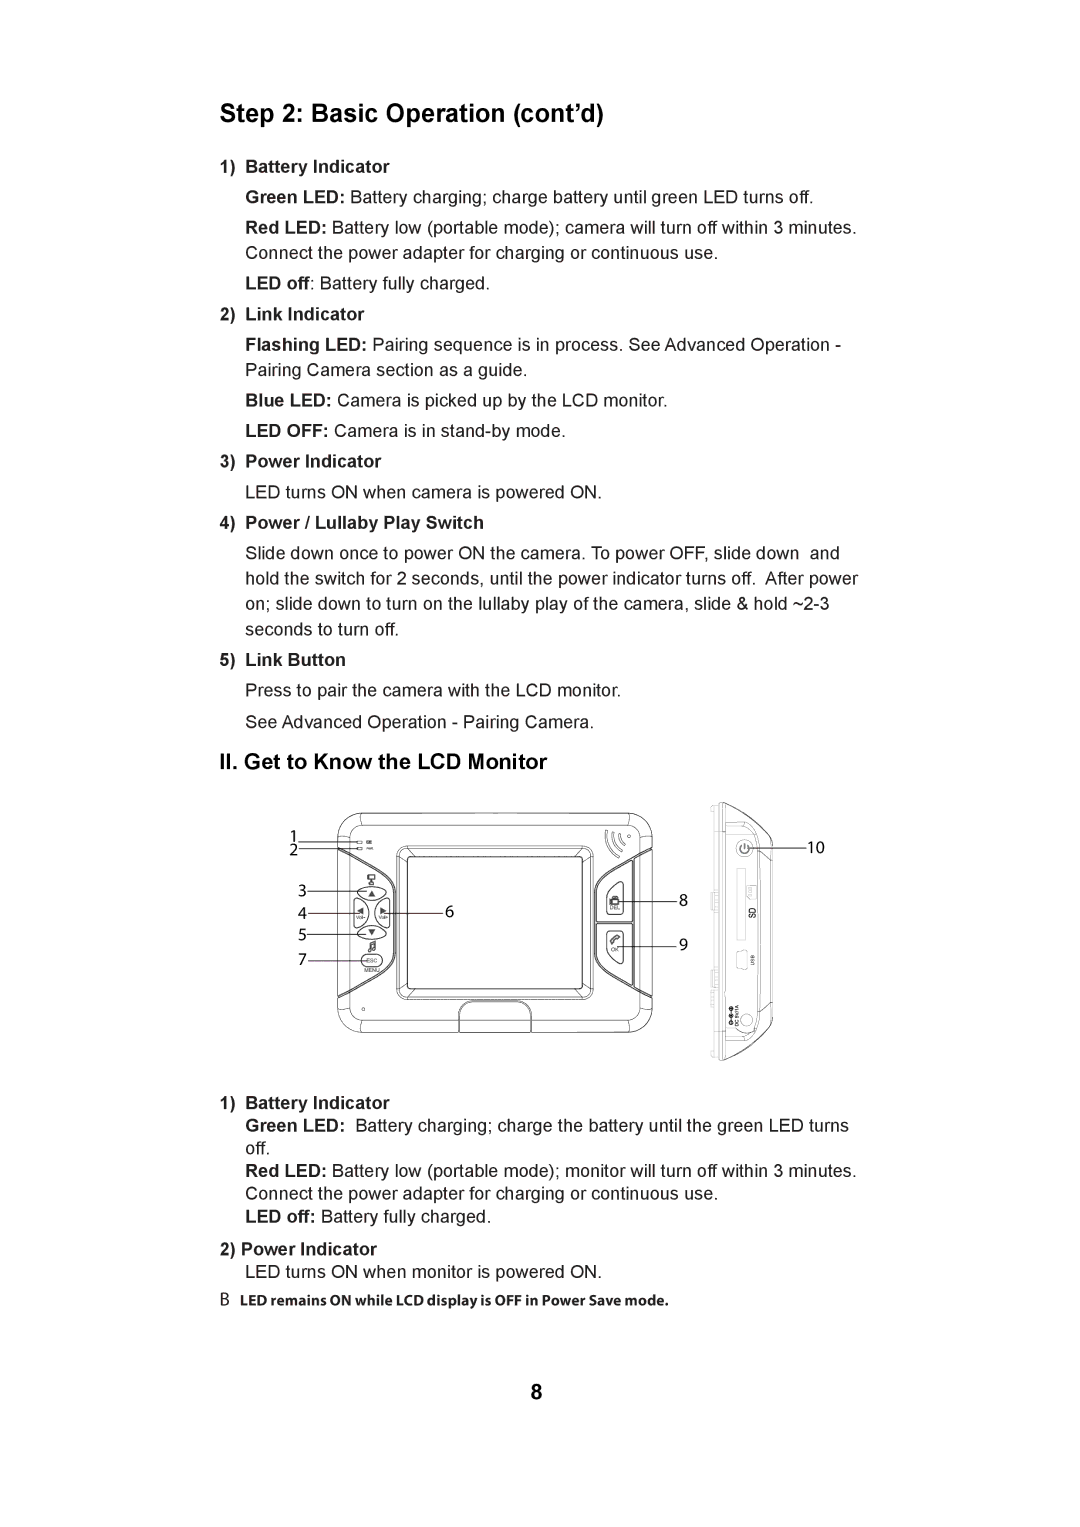
II. Get to Know the LCD Monitor
1 |
|
2 |
|
3 | 6 |
4 | |
5 |
|
7 |
|
8
9
USB |
10
1)Battery Indicator
Green LED: Battery charging; charge the battery until the green LED turns off.
Red LED: Battery low (portable mode); monitor will turn off within 3 minutes.
Connect the power adapter for charging or continuous use.
LED off: Battery fully charged.
2)Power Indicator
LED turns ON when monitor is powered ON.
## LED remains ON while LCD display is OFF in Power Save mode.
8
