Getting Started (cont’d)
Installing the Camera on the Goose Neck Mount Stand
Use the goose neck mount stand to install the camera at an appropriate angle in a
## Ensure the install location is within range of a standard 120 V AC wall outlet.
Desktop mount option
1. Select the position for the camera and secure the camera stand.
Wall mount option
| 1. | Select the position for the |
|
| mount stand and mark out |
|
| the mount holes. The two wall |
|
| screws should be spaced |
|
| in. (40mm) apart. Screws and |
|
| anchors are supplied, but if |
|
| necessary, use an appropriate |
|
| screw type for the mounting |
|
| surface. |
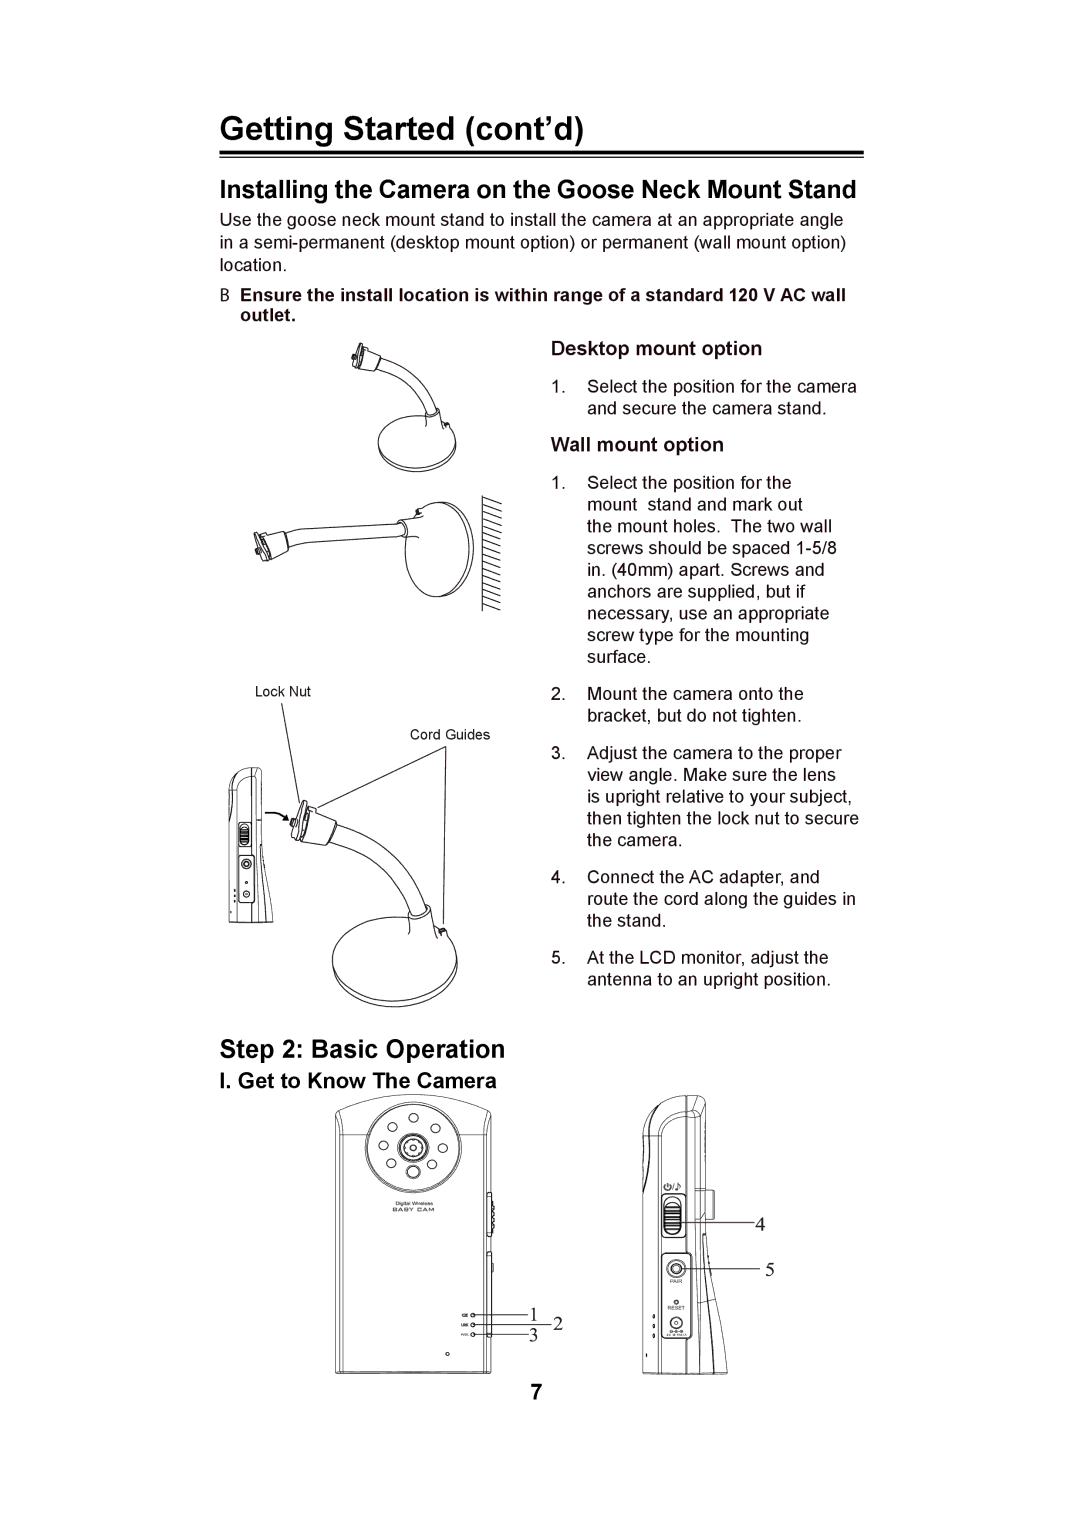
Lock Nut | 2. | Mount the camera onto the |
| Cord Guides | bracket, but do not tighten. |
|
| |
| 3. | Adjust the camera to the proper |
|
| view angle. Make sure the lens |
|
| is upright relative to your subject, |
|
| then tighten the lock nut to secure |
|
| the camera. |
| 4. | Connect the AC adapter, and |
|
| route the cord along the guides in |
|
| the stand. |
| 5. | At the LCD monitor, adjust the |
|
| antenna to an upright position. |
Step 2: Basic Operation
I. Get to Know The Camera
PWR. |
7 |
DC IN 5V/1A |